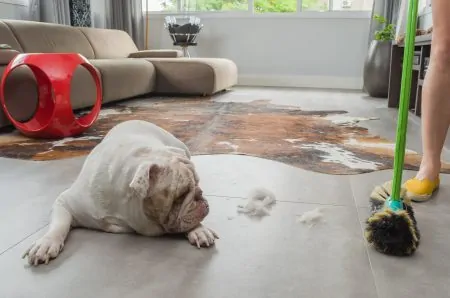
Wooden floors aren’t always the easiest to care for. They tend to be quite sensitive to scratches, cleaning products, and tools.
But where there’s a spot or scratch to be removed, there’s a hack waiting to be tried. We’ve been trying out some of the most popular wooden floor hacks to find those worth using.
Keep reading for 12 handy hacks to make your wooden floor care a lot easier.
Key Takeaways
- Use tea bags to restore shine to dull wooden floors.
- Remove shallow scratches with a walnut shell or a mixture of white vinegar and canola oil.
- Use white toothpaste and a microfiber cloth to remove marker stains from wooden floors.
- Repair dents in wooden floors with a damp cloth and a hot iron.
Top 12 Wooden Floor Hacks
Ready to have your wooden floor world altered? Let’s go!
1. Restore Shine
When your wooden floor begins to look dull, you might try to restore the shine using a polisher. However, these products tend to be expensive and require lengthy preparation and drying times.
Fortunately, there’s a smart hack to use. For this, you’ll need four tea bags and a heat-safe container. The tannic acid in your tea can shine on your floors.
Fill the container with boiling water and add your four black tea bags. Allow the tea to steep as you normally would. Then dampen a cloth in the mixture and wipe your floors.
For large areas, you can fill a bucket and clean with a damp mop. If you have lighter floors, only steep the tea slightly to avoid darkening your floors.
2. Natural Scratch Remover
Discovering scratches on your wooden floor can be frustrating. But, before you pay someone to fix the planks for you, try this.
If the scratches are only shallow, you can use a walnut to cover them. Rub the scratch with the walnut shell. The natural oils within the shell will help to hide the flaws in the planks.
If you don’t have any walnuts laying around, create a solution using white vinegar and canola oil. Add one part vinegar to two parts oil and mix it well.
Use a microfiber cloth to rub it into the wood — don’t soak the cloth. Leave the solution to dry on your floors and watch as it shines.
3. Quick Marker Remover
Children will sometimes take their art from paper to the floor. This can cause us parents to worry about whether the stain will ever come off!
Not to worry: even a permanent marker won’t be able to hold up to this hack. All you need is white toothpaste and a microfiber cloth.
Apply a dab of toothpaste to the affected area and rub using the cloth. You might need to use some elbow grease, but the marker should come off quickly. Once you’re done, clean the area using a damp cloth.
4. Repairing Dents
Unfortunately, dents happen on wooden floors. It could be because someone dropped something heavy or from high-heeled shoes. Whatever the reason, the cost of fixing the problem can bore a hole in your wallet.
However, this hack might help you fix it yourself — for free. All you need is a wet cloth and a hot iron.
Start by moistening the dent and then place the damp cloth on top. Take the hot iron and rub it lightly across the rag using circular motions. Keep going for a couple of minutes, and the dent should smooth itself out.
5. Fixing a Creaky Floor
A squeaky floor can be irritating to hear. But fixing it can become pricey if you hire professionals.
Luckily, there’s a hack to try before seeking help. For this, you’ll need baby powder and a paintbrush.
Apply the powder to the squeaky area and use the paintbrush to brush it into the cracks between the planks. The baby powder works as a lubricant and will prevent the planks from rubbing against each other.
If you don’t have baby powder, you can use baking soda or powdered graphite.
6. Quick Urine Eliminator
If you have pets or small children, you will most likely deal with a few accidents. However, this can spell disaster for hardwood floors as urine can cause permanent damage if left untreated.
Wipe the urine as fast as you can, blotting out the edges and working your way to the center. When most of the fluid is gone, sprinkle the area with a generous amount of baking soda. Then leave it to sit overnight and clean with a mild solution safe for wooden floors.
The baking soda will effectively absorb excess fluids and any odors. If you don’t have baking soda, you can use clay-based cat litter.
7. DIY Anti-Scratcher
Furniture can cause scratches and dents on hardwood floors. Luckily, this is preventable using two quick hacks.
If you’re a wine-lover, you might have a bunch of corks laying around. Cut these into flat, equal-sized slices. Apply one to each foot of the furniture using a strong glue.
You can also use slices of leather if you don’t have corks. Another hack for this is to use socks and elastics. However, this is a lot less subtle compared to the corks.
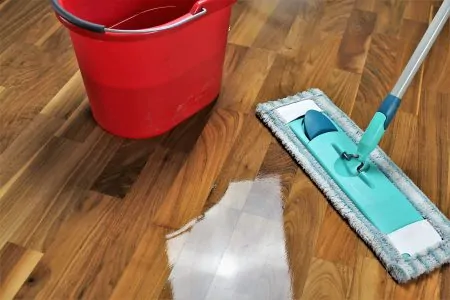
8. DIY Wood Floor Cleaner
Are you in the middle of a cleaning-crisis but out of cleaning products? Not to worry, there’s an easy three-ingredient cleaner you can mix up using ordinary products found in the pantry.
For this hack, you will need a spray bottle, water, vinegar and lemon essential oil. Add equal parts of vinegar and water to the bottle and 10 drops of essential oil. Shake the mixture to combine properly.
When you’re cleaning, spritz the solution as you go and wipe with a microfiber mop — you’ve made your own spray mop. The vinegar will disinfect the floor while deodorizing and removing stains.
The lemon essential oil will help to bring a fresh scent to the floors as you clean. Lemon is also effective at cutting through grime.
Another awesome recipe adds eight tablespoons of castile soap to the vinegar mixture. It works excellent at beating extra-dirty areas.
9. Easy Fresh Paint Remover
You might be doing some remodeling or any other project involving paint. Even if you’re very careful, it could still cause a few spills on the floor.
Unfortunately, paint is usually tricky to get off. However, using this hack, you should be able to get it out with little fuss.
All you need is some facial cleansing wipes. Wipe the paint off straight away. The more the paint dries, the more difficult it is to remove.
10. Non-Toxic Polisher
Polishing your hardwood floors will restore the shine and bring healthy moisture to your planks.
However, commercial products often require long drying time. Worse still, others have a pungent scent that makes it difficult to stay in the room after application.
In contrast, olive oil is a natural moisturizer that’s very healthy for hardwood floors. Apply just a small amount to a cloth and wipe the floors after cleaning. Avoid using too much, though, as this can be bad for the wood.
11. Easy Scratch Repairer
Deeper scratches will need a tougher method than walnuts. For this, we suggest you try this hack using steel wool or sandpaper.
Locate the scratches and begin to rub lightly with the wood’s natural grain. If you go against the grain, you’ll create new, potentially deeper scratches that need treatment.
After sanding the scratches, use a dab of mineral spirits on a cloth to smooth it over. This will also help to remove any dust and splinters.
You can then finish off with a premixed wood filler for deep scratches. Apply it using a plastic putty knife, let it dry and sand away the excess. If this seems like a lot of work, you can use a small amount of olive oil and mayonnaise to fill the scratches.
12. Give Your Floors a New Look
If your wooden floors are beginning to look old and tired, it might be time to replace some planks. But before you spend a significant amount of money on that, you could try this hack.
Use a stencil painting technique to cover the worn floor and give it a new look. All you need is a little creativity and good paint.
Some artistic DIYers redecorate individual planks using decoupage techniques. You can use wallpaper or fabric for this.
Hacks to Avoid
After searching through nearly 100 hacks, we did find some that you should avoid. You have to remember that wooden floors are more sensitive compared to other hard floors. So, you should avoid abrasive tools and cleaners to prevent damage to the wood or finish.
One hack that stood out was the magic eraser. Magic erasers use melanin to remove stains. However, as the melanin is cured and becomes a foam, it’s extremely hard, acting like fine sandpaper (1).
Using a magic eraser on wooden floors can cause substantial damage to the finish and wood itself. Such damage could be expensive to repair. Multiple people who tried this hack have ended up seeking help on how to fix the damage (2).
FAQs

Can I Restain My Hardwood Floors Without Sanding?
You can restain your hardwood floors without sanding using a restaining kit like this Weiman Hardwood Floor Cleaner and Polish. It restores the natural shine, removes scratches, and protects the hardwood against damage.

What Can be Used to Cover Wood Floors?
You can cover a wood floor with tile, brick, slate, natural stone, and even carpet. If you lay tiles and slate, ensure you use a backing board to create a smooth surface.

How Often Should You Mop Hardwood Floors?
You should mop your hardwood floors at least once weekly to keep them clean and free from bacteria. You may need to increase the mopping frequency if you have pets or children or your floor is in a high footfall area.

Will Heavy Furniture Dent Wood Floors?
Heavy furniture will dent wood floors because hardwood is highly susceptible to damage. Heavy furniture is also likely to scratch your hardwood floor.

What is the Most Popular Wood Floor Color?
While brown is by far the most popular wood floor color, there are over 200 subtle variations in shades and tones of brown.
Hacking Down the Wood
Although wooden floors can be a handful to maintain, there are still plenty of hacks to use daily. However, you should be wary about using just any hack you find online. Always do a spot test in an inconspicuous area before treating the whole floor.
Also, remember that you should avoid some hacks. If you have finished hardwood floors, for instance, say “no, thanks” to the magic of a magic eraser.