If you’re into organization, redecorating and being creative — we’ve got news for you! We have put together our list of great ironing board storage ideas. This will help you make the most of your space. Plus, it’ll fuel some creativity and give you a fun new project to focus on!
If you’re not into being creative, there are still some awesome simple ideas in here, too.
Key Takeaways
- Consider built-in ironing cabinets, wall-mounted cupboards, or slide-out ironing boards for space-saving storage solutions.
- Repurpose old furniture like tables, storage units on wheels, or craft tables to create a functional ironing station.
- Simple storage ideas include hanging the ironing board on a hook, storing it in a closet, or placing it behind a mirror.
- Combine your ironing board with a laundry basket or store it under cabinets for practical and efficient organization.
Ironing Board Storage Ideas
Let’s jump in, shall we? We’ve got 15 great ways to amp up your ironing routine by helping you find great storage solutions.
1. Built-In Ironing Cabinet
Best For
People with a laundry room or extra storage they aren’t sure what to do with! It’s also great for people obsessed with organization.
Why not create a slim cupboard made just for your ironing board? It looks really cute and makes it easy to slip your board in and out. Much better than shoving your ironing board in an already cluttered cupboard!
Pros
- It’s practical.
- Easy to put your iron away and take it out.
- Doesn’t take up space.
Cons
- You’ll need to build it, or hire someone else to do it.
2. Wall-Mounted Cupboard
Best For
Disguise your ironing board when it’s not in use by getting a wall-mounted ironing board. It also doubles as a cupboard, so you can store your iron, starch and spray bottle in here, too.
Pros
- Saves space.
- Easy to access.
- Extra storage.
Cons
- It can be hard to install.
- Board will be smaller.
3. Slide Out Ironing Board
Best For
Get a sliding ironing board that slots into a drawer or wardrobe! The board might be smaller than standard, but hey — great option for saving space!
Pros
- Saves space.
- Easy to slide in and out.
- Disguised when not in use.
Cons
- You need a free drawer.
- Smaller than standard board.
4. Store Ironing Board in Closet
Best For
An obvious and common choice but a good one: keep your ironing board in a closet. This keeps it out of sight when not using it. An organized closet makes it easier, since you don’t have to wrestle with other clutter to retrieve it.
Pros
- Requires no effort.
- Easy access.
- Ideal for standing irons.
Cons
- You need space.
- Not good for cluttered closets.
5. From Table to Ironing Board
Best For
Why not turn an old table into an ironing board? Say what? You heard us right. This is a great upcycling project. If you’re into sewing, then this is an easy, fun task. You just have to make your own padding and cover.
We recommend making it removable and washable so if it gets dirty, you can just toss it in the washing machine. When you’re not ironing, you can use it as a table for a vase of flowers or a record player!
Pros
- Upcycling project.
- 2-in-1 ironing board and table.
- You can choose the aesthetic.
Cons
- Requires effort.
- Might be quite small.
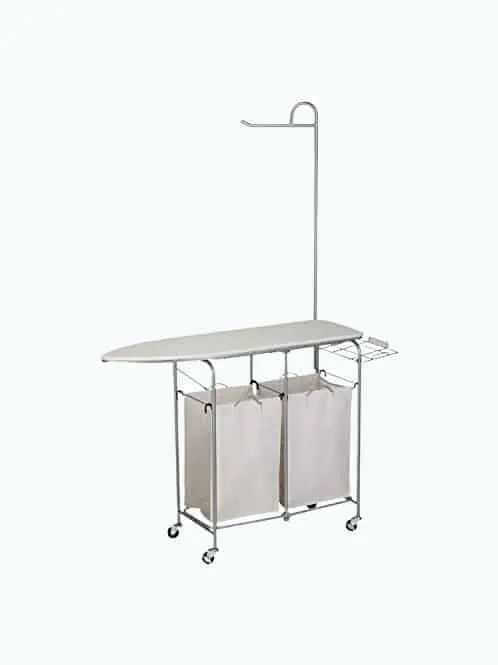
6. Ironing Board on Wheels
Best For
If you’ve got an old storage unit on wheels (or even not on wheels) that you’re unsure what to do with — try this. You can get the top of an old ironing board and secure it to a storage unit. Keep your laundry in the baskets below, along with your iron and spray bottles.
Pros
- Recycle old furniture.
- Keeps everything in one place.
- If on wheels, you can move from room to room.
Cons
- Requires effort and DIY skill.
7. Hang Your Board
Best For
This is one of our favorite simple storage solutions for ironing boards. Just hang it! You can get hangers online or at your local craft stores. Secure it to your chosen spot — like behind a door or on the side of a cabinet — and hang your board there.
Pros
- Simple.
- Keeps it out the way.
- Easy to put up and take down.
Cons
- Doesn’t hide the board away when not in use.
8. DIY Iron Station
Best For
Excuse me — how cute is that? This is a brilliant and aesthetically pleasing ironing board storage idea! If you’ve got a wooden crate like this, rotate it, secure it to the wall and store your iron. Hang your iron below it and viola, you’ve got a DIY iron station!
Pros
- Cute.
- Extra storage for iron.
- Easy.
Cons
- Requires a wooden crate.
9. Down the Side of Washing Machine
Best For
We know — this tip is a little boring. But it’s practical! If you’re looking for a storage idea, get a tabletop ironing board. They’re small and easy to store. Then, slot it down the side of your washer or dryer when you’re not using it.
Pros
- Requires no effort.
- Easy access.
- Great space saver.
Cons
- It might get dusty.
10. Craft Table
Best For
If you’re into crafts, you’ll know the importance of ironing. Well, why not turn your craft table into an ironing board? All you need to do is create your own padding to fit the table, then cover it with a heat resistant material. 100% cotton works great!
Pros
- Doubles as a craft table.
- A fun project.
- Large surface area — so, great for quilting.
Cons
- Takes time to make.
- Not portable.
11. Clothes Hook
Best For
If you’re stuck for ideas — try using a clothes hook. You can just put the feet of the board over the pins and hang it. Super easy!
Pros
- Practical.
- Requires no effort.
- Easy to remove and replace.
Cons
- Can’t use the hooks for jackets.
- Doesn’t hide the board.
12. Sliding Ironing Desk
Best For
If you have the skills and time, you can make a sliding ironing desk. This is great for people with a spacious laundry room. When you’re not using it, slide it back under your countertops!
Pros
- Stylish.
- Portable.
- Good for extra storage.
Cons
- Requires time, skill and money.
- You need extra space.
12. Behind a Mirror
Best For
This one is a fun, sneaky option! Surprise people with this 2-in-1 mirror and ironing board. When you open this mirror, out pops your board. But don’t worry — it’s got a lock mechanism so it won’t hit you on the head when you open the cabinet. Close the cupboard back up again to hide your board.
Pros
- 2-in-1 storage solution.
- Saves space.
- Fits in with your decor.
Cons
- Smaller board.
13. Under Cabinets
Best For
If you have free space under laundry room cabinets, you can store your ironing board. Keep it standing — then, you never have to go through the hassle of folding up your board again!
Pros
- Uses free space.
- You don’t need to fold up your board.
- Saves time when ironing.
Cons
- You still see the board.
- Requires a large laundry room.
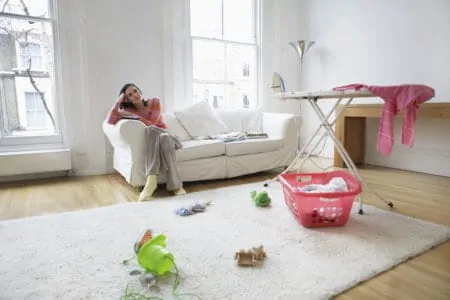
14. Combine With a Laundry Basket
Best For
Everyone needs a laundry basket. So why not double up and combine your ironing board with your basket? This saves you space and is very practical!
Pros
- Saves space.
- It’s practical.
- Keeps your laundry tasks all together.
- Portable.
Cons
- Not the most aesthetically pleasing.
- Quite large.
15. Over the Door
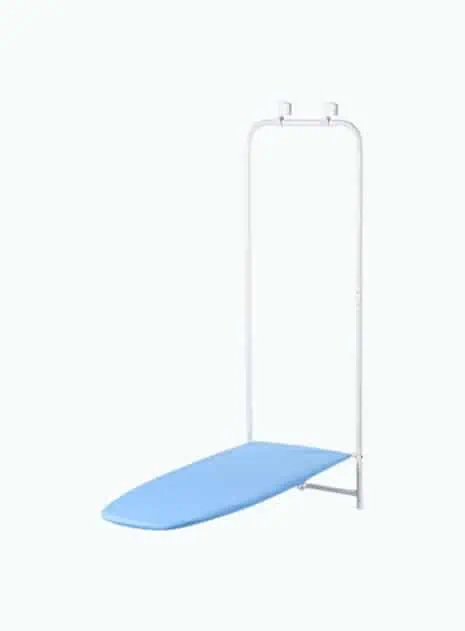
Best For
This is actually another type of ironing board altogether. But it’s super useful if you’re trying to save space. The board is smaller than your average size but it takes up absolutely no additional space since it hangs and functions over your door.
Pros
- Saves space.
- Easy access.
- Many different options on the market.
Cons
- Not the most stable.
- Always visible.
Ironing Board Alternatives
If you don’t have an ironing board, don’t worry! You’re not the only one. Plus, there are great ironing board alternatives out there for you.
- Iron on the floor: You can do your ironing on the floor. Just lay down a thick white towel underneath to protect your surface.
- Iron on a table: If you have a sturdy table, it can double as an ironing board. Again, just make sure to lay down a thick white towel or two to protect your furniture.
- Iron on the bed: It’s not the most firm surface, but it’s a good alternative option. Make sure to lay down a thick white towel so you don’t scorch your bedsheets.
- Iron on the washing machine: The surface of your washing machine is a great ironing surface. The metal can reflect heat back into the clothes to speed up your ironing time. But be careful because the washing machine will get really hot!
- Get an ironing blanket: If you need something that you can roll up and hide away in a small space, an ironing blanket is a great choice. You can put it on any surface (floor, table, bed) and iron as normal.
FAQs

Do Ironing Boards Wear Out?
Ironing boards do wear out because everything does. Joints rust or snap, legs buckle, and the covers need replacing every five to seven years.

How Much Does an Ironing Board Weigh?
The average weight of an ironing board is 13.4 pounds. Other models, like tabletop boards, weigh just 2.97 pounds, while wall-mounted boards weigh 18.7 pounds.

How Often Should You Change an Ironing Board Cover?
You should change your ironing board cover every five to seven years. Most cotton covers become blemished, scorched, and lose their padding over time.

What Can I Put Under My Ironing Board Cover?
The best materials to put under your ironing board cover include heat-resistant cotton batting, Hobbs Heirloom Batting, or pure wool or wool felt.

How Do You Make an Ironing Board Cover for a Table Top?
The easiest way to make an ironing board cover for a tabletop is to fold a clean bath towel in two and lay it on the table. It absorbs the heat from the iron and grips the garments.
Time to Get Creative
These ironing board storage ideas are great for anyone! Most involve some kind of creativity, even if it’s just choosing what kind of coat hooks you’re going to get.
But overall, there are loads of storage solutions so that it doesn’t feel like your ironing board is taking up loads of space. Whether you’re a busy mom, college student or just looking for something fun to do with your free time, these storage ideas are grand.