You’ve perfectly ironed your vest, button-up shirt and even your underwear. But what about those dress pants?
It’s easy to shy away from ironing your dress pants, for fear of ruining them. But nothing ruins an outfit quite like crinkled dress pants. Especially if you’re standing up for a work presentation, waiting at the end of the aisle, or going for a job interview.
We’ll teach you how to iron dress pants so your outfit is put together and professional. These straightforward tips will help you to look your best — always.
Key Takeaways
- Iron the pocket linings first.
- Move to the top of the trousers, ironing around the waistline and seat.
- Iron the bottom crease.
- Iron the top crease.
- Iron the middle crease.
- Focus on the center leg, ironing out all wrinkles.
- Do any final touch-ups.
Why Men Do Not Iron Their Trousers
Men often shy away from ironing trousers, even if they’ve already got the iron out for their shirt. Why is that? There are a few reasons.
Damage
If the dress pants are made with wool, men might be scared that the iron will add a shine to the wool and ruin it. Shining happens when the iron is too hot and you push the iron repeatedly across the fabric.
Since the fabric on dress pants is molded and compressed, shining is quite possible. This makes the pants look cheap and unfortunately, you’ll have to toss them out sooner than you’d hoped.
Clueless
It’s not super easy to find information about how to properly iron dress pants. Dress shirts? You’ll find lots of search results. But when it comes to ironing dress trousers, we’re pretty clueless. Until now, of course!
Nobody Notices
You might skip ironing dress pants because nobody notices. Right? Wrong. Of course they do! If you’re going to iron the rest of your clothes, you’ve got to iron the pants as well. It will complete your outfit and show that you care about appearances.
Should Dress Pants Even Be Ironed?
Men might also wonder if dress pants can or should be ironed.
Whether the dress pants are made from wool, cotton, or synthetic, wrinkles still exist. So no matter the material, ironing is key. And don’t worry, we’ll teach you how to iron dress pants to make sure you get a good sharp crease down the legs.
What You Need
It’s time to unpack your supplies so that you can get a good iron of your favorite dress pants. Here’s what you’ll need:
- Ironing board.
- Iron.
- Distilled or purified water.
- Spray bottle.
- Clean trousers.
How to Iron Pants
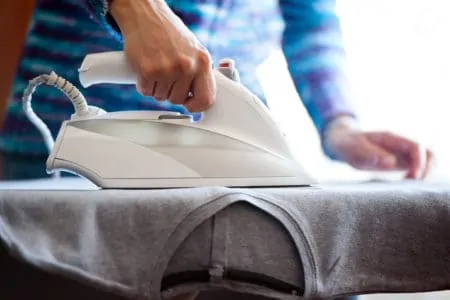
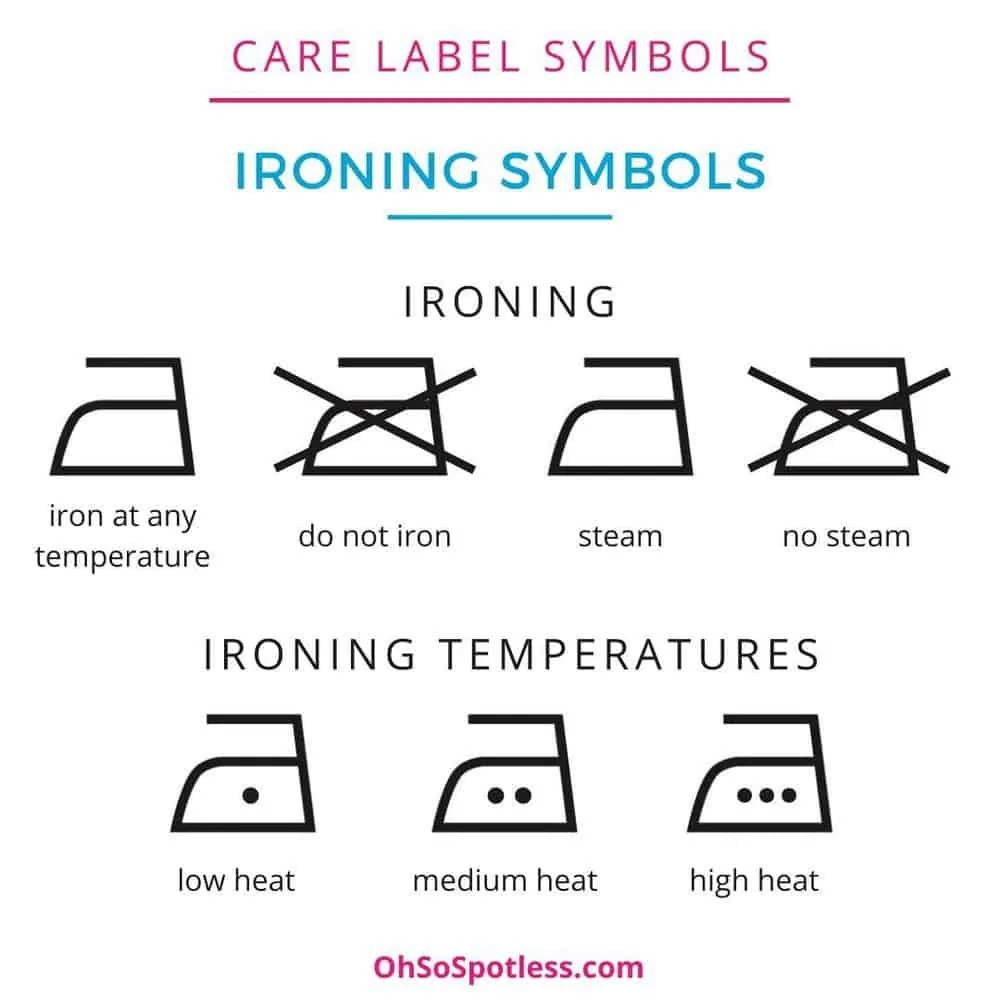
First, set up your iron. Follow the manufacturer’s instructions. If you have a water reservoir, fill it with distilled or purified water. Set the heat according to the fabric care label on your trousers. Now, turn on the iron and let it heat up before use.
Top Tip
In general, the rule is low heat for synthetic fabrics, low to medium heat for wools and high heat for linen and cotton. Cotton trousers need ironing after each wash, while wool trousers require a quick touch-up between washes.
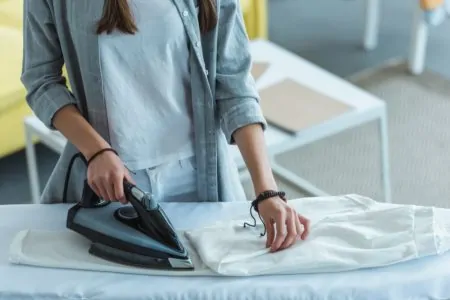
For dark colors and delicate fabrics, don’t push the iron along with the fabric. Press it instead by evenly laying the iron on top of the fabric for a few seconds. Lift it straight up before moving on to the next area. Pushing is what creates those horrible shiny marks.
Now for the ironing!
1. The Pockets
First, let’s start with the pockets. Most dress trousers have pocket linings. Even though people never see these, if they’re wrinkled, they create a wrinkled look around the pocket area.
Smooth out the lining and with a hot temperature (because linings are usually made from cotton), iron out the wrinkles. Let these cool for five minutes before ironing the rest of the trousers.
2. The Top Of The Trousers
Moving on, let’s go to the top of the trousers next. Around the waistline, gently press the fabric. Be careful around pleats and folds.
Put the front pocket back in place, then move to the seat of the trousers. Take out the back pocket and press around it. This will help with wrinkles. Put the pocket back. Next, press the waistband. Avoid buttons and be careful around belt loops.
Do this on both pant legs.
3. The Bottom Crease
Choose a pant leg to start with. Lie it flat and let the other leg hang over the end of the board. Align the pant seam in the middle of the board in a straight line. Smooth the fabric with your hands first to get rid of big wrinkles.
Press the iron at the edge of the cuff on one side of the leg. Repeat on the other side. This is forming the crease. You’ll see a sharp crease that’s formed a few inches along each side of the leg.
4. The Top Crease
You can’t do the bottom crease without doing the top crease. Simply repeat the steps above with the top of the pant leg.
Align the seams in the center again. Gently press a crease on each side of the leg about six inches below the waistband.
The bottom of the pocket lining is a good place to stop creasing. If the pants are pleated, you can form a crease all the way up to the pleats.
Why The Crease?
5. The Middle Crease
If you thought we were done making creases, you were wrong! Now, we’ve got to do the middle creases. Use the top and bottom creases to help you find a beginning and end point for the middle crease. Travel down the pant legs, pressing the crease gently all the way down.
Don’t slide the iron, just press and pick up before moving to the next area.
6. The Centre Leg
It’s time to focus on the center legs. Use the pressing and picking technique to remove the wrinkles. Don’t slide the iron! Good news: you don’t need to iron both sides of the pant legs. Pressing one side is good enough.
Before moving onto step seven, repeat steps three to six on the other pant leg.
7. A Final Touch Up
Now that both pant legs have been creased and ironed, it’s time for the final touch up. After moving the dress pants around quite a bit, the seat of the trousers can get crumpled a little. Slip the trousers over the end of the ironing board for a quick press. Don’t forget to pull out the pockets to avoid extra wrinkles.
To Steam or Not to Steam
It all depends on the care label for your pants. In general, pants need less steam than shirts, so it’s not necessary to use steam.
However, if you’re ironing wool pants, do not use steam at all. Wool is more prone to shrinking than cotton, so definitely don’t apply steam for wool.
How to Remove Shiny Iron Marks From Dark Trousers
Uh-oh. You got shiny iron marks on your dark trousers. Now what?
The bad news is that it might be impossible to remove the stains. But we’ll give you our best tips. For natural fibres, like wool or cotton, try this:
- Water plunge: Plunge the trousers into cold water for 24 hours. Remove and dry as normal.
- Vinegar cloth: Dampen a white cloth with distilled white vinegar. Dab onto the shiny marks. Repeat with a white cloth soaked in water. Alternate between vinegar and water until the mark is gone.
- Vinegar wash: Put the dress pants back in the wash with distilled white vinegar and your regular detergent. Use half the amount of vinegar as your detergent.
- Steam: I know we said no steam, but a little might help here, especially for cotton pants. Hold the iron above the trousers and release some steam onto the shiny marks. This works well for light marks.
- Hydrogen peroxide: Soak a clean white cloth with hydrogen peroxide. Lay the cloth on top of the shiny marks and iron over it. Check if the marks are gone. If not, repeat.
For man-made fibers, like polyester, try this:
- Vinegar steam: Soak a clean white cloth in distilled white vinegar and wring out the excess water. Locate your shiny marks and flip the fabric inside out so you’re not ironing directly onto the shiny marks. Place the vinegar cloth on top of the area where the marks are. Hold the iron above the cloth and emit steam. Now, find the shiny marks and rub against the grain to remove the stains.
- Peroxide wipe: Dampen a clean cloth with hydrogen peroxide. Gently rub the cloth on the shiny marks, then wash, dry and iron as normal.
Hopefully these tips help, but there’s no guarantee. That’s why it’s so important to follow the fabric care labels so you don’t ruin the dress pants.
How Do You Store Dress Pants?
It’s important you store dress pants properly.
This is so you don’t undo all your hard ironing work and need to go back to the ironing board.
Follow these steps to store your dress pants the best way:
- Grab each leg by the hem, while maintaining the crease. Hold each pant leg on either side of a wooden hanger.
- Fold one leg through the hanger and let the bottom hem hang about an inch above the crotch. Hold the fold together so it doesn’t fall off.
- Fold the other pant leg over the first pant leg in the opposite direction.
- Straighten the dress pants out, making sure the creases are aligned. This method stops your pants from falling off the hanger, while maintaining those crisp creases.
Pro Tips for Ironing Your Trousers
We wouldn’t leave you with some tips from the experts. These tips will help with prime ironing care for your dress trousers.
- Iron while damp: It’s best to iron your dress pants while they’re still damp. In fact, you can take them straight from the washing machine to the ironing board for really great results. This also saves the fabric from a harsh drying cycle.
- Iron in batches: Ironing dress pants takes a lot of time, so you can save time by doing it in batches. This saves set up and take down, and also lets you get into a good rhythm.
- Don’t iron dirty pants: Yuck. This is a bad idea. This can set stains and discolor the fabric while ironing pants.
- Khakis: With khaki pants, you can use the pushing and sliding technique, rather than pressing. This is because the light-colored fabric won’t be as likely to get shiny marks.
- Delicates and wools: It’s super important to remember to use low heat for delicates and wools. As an extra precaution, place a clean white cloth or handkerchief between your iron and the fabric.
- Aluminum foil: You can speed up your ironing time by placing aluminum foil beneath the ironing board cover. This heats up and smooths out wrinkles on both sides of the garment.
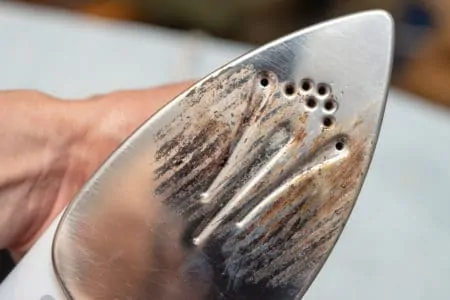
- Clean your iron: It’s so important to give your iron a regular clean. You can get an ironing kit online or at your local hardware store. You can also use a damp clean cloth to wipe away residue on your ironing soleplate. Make sure the iron has cooled down before doing this. Rubbing a beeswax candle over the soleplate will help get rid of extra residue.
FAQs

How Many Times Can You Wear Dress Pants Before Washing?
The amount of times you can wear dress pants before washing depends on how active you are while wearing them, and the type of dress pants. You are expected to get three to five uses before you should consider cleaning them.

Is It Okay to Wear Wrinkled Linen?
It is okay to wear wrinkled linen. Some casual garments actually look better with wrinkles because it makes them look more comfortable and gives them character.

Can Dry Clean Only Pants Be Ironed?
Dry clean pants can be ironed, provided that the iron steam function is turned off and the iron is set to the correct temperature. You should also hang the pants to air after ironing to ensure there are no wrinkles or lasting damage.

Can You Throw Suit Pants In the Dryer?
Throwing suit pants in the dryer is a bad idea because blasting them with heat causes them to wrinkle and possibly shrink. Always follow the cleaning instructions on the label for the best results.

Does Wrinkle Release Spray Work?
Wrinkle release spray does work to remove wrinkles from garments. Brands like Bounce Rapid Touch-Up are perfect for on-the-go touch ups to your clothes and it even deodorizes for freshness.
Never Skip the Ironing Again
Now that you know the best way to iron dress pants, you never have to skip ironing pants again. Your outfit will be complete with your smart shirt, pressed trousers and stylish jacket. Make sure to follow the care label instructions to know what iron setting to use.
Follow the steps in this order for the best results. Also, don’t forget to check out our additional tips before ironing so you don’t forget important information.
Lastly, store your dress pants properly so you don’t undo all your hard work.