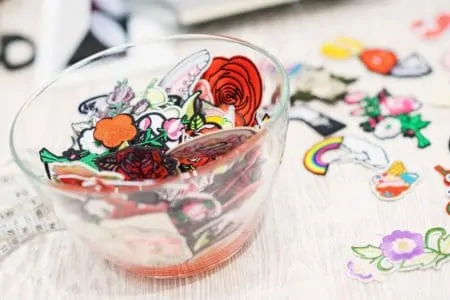
Good news. Patches are back in fashion!
If you’re going for a retro vibe or jazzing up a favorite backpack, patches are a cool accessory. They’re also ideal for covering up stains or rips on your old garments.
We’ll give you great tips on how to iron on patches at home. Your jacket will look vintage, and your patches will be secure.
Key Takeaways
- Prep the iron: Check the clothing label for ironing instructions. Don’t use steam.
- Position the patch: Place the patch on a clean garment.
- Use a pressing cloth: This protects the patch. Push hard for 30 to 45 seconds.
- Flip and repeat: Repeat these steps on the other side of the garment.
What You Need
To iron on a patch, you’ll need a few supplies.
- An iron-on patch.
- Iron.
- Ironing board.
- Garment you’re going to iron the patch on.
- Pressing cloth.
Option:
- Needle and thread.
How To Iron On Patches
We’ll give you a step-by-step guide to an easy way to iron on patches.
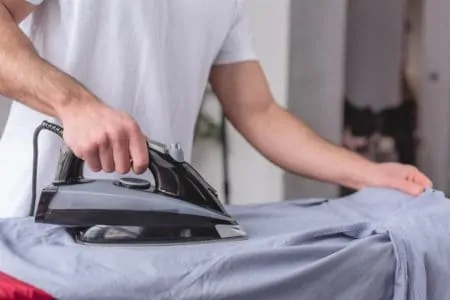
1. Prep The Iron
The first thing you need to do is prep your iron. It’s a good idea to use an ironing board here so you don’t damage any surfaces in your home.
When prepping the iron, use the highest setting your chosen garment can handle. Make sure to read the clothing label for this information.
For a general guideline, polyester requires low heat. Cotton can handle high heat. Always check the label first to see what it states.
Silk and other delicates are not good for ironing on patches. Denim and cotton are the best candidates for them.
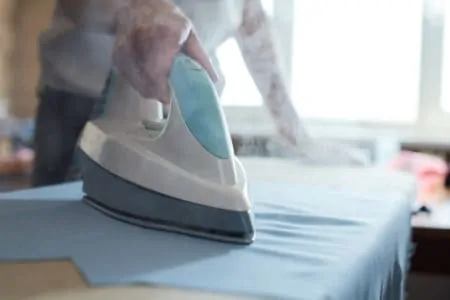
If you have a steam iron rather than a regular iron, turn the steam setting off. Also, make sure the iron is empty of water.
2. Position The Patch
Before you bring the iron to the patch, decide exactly where you want it.
The patch should be flat and not crooked for best results. In terms of where to place it, it’s totally up to you. There’s no right or wrong way to wear your patch.
However, we have some recommendations for the best place to put a patch on particular garments.
For shirts, you could put your patch on the chest, breast pocket, or sleeve. If it’s smaller, you could even wear the patch on your collar. Stand out from the crowd.
If you’re ironing your patch onto a jacket, a sleeve or chest pocket usually works best. However, you can put your patch wherever. If you’re wanting to fill up a whole jacket with patches, make sure you leave room for additions.
Pro Tip
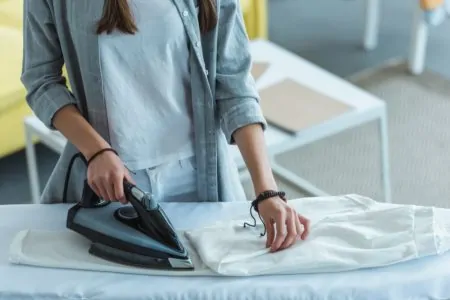
3. Use A Pressing Cloth
Now that you’re nearly ready to go, get out your pressing cloth. This will protect the patch.
Place the cloth over the patch. Be careful not to move the patch when doing this.
Take your heated iron and press it down on the cloth for about 30 to 45 seconds. Push hard and don’t move around. You don’t want to move the patch from its chosen position.
4. Flip And Repeat
Give the patch a couple of minutes to cool before flipping the garment inside out and laying it flat on the ironing board. Lay the pressing cloth on the other side of the patch and repeat step three. This ensures your patch is secure.
Let it cool completely before wearing it.
Top Tips
For the best results, follow these extra tips.
- Sew your patch on: You can sew around the edges to really secure that patch in place. Use a needle and thread and go round the outside of it. Make sure to use a color that goes well with your new patch.
- Wash when necessary: Iron-on patches tend to loosen over time. So don’t wash the article of clothing more than necessary.
- Washing tips: When washing the garment, consider hand washing in cold water to best care for your patch.
- Drying tip: Air drying will prolong the life of your patch, so do your laundry on a sunny day when you can hang it out to dry.
- If it falls off: If your patch comes off your garment, the best thing to do is to sew it back on, as the adhesive backing might not work anymore.
FAQs
Still have more questions? We have more answers!

How Do You Know If It’s An Iron On Patch?
The packaging might state if it is the iron-on type. But iron-on patches will have a shiny back that isn’t adhesive unless heat is applied. The adhesive goes all the way to the edges of the patch.
What Temperature Should I Iron On Patches?
This totally depends on the material of your garment. For best results, follow the instructions on your clothing label. Again, make sure the steam setting is turned off and there is no water in the iron.
A good patch will need about 270 degrees Fahrenheit to stick to your item. If your garment cannot handle that temperature, the patch might not stick.

Can You Take Off Iron On Patches?
If you’ve fallen out of love with your patches, you might be wondering how to remove them. This is a difficult task that can leave your garments unsightly.
Iron on patches, when removed, can leave behind a gummy residue from the glue. But here are some tips you could try as a way to remove them.
First Method For Removing Patches
- Check the clothing label: Check the clothing label to see what heat setting to use.
- Use a pressed cloth: Time to whip out your trusted pressing cloth again. Put it over the patch.
- Iron the patch: Press the iron onto the pressing cloth for about 15 seconds. If the glue doesn’t seem to soften, try again. Keep going until the adhesive melts.
- Peel off the patch: When the adhesive melts, carefully peel the patch off your clothes. Be careful because the adhesive will be hot. You can use tweezers or a butter knife if you’re having issues.
Second Method For Removing Patches
- Get a fabric-safe adhesive remover: You can buy these in a store. If it comes in a spray form, it will be even easier. Rubbing alcohol will also work.
- Patch test your garment: Before using this product, patch test on a hidden part of your clothes, such as the inside collar. Dab a little bit of the adhesive remover, work it into the fabric with a cloth, rinse and check for any damage.
- Turn the item inside out: If step two worked, time to turn the garment inside out. Locate the area where your patch is.
- Apply adhesive remover: Liberally apply your adhesive remover to the area with a cloth. Let it soak through the item completely, and work it in well using a cloth. After a minute or so, try to loosen the patch.
- Peel off the patch: If it is able to be removed, peel it off carefully. Work at it slowly, with your fingers, tweezers, or a butter knife, until the patch is completely removed.
- Repeat on residue: If your patch leaves behind an ugly residue, you can repeat these steps until it’s completely gone.
You can also use white vinegar on the tough stains. Wash your item as normal after you’ve removed your patch to give it a good clean.

Do Iron On Patches Come Off In Wash?
They might. But generally, patches can go in the washing machine. For extra security, turn the garment inside out, so the patch doesn’t get disturbed by the other items in the wash.
It’s best to put the clothes on a gentle wash in cold water. Heat might loosen the patch and remove it over time. After every wash, check if your patch is okay.
To prevent the patch from coming off, sew it down.
You can also hand wash the garment in cold water to ensure the best quality of life for your patch.

Is It Better To Sew Or Iron On A Patch?
Ironing on your patch is quicker and easier than sewing. But sewing it on might be a better way. Iron-on patches can be sewn on if you don’t want glue on your garment.
Or perhaps you like to swap your patches often for a fresh look. Sewing would be the winning choice here.
Sewing is sturdier than ironing on patches. It’s also less likely to fall off in the wash or during wear.

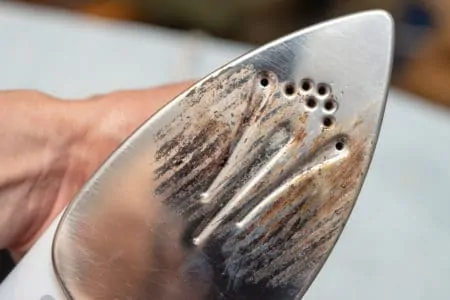
Why Are My Iron On Patches Not Sticking?
Your iron-on patches are not sticking because you are using too much heat or not enough heat. Both will cause the adhesive to fail, and the patch will fall off.
Get Trendy With Iron On Patches
Iron-on patches are back in fashion, and they’re totally trendy. If you’re looking for a way to revive an old denim jacket or fix your favorite pair of jeans that now have an unwanted hole in them, iron-on patches can come to the rescue.
Make sure to use the right heat setting and consider sewing it on after for best results. Just remember to wash it gently with cool water once the patch is secure, and to only wash it when truly needed. With these simple steps on how to iron on patches, you’ll be looking hip in no time.