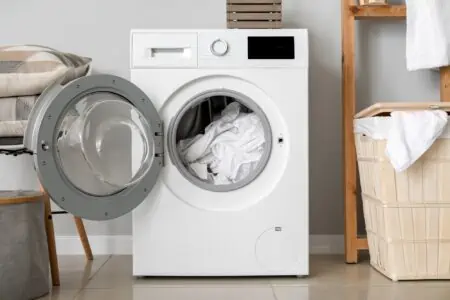
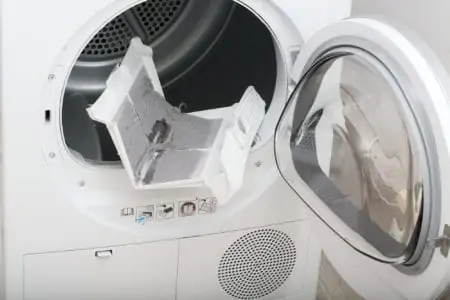
Are your clothes stinky? Is your machine not draining properly? Then there may be a clog in your washing machine. Yes — that’s right, your machine probably isn’t broken.
We’ll walk you through how to drain both a top load and front load washing machine. This quick method will remove standing water and give you an option to check for clogs.
Your machine will be up and running properly again in no time!
Key Takeaways
- Unplug the washing machine before starting and lay down towels to catch water.
- Locate the drain, usually at the front for front-loaders and at the back for top-loaders.
- Remove the drain pump and drain water into a storage container until it stops flowing.
- Check for and remove any clogs in the pump before putting it back in place.
How to Drain a Washing Machine
When you have to drain water from your machine manually, make sure you follow the corresponding instructions for your machine type.
Before you get started, always make sure that you unplug the machine. This will reduce your chances of electric shock.
We also recommend consulting your user manual for specific instructions for the brand of appliance you own. They may slightly differ from our advice.
- Time: 15 minutes
- Difficulty: Intermediate
Draining a Front Loading Washer
Many front loading machines house the drain in the bottom right-hand corner. This means you can’t always fit a storage container neatly underneath the drain and you might end up with a lot of water on the floor.
In that situation, you can use a very shallow tray. You could also ask somebody to help you position the machine on blocks of wood or bricks so that it’s slightly elevated. That way, you can place a bucket underneath the appliance.
What You’ll Need:
- 3-4 towels
- Tarp (optional)
- A shallow tray or bucket
- Bricks or wood (optional)
- Basin
- Laundry detergent
- Warm water
- Soft-bristled brush
1. Prep the Area
Start by unplugging the machine. If you used hot water in the most recent cycle, give the machine a few hours to cool down.
Lay down a tarp if you think it’s necessary. Otherwise, you can just lay down a few towels to absorb any water that might end up on the floor.
If you think it would help, get someone to help you raise the machine onto blocks of wood or bricks. Our Samsung machine’s drain pump is very close to the ground and always creates a mess when we drain it. However, it’s never been enough to justify doing this. So it’s completely up to you!
2. Locate the Drain
Look for the drain pump and filter. It’s usually located at the bottom right-hand side of the machine. There will be a small panel that covers it. For instance, if you have a GE appliance, this is where it’s usually located.
Most of the time, these panels are on hinges, so you can easily open them. However, yours may be screwed into place, in which case you’ll need a screwdriver.
Note that the drain filter isn’t always on the front. For instance, some Whirlpool appliances have their drainpipe at the back. Always check your user manual if you’re unsure.
3. Drain the Washing Machine
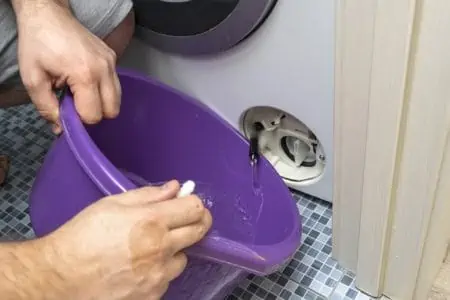
Your machine might have a small emergency drain filter. It’s a narrow rubber hose. Pull this out of place and aim it into your bucket or tray.
Remove the cap and let the water filter out into the storage container. Wait a few minutes until only a small trickle is coming down. Replace the cap and put the hose back into place.
It’s time to drain the machine. Unscrew the drain filter slowly before gently pulling it out of place. Water will start trickling out. Make sure your container catches the water before pulling the filter out any further.
We don’t recommend pulling the filter all the way out at this moment. This is to ensure you proceed without flooding.
Let the bucket or tray fill up with water. If it starts to overflow, return the filter before emptying your bucket. Then continue the process.
Once the water has stopped flowing, you can pull the filter all the way out to check for clogs and objects stuck in the filter.
Top Tip
If you decided to raise your machine, there might still be some water inside the machine. This might be because your machine, when raised, wasn’t 100 percent level. Carefully place it back on the ground and let the remaining water drain out.
4. Inspect and Clean the Pump
We know this isn’t technically part of draining the machine, but it’s essential for the health of your appliance. If your machine wasn’t draining correctly, it might have been due to a clog.
Use a flashlight to look into the drain to check for clogs or foreign objects. Remove them.
Fill up a basin with warm soapy water (use detergent, not dish soap) and soak the filter for 10 minutes before scrubbing with a soft-bristled brush. Then return it to the appliance.
Draining a Top-Loading Washer
Before starting, always switch the power off and unplug the appliance. You might even want to duct tape the power cord to prevent it from getting wet during the process.
The drain hose for top loading washers is usually located at the back of the washer, next to the water supply hoses. The hot and cold water hoses are usually red and blue, whereas the drain hose is usually gray.
Turn off the water supply hoses as a precaution.
What You’ll Need:
- Large bucket or shallow tray
- A couple of towels
- Plumber’s snake
- Pliers (optional)
1. Prep the Area
Pull the machine away from the wall so that you can locate the hose at the back of the appliance.
Place a few towels on the floor with your large bucket. If your drain hose is low to the ground, you will have better success with a shallow tray.
Top Tip
Ask someone to help you move the machine. These appliances are hefty, and it may not be safe to do it yourself.
2. Disconnect the Drain Hose
Disconnect the drain hose from the pipe. Usually, you simply need to wiggle it loose. Hold it upwards, so gravity doesn’t send the water down the hose and onto the ground.
3. Drain the Hose Into a Bucket
Carefully position the drain hose into your bucket or tray. This will prevent spills on your floor. Watch carefully to ensure that the tray or bucket doesn’t overflow.
When the bucket or tray starts to get full, carefully replace the drain hose into the pipe. Empty your tray or bucket, then repeat steps 2 and 3 until all of the water is drained.
4. Check for Clogs and Remove Them
If your machine had an issue draining, then a clog may be the culprit.
Use a plumber’s snake to feel around for a blockage in the pipe and drain system. Turn the handles until you locate the blockage, then remove it.
In some machines, the drain pump may be underneath the appliance. This is where you might find clogs. In this case, you’ll need to tip the appliance forward with some help from someone else.
You will notice a drain hose and inlet hose connected with spring clamps. Use a pair of pliers to squeeze the clamps off. From here, you can clear any clogs you find using your pliers.
Once you’re done draining the appliance and clearing clogs, replace all of the parts and plug your machine back in.
Why is My Washing Machine Not Draining?
Usually, when a washing machine isn’t draining correctly, there’s an issue with the drain hose. Perhaps it’s clogged or bent.
There may also be an issue with the lid-locking system. Another issue is a dirty coin trap. Lastly, there might be an issue with the water level sensor.
How to Fix a Washing Machine That Won’t Drain
If you’ve found the issue with your machine, then here are some hacks for fixing the problem:
- Clog in the pipe: Usually, draining issues are caused by clogs. When draining your machine using the above steps, always check for clogs. Remove any if you find them.
- Bent pipe: If the pipe is bent or kinked, try straightening it out. If that doesn’t work, you may need to buy a replacement pipe.
- Lid locking system: For top loading washing machines, the water only drains if the lid is securely locked. If your machine has stopped registering that the lid is closed, you can extend the stem on the lid so it presses the switch. Alternatively, you may need to purchase a new lid switch.
- Dirty coin trap: Many machines have a coin trap that catches debris so that it doesn’t drain away. Clean out your coin trap regularly.
- Water level sensor: If you have an issue with the sensor, check it using a multimeter. Find the wires that run from each terminal to the switch in the circuit, then disconnect them. Test for continuing in pairs for the three terminals. For instance, touch the probes to terminals one and two, then one and three, followed by two and three. You should only have continuity between one pair. If you find continuity between the other two pairs, there is an issue with the water level sensor, and you will need to get a replacement switch.
If none of the above works, contact the manufacturer.
How to Drain a Washing Machine For Moving
Draining a machine for moving is slightly different than draining a machine for maintenance. When you move, you want to have absolutely no water left in the machine. The last thing you need is leaks in the moving van.
This will also prevent mold and mildew build-up within the machine, especially if it will be in storage for a while.
- Time: 2-3 hours
- Difficulty: Intermediate
What You’ll Need:
- Distilled white vinegar
- Spray bottle
- Microfiber cloth
- 3-4 towels
- Tarp (optional)
- A shallow tray or bucket
- Basin
- Laundry detergent
- Warm water
- Soft-bristled brush
- Plumber’s snake
- Pliers (optional)
1. Deep Clean the Machine
Before draining a washing machine for moving, it’s crucial to deep clean it.
Create a 1:1 solution of distilled white vinegar and water in a spray bottle. Spray the interior of the machine, including the door and rubber gasket. Wipe down with a microfiber cloth.
Then spray the cloth with the solution before gently wiping down the machine’s exterior.
Pour one cup of distilled white vinegar into the drum and initiate a hot cycle. Your machine may have a drum cleaning cycle. Utilize that.
Once the cycle has finished, let the drum air dry thoroughly.
2. Prep the Area
Unplug your machine and give it a few hours to cool down since you used hot water during the last cycle. Lay down a tarp if you’d like to protect your floors. Otherwise, you can just lay down a few towels. Then put down your large bucket or shallow tray, depending on how low the drain is to the floor.
3. Turn Off Water
Turn off the water supply faucets and completely disconnect the hoses since you’re moving and won’t be using the machine for a while after this. This will ensure that no trickles of water end up back in your machine after you’ve drained it.
4. Disconnect the Hoses and Drain the Water
For a top-loader, disconnect the drain hose from the pipe and hold it upwards until you’ve aimed the hose over the bucket. Then position it into the bucket, so that the water drains downwards into your storage container. Watch carefully to ensure that the bucket doesn’t overflow.
If it starts to fill to the top, replace the drain hose into the pipe, empty the bucket and repeat the above process.
For front-loaders, empty the emergency drain filter if you have one. It’s a narrow rubber hose. Pull it out and aim it into a bucket or tray. Remove the cap and drain the water for a few minutes until only a small trickle remains. Cap the hose and put it back into place.
Unscrew the drain filter before slowly pulling it out, ensuring the water falls into the tray or bucket. Don’t pull it all the way out; otherwise, the water will gush and flood. When your tray or bucket is full, put the drain back into place, empty the bucket, and repeat this step. Continue until no water comes out.
5. Remove Any Clogs
For top loaders, use a plumber’s snake to check for and remove clogs. Some top loaders keep the drain pump underneath the appliance. You’ll need to ask someone to help you tip the machine forward so that you can remove the clamp connecting the drain and inlet hoses. Use a pair of pliers to do this, and to remove the clogs.
For front loaders, you can use your flashlight to look inside the drain pump. Remove any apparent clogs using your fingers (or pliers if that grosses you out).
6. Tilt Machine to Remove Excess Water
Before packing your machine up for moving, the final step is to remove any excess water. For top loaders, you will need to tilt the machine backward to drain excess water.
For front loaders, tilt the machine forward 4-6 inches so that all of the remaining water flows out the open drain pipe. It’s a good idea to have thick absorbent towels laid down for this.
Tips For Draining a Washer Without Water Going Everywhere
You’ve probably already gathered that draining a washing machine is a bit of a messy job. This is especially true if you have a front loader where the drain pipe is low to the ground. Let’s recap our top tips for minimizing mess:
- Raise the machine: Elevate the machine on bricks or blocks of wood if you’re able.
- Lay down tarp: A tarp can protect your floors and contain water.
- Lay down absorbent towels: We won’t think you’re crazy if you use tons of towels to absorb any messes.
- Use the right depth of storage container: While it’s tempting to use a deep bucket, a shallow tray will fit underneath the drain pipe better, especially for front loading machines. Just keep in mind that you’ll need to empty it every minute or two so that it doesn’t overflow.
- Empty it slowly: Be careful to point the drain hose upwards with a top loader until you have your bucket ready. As soon as you point the hose down, gravity will push the water out. For front loaders, remove the drain filter slowly so that the water doesn’t all gush out at once.
Warning
If there’s a clog in your machine and it stops functioning mid-cycle, you will have a messier job at hand. When you open the drain of your machine, it will be full of water from that cycle. This could be a good few gallons! In this case, it will be very wet and messy. So we recommend the above five steps as a necessity in this situation. You don’t want to flood the room.
FAQs
Drain Away Your Machine
It’s essential to drain your washing machine from time to time. If your appliance isn’t draining correctly or your clothes stink, it may be because there’s a clog in the drain.
Draining a washing machine and removing clogs is now accessible with our four-step method. It may be a little messy, but it only takes around 15 minutes!
