Disconnecting a washing machine isn’t as simple as unplugging it and calling it a day. There are electrical and water supplies that you must disconnect properly.
If you’re moving house or just transferring your washing machine to another room, we’ll show you how to disconnect the washing machine properly. Note that these instructions work for both top loading and front loading machines.
We’ll also provide safety warnings, top tips, and how to uninstall a dryer. Keep reading for the answers to all your disconnection queries.
Key Takeaways
- Turn off and unplug the washing machine, then turn off water valves and disconnect water supply lines to prevent electric shock and leakage.
- Gently pull the machine out from the wall, disconnect hoses from the wall and machine, and drain any remaining water.
- Clean the intakes, remove the power cord, and secure the machine with transportation bolts and drum securing bolts if moving.
- When reconnecting, level the machine, switch off home water supply, attach water-in hose, switch on water valve, and plug the machine into the main wall socket.
- Is It Safe to Unplug a Washing Machine Yourself?
- How to Turn Off the Water to a Washing Machine
- How to Disconnect a Washing Machine
- Tips For Moving a Washing Machine
- How to Connect a Washing Machine After Moving
- How to Uninstall a Dryer
- How Much Does It Cost to Disconnect a Washing Machine?
- FAQs
- Moving Machines
Is It Safe to Unplug a Washing Machine Yourself?
If you follow the instructions carefully, it’s safe to disconnect a washing machine yourself. In fact, unplugging a washing machine is the safest thing you can do. It stops electricity from traveling from the power source to your machine, reducing your chances of an electric shock.
How to Turn Off the Water to a Washing Machine
Before you disconnect your machine, you need to turn off the water. We’ll provide easy-to-follow instructions for turning off the water valves and supply to the washer.
- Time: 5 minutes
- Difficulty: Easy
What You’ll Need:
- User manual
1. Read the User Manual
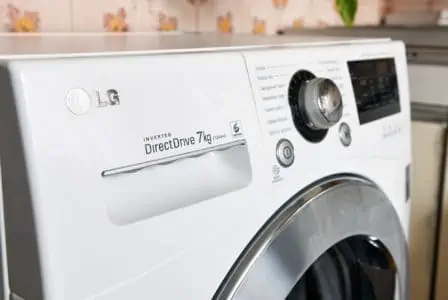
While you can disconnect the water supply to most washing machines using the same method, it’s good to check the user manual first. Your manufacturer might have alternative instructions to ours.
Most machines — including LG, Samsung, Whirlpool, and more — use the same method.
2. Turn Off the Machine
Before fiddling with electronic appliances, turn them off and unplug them from the main socket.
3. Locate the Water Valves
Locate the hot and cold water valves that supply water to your machine. They are usually behind your machine and are sometimes located in a washer box.
4. Turn the Valves Off
When the valves are switched on, they’re usually in line with the hoses. To turn them off, rotate them clockwise until you can’t turn them anymore. This means they’re switched off.
It’s essential to do this before disconnecting your washing machine as it prevents spills and leaks during the next steps.
How to Disconnect a Washing Machine
We will walk through the ultimate instructions for how to unplug a washing machine and disconnect it.
These in-depth instructions are thorough enough that they work for those who are moving their washing machine from one room to another and those who are moving house.
You don’t want any water left in your machine — as this can lead to mold. We’ll make sure your machine is safely and adequately disconnected.
- Time: 1 hour
- Difficulty: Easy / Intermediate
What You’ll Need:
- User manual
- Tray for catching water
- Transportation bolts (optional)
- Adjustable pliers or pipe wrench (optional)
- Pair of gloves (optional)
- Pipe cleaner (optional)
- Philip screwdriver (optional)
- Industrial tape (optional)
1. Unplug Machine and Disconnect the Water
Following the four-step method above, unplug your machine and disconnect the water supply lines. This prevents the risk of electric shock and leakage.
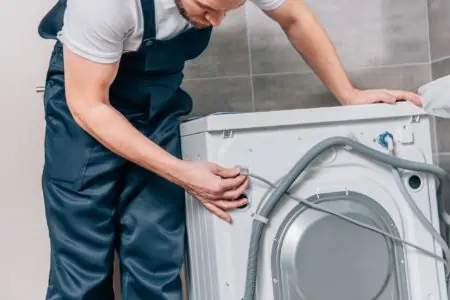
2. Pull the Machine Out From the Wall
You may need to do this step before number one if your machine is built-in or underneath countertops.
Grab either side of the washing machine and gently pull it forward. You may want to get help if the machine is particularly heavy.
Don’t pull it too far as you could snap or stress the hoses. If you feel resistance, stop pulling.
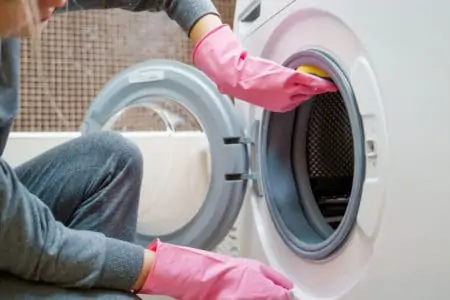
3. Disconnect the Hoses From the Wall
If you’re easily grossed out, wear your rubber gloves. There may be some dust, dirt, and gunge during this process.
Locate the water hoses by following them back from the machine to where they’re attached to the wall or pipe. You will need to disconnect every pipe attached to the machine. This usually includes the water hose and the drainage hose.
Place buckets or trays underneath in case there is water leakage.
You should usually be able to unscrew the hoses by hand by turning the connection counterclockwise. You may need to use adjustable pliers or a pipe wrench in some cases. Let the water flow out into the bucket. Give it a couple of minutes to completely empty before moving the machine.
Expert Advice
Double-check that your water valves are still off while doing this. Some styles of valves are easily turned back on accidentally.
4. Disconnect the Hoses From the Machine
If necessary, you will also need to disconnect the hoses from the machine. This is often required if you’re recycling the machine.
To do this, move the bucket or tray underneath the hoses to catch excess water.
You should be able to unscrew the pipes by turning the connection point counterclockwise. However, some are connected with clamps, so you will need to turn them counterclockwise until the clamps come loose.
Point the hoses into the bucket for a few minutes, so that they drain fully.
5. Remove the Drain Hose
Your drain hose may still be connected. Usually, this will be to a sink, a floor drain, or a stand-pipe. You will need to check the manufacturer’s instructions for removing this as it differs by machine.
Some can simply be pulled out of place by unclipping them. If so, remove it and point the drain hose into a bucket or tray to empty any water and gunk.
If any of the parts are rusted, worn, or damaged, you will need to buy replacements if you plan to reinstall the appliance in a new location.
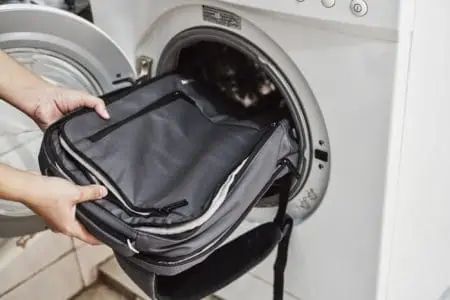
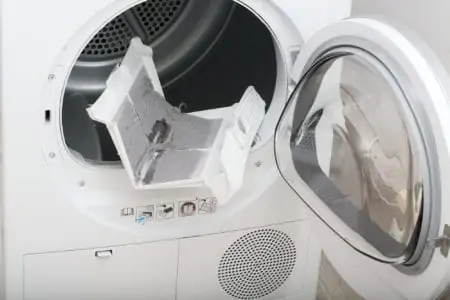
6. Clean the Intakes
If you’re moving the machine, it’s good to give the intakes a quick clean to remove built-up debris. Use a large pipe cleaner to get into the intakes at the back of the machine.
7. Remove the Power Cord
If you’re moving house, removing the power cord or taping it into place protects it during transit. Use a Philip screw to unscrew the ground wire. Pull the cord down and out.
Check your user manual if these instructions don’t make sense with your appliance.
Alternatively, you can tape it into place so that it’s protected.
8. Secure the Machine
If moving house, you’ll need to secure the machine. Reinsert the shipping bolts so that the machine doesn’t overly vibrate during transit. If you did not keep them, contact the manufacturer to get new ones.
Next, you’ll need to secure the drum. You will need special bolts to do this, supplied by the manufacturer.
Finally, wrap up any extra cords to ensure that they’re protected. You can also tape them to the side of the machine to ensure that they don’t become damaged.
Tips For Moving a Washing Machine
If you don’t want to hire a moving company, there are ways you can move your machine safely and effectively. Here are our favorite tips and hacks:
- Hire or buy a trolley: You can damage the flooring when you move a washing machine across the floor. Buy or hire a trolley with wheels to move your large appliances from the house to the moving truck.
- Secure the door shut: Firmly close the door and secure it with parcel string or a rope. If it swings open and something falls on it, the door can easily become damaged. As an extra measure, you can wrap the door in bubble wrap.
- Clean the machine before you move: It’s a good idea to give your washing machine a deep clean before moving. This prevents dirt and debris from traveling around in the machine. It also reduces the chance of mold and mildew growth while you’re in the moving process.
- Don’t skip the transit bolts: If you’ve lost them, it can be annoying to get new ones, but it’s crucial you don’t skip this step. Vibrations can damage your washing machine in transit, so we recommend buying the bolts.
- Keep the machine upright: Keep it upright when maneuvering your machine and storing it in the moving van. This protects your machine and ensures no excess dirt or water gets into the motor.
- Ask for help: You shouldn’t aim to maneuver the washing machine yourself. It’s heavy, and you don’t want to forget an important step. Get a friend or family member to help you disconnect the washing machine and move it.
- Drain before moving: Before moving the machine, we recommend draining it 24-48 hours beforehand. This ensures that it’s definitely empty and no water will be sloshing around during the moving process.
- Wrap the machine: When your washing machine arrives from the manufacturer, it’s surrounded by bubble wrap and styrofoam for protection. If you can replicate that, great. But if you can’t access these tools, wrap the machine in thick blankets to protect it from dents and scratches.
How to Connect a Washing Machine After Moving
So you’ve arrived in your lovely new home. We’ve walked you through how to disconnect a washer — but how on earth do you reconnect it?
We’ve got you covered. Here’s all you need to know to set your machine up in the new location.
- Time: 30 minutes
- Difficulty: Intermediate
What You’ll Need:
- Mole grips
- Bucket
- Spirit level
1. Unpack the Machine
Remove the packaging from the machine, whether that’s blankets or bubble wrap.
Next, remove the transit bolts from the machine. You may need a special tool to remove them, but that should be provided with the bolts.
2. Level the Machine
Get help to tilt the machine back slightly. Locate the adjustable feet and rotate them by hand until the machine is level. Use your spirit level to check. Tighten the feet using lock nuts to secure them in place.
3. Switch Off the Home Water Supply
Turn off the water supply in the home by switching off the isolating valve, which is usually a small blue tap.
Unscrew the cold water-in pipe and catch any of the water using a bucket or tray. When only a few drops come out, it’s time to move on to the next step.
4. Attach the Water-In Hose
Your washing machine should have a water-in pipe that attaches to the machine’s upper back. You should secure this into the machine first (if you removed it earlier).
You may need to use mole grips or a mole wrench to install the hose to the plumbing. Otherwise, you can screw it in.
5. Switch On the Water Valve
Release the isolating valve to let the water go through the pipe. When it’s flowing, check that the pipes are secure, and there aren’t any leaks.
Now attach the wastewater or drain hose. Read your user manual for instructions, as this tends to vary from brand to brand. You can usually feed the included hose into the wastewater downpipe.
6. Turn on the Machine
Turn the machine on. The control panel should light up.
Now your machine is ready to use!
How to Uninstall a Dryer
If you’ve got a dryer, you’re probably taking that with you, too. Let’s walk you through how to unplug and disconnect your dryer.
- Clean it out: Give the dryer a quick clean. Remove debris from the lint trap and clean that out. This reduces mess during the uninstallation process.
- Unplug the dryer: If you have an electric dryer, simply turn it off and unplug it at the wall. Remove the plug. Duct tape the power cord to the side of the dryer to protect it during transit.
- Turn off the gas: If you have a gas dryer, completely turn off the gas source. Remove the supply hose from the gas outlet and the dryer. You can store these in the machine’s drum. Turning off the gas can be dangerous, so many folks like to contact a professional plumber to uninstall gas dryers. If doing it yourself, make sure there are no open flames nearby, such as those from a stove or a candle. Open doors and windows to increase ventilation. Install a gas cap once you’ve turned off the gas and unscrewed the hose at the gas line. Wrap it up with specialized gas tape. Then disconnect the hose from the dryer. Let the room air out before moving on to the next step.
- Disconnect the water supply: Some dryers use steam settings and are connected to a water line. You will need to disconnect the waterline. Turn off the water valve before doing so. Keep a bucket or tray nearby to catch excess water.
- Disconnect the vent ducts: The vent pipe is usually connected to the back of the dryer and the dryer vent line. Disconnect it at both ends. You may need a screwdriver to do so.
Now your dryer is disconnected and ready to move. We recommend using a furniture trolly — sometimes referred to as a dolly — to transport it.
How Much Does It Cost to Disconnect a Washing Machine?
If you can’t disconnect your machine yourself, you may want to hire a professional. The price varies depending on the company you use and whether you’re recycling or disposing of the machine.
In general, you can expect to pay between $30 and $100 depending on the brand and the service you require. It averages around $80.
FAQs

What Is the Best Way to Remove a Washer From a Tight Space?
Slide a two-wheeled dolly underneath the front of the appliance. Cover the front of the machine with a towel so that when you tilt the machine onto the dolly, the machine is protected.
Wrap the dolly’s ratchet strap around the machine and secure it to the dolly. Then tilt the dolly back and carefully remove the machine from the space.
It helps to have someone help you, but the dolly almost acts as a second person. So you should be okay doing this yourself.

Should I Hire a Plumber to Disconnect a Washing Machine?
We believe that following our instructions makes it pretty easy to disconnect a washing machine without a plumber. However, if you’re confused or not confident in your DIY skills, a plumber would be happy to help.

Do Removal Companies Disconnect Washing Machines?
Most moving companies do not disconnect washing machines or other appliances. In fact, some are legally prohibited from dealing with your main supplies and supply lines.
Therefore you will need to disconnect all of your appliances before your removal company arrives.
Contact the removal company in advance to double-check their policies when in doubt.

Why Is There Still Water In My Washing Machine?
When you remove the drain hose, you should be able to empty all the water. But in some cases, that doesn’t happen.
This is usually caused by a clogged drain hose or a broken pump. A broken lid switch can also cause this issue. You will need to drain all the water from the machine before moving it, so troubleshoot this issue beforehand.
If nothing seems to work, you may need to contact a plumber or your washing machine manufacturer.

Do You Have to Turn Water Off to Disconnect a Washing Machine?
You do have to turn water off to disconnect a washing machine. Isolate the water supply at the taps, and unscrew the pipes leading to the machine.

Can One Person Move a Washing Machine?
It is not possible for one person to move a washing machine unless they possessed extreme strength. The average washer weighs 170 pounds, so get help if you are planning on moving your machine.

How Do You Put a Whirlpool Dryer in Diagnostic Mode?
The best way to put a Whirpool dryer in diagnostic mode is to press the SW1 and SW2 buttons simultaneously for three seconds until the machine beeps. You should see 01 on the screen, indicating that the washer is in diagnostic mode.

Is it Worth Replacing a Heating Element in a Dryer?
It is worth replacing a heating element in a dryer because it is pretty simple and inexpensive, and it saves you hundreds of dollars on a new machine.

Why is the Dryer Blowing Cold Air?
The most common reason why your dryer is blowing cold air is it has overheated. It is a legal failsafe that when your dryer gets too hot, it cold down by blowing cold air to prevent a fire.

Where is the Thermal Fuse on a Whirlpool Dryer?
The thermal fuse on a Whirlpool dryer is located on the exhaust duct. You will probably have to remove some panels to access it.
Moving Machines
When you move your washing machine from one room to another, or to a new home altogether, it’s important to be careful.
Our instructions have shown you how to disconnect a washing machine safely and effectively. Now you can have it ready to go when the removal company arrives.
Always make sure to unplug the machine first, turn off the water valves, and always use shipping bolts during transit!