Does your coffee just not taste the same anymore? Maybe you have noticed that your machine is taking longer to brew the coffee than before. Coffee makers need to be deep cleaned and descaled regularly to keep the taste fresh and the machine in good working order. Mold and bacteria multiply and grow inside your machine and give your coffee an off-flavor if not cleaned regularly.
Plus, minerals from the water will add scaling to your machine. Then one day you wake up and realize your coffee tastes bitter. So today we’re discussing how to clean a Hamilton Beach coffee maker with vinegar so you can enjoy great-tasting coffee every morning.
Key Takeaways
- Clean your Hamilton Beach coffee maker with vinegar or lemon juice to remove mineral deposits and bacteria.
- Rinse the machine with 2-3 brewing cycles of fresh water to remove any vinegar or lemon juice residues.
- Clean removable parts like the filter basket and drip tray with mild dish soap and water once a week.
- Maintain your coffee maker by cleaning and descaling it once a month for better-tasting coffee and a longer-lasting machine.
- How Do I Clean My Hamilton Beach Brewstation With Vinegar?
- How Do I Clean My Hamilton Beach Coffee Maker Without Vinegar?
- How to Clean My Coffee Maker’s Hot Plate
- How to Clean My Coffee Maker’s Stainless Steel Exterior
- How to Clean the Carafe Side of Your FlexBrew Coffee Maker
- How to Clean the Single-Serve Side of Your FlexBrew
- Tips To Maintain A Hamilton Beach Coffee Maker
- FAQs
How Do I Clean My Hamilton Beach Brewstation With Vinegar?
Vinegar is an excellent way to descale the mineral deposits inside your machine while killing any mold or bacteria hiding there.
- Time: 1 hour
- Difficulty: Beginner
What You’ll Need
- White Vinegar
- Water
- Dish soap
- Microfiber cloth
1. Remove Filter Basket
Remove the black plastic filter basket from your machine. You don’t need it when you’re cleaning your Brewstation. If you have the optional water filter holder, remove it too.
2. Add Vinegar to the Reservoir
Add 2 cups of vinegar to the reservoir. The vinegar will clean and descale your machine.
3. Start the Brew Cycle
Place the carafe onto your machine’s hot plate so that it can catch the hot vinegar as it brews. Then press the ON or BREW button on your machine to start the brewing cycle.
4. Stop the Brew Cycle & Wait 30 Minutes
Let your machine brew for a short time, between 30 seconds and 2 minutes. Press the OFF button or press the BREW button again. This is to stop the brew cycle. Now, wait 30 minutes before restarting the brew cycle to give the vinegar time to work.
5. Restart the Brew Cycle
After 30 minutes have passed, restart the brewing cycle. Let the brewing cycle finish before turning your machine off. When it is done brewing, pour all of the vinegar left in your machine and carafe down the drain.
6. Rinse Your Coffee Maker
Wash the carafe in warm soapy water and rinse it thoroughly. Then fill the reservoir with water and make sure the carafe is on the hot plate. You’ll be running 2-3 brewing cycles of fresh tap water through your machine to remove the vinegar.
Remember to allow your coffee maker time to cool between each cycle. As vinegar has a strong flavor, you’ll need to be sure that you’ve thoroughly rinsed your coffee maker and removed all vinegar traces from your machine.
7. Wash Removable Parts
Remove the drip tray. Handwash both the drip tray and the black plastic filter basket with mild dish soap. Rinse them thoroughly and place them on the counter to dry.
Now remove the coffee tank and put it upside down. Press the dispensing lever down before flushing with water for 30 seconds. This is to remove any coffee grounds left in the tank.
Rinse the tank, wipe the outside dry with a clean cloth, and leave it on the counter to dry.
8. Put Your Coffee Maker Back Together
Put your coffee maker back together again. If you removed the optional water filter, be sure to put that back in place as well. Once you have your machine together, you’re ready to brew a fresh and delicious cup of coffee.
Pro Tip
If you are cleaning a coffee maker with a removable reservoir, remove the reservoir after cleaning your machine with the vinegar solution. Rinse the reservoir thoroughly before you rinse your coffee maker with fresh water.
How Do I Clean My Hamilton Beach Coffee Maker Without Vinegar?
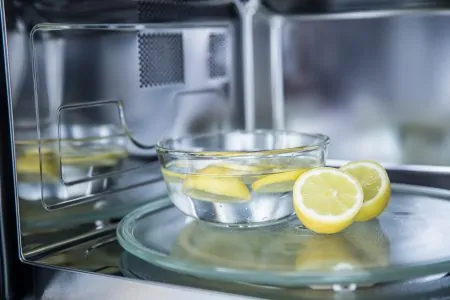
The best way to clean a coffee maker without vinegar is to replace the vinegar with lemon juice.
- Time: 1 hour
- Difficulty: Beginner
What You’ll Need
- Lemon juice
- Water
- Dish soap
- Microfiber cloth
1. Remove Filter Basket
Remove the black plastic filter basket from your machine and place it on your counter. If you have the optional water filter holder, remove it as well.
2. Add Lemon Juice to the Reservoir
Pour 2 cups of lemon juice into the reservoir. You can use bottled lemon juice or fresh lemon juice. Both will work.
3. Start the Brew Cycle
Place the carafe onto your machine’s hot plate. You need it to catch the hot lemon water as it brews. Press the ON or BREW button on your machine to start the brewing cycle.
4. Stop the Brew Cycle and Wait 30 Minutes
Wait at least 30 seconds but no more than 2 minutes. Press the OFF button or the BREW button again. This is to stop the brewing process. Let the machine sit for 30 minutes.
5. Restart the Brew Cycle
Restart the brewing cycle after 30 minutes have passed. Finish the brewing cycle, and turn off your machine. When complete, pour the lemon juice down the drain.
7. Rinse Your Hamilton Beach Brewstation
Allow your coffee maker to cool before running 2 brewing cycles of fresh tap water through your machine. Lemon juice does not have the strong flavor that vinegar has and so shouldn’t alter the taste of your coffee when rinsed properly.
8. Wash Removable Parts
Handwash the drip tray and filter basket in soapy water. Rinse thoroughly and place them on the counter to dry.
Remove the coffee tank and place it upside down. Press the dispensing lever down before flushing the tank with water for 30 seconds. The goal is to remove the coffee grounds from your tank.
Rinse the tank, wipe the outside dry with a clean, dry cloth, and leave your tank to dry on the counter.
9. Put Your Coffee Maker Back Together
The final step is to put your coffee maker back together again remembering to insert the optional water filter holder if you removed it. Now brew yourself a fresh pot of delicious coffee.
Pro Tip
Another option to use as a cleaning agent is vodka. Follow the same instructions above, but replace the lemon juice with vodka.
How to Clean My Coffee Maker’s Hot Plate
The hot plate of a coffee maker becomes dirty as the liquid is spilled on it. Thankfully, it’s easy to clean.
- Time: 45 minutes
- Difficulty: Beginner
What You’ll Need
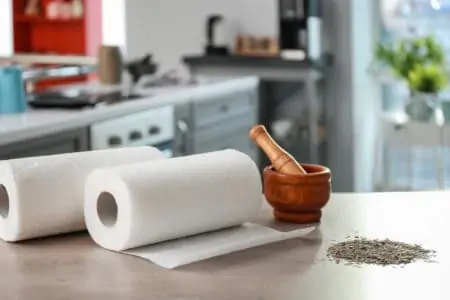
- Paper Towel
- Water
- Cloth
1. Allow Hot Plate to Cool
Make sure that the hot plate is cool before you begin to clean it. This is to prevent you from being burned or injured while cleaning the hot plate.
2. Moisten Paper Towel
Moisten a paper towel. Now lay the towel over the hot plate.
3. Leave the Towel on the Hot Plate
Leave the paper towel on the hot plate until the stains are softened. This may take as long as 30 minutes.
4. Remove Paper Towel and Wipe Clean
Remove the paper towel and wipe the hot plate clean with a soft cloth. The stains should wipe away easily.
Pro Tip
Apply the mixture to your hot plate with a toothbrush. Gently scrub until the stain is gone. Wipe clean with a damp microfiber cloth.
How to Clean My Coffee Maker’s Stainless Steel Exterior
- Time: 15 minutes
- Difficulty: Beginner
What You’ll Need
- Microfiber cloths
- Dish soap
- Water
1. Wipe the Outside of Your Coffee Maker
Moisten one microfiber cloth and wipe the exterior of your coffee maker in the direction of the metal grain. If you’re having trouble cleaning it, you can add a drop or two of dish soap to the microfiber cloth and scrub your machine.
When you’re finished, use a clean moist cloth to remove the soapy residue.
2. Dry Your Coffee Maker
Use a dry microfiber cloth to dry the exterior of your coffee maker, rubbing in the direction of the metal grain.
3. Buff Your Coffee Maker
Take a dry soft cloth and buff your coffee maker until it shines.
Pro Tip
Use olive oil to add a protective coat to your stainless steel exterior, by pouring a small amount of olive oil onto a clean microfiber cloth and buffing it into the exterior of your coffee maker.
How to Clean the Carafe Side of Your FlexBrew Coffee Maker
A Flexbrew coffee maker has the flexibility of brewing an entire pot of coffee or a single mug of coffee. When cleaning your FleBrew you will need to clean both sides of your coffee maker separately.
- Time: 1 hour
- Difficulty: Beginner
What You’ll Need
- White Vinegar
- Water
- Measuring cup
1. Select the Carafe Side
Press the carafe button on the front panel of your machine to ensure that you’ll be cleaning the carafe side.
2. Add Vinegar to the Reservoir.
Measure and pour 2 cups of vinegar into the reservoir. Place the carafe on the hot plate of your machine.
3. Begin Brewing Cycle
Press the BREW NOW I/O button once to start the brewing cycle. After 30 seconds press the button again to stop the brewing cycle.
4. Wait 30 Minutes Then Resume Cleaning Cycle
Wait 30 minutes to allow the vinegar solution time to work. After 30 minutes, you will restart the brewing cycle. Let the brewing cycle continue until it’s finished.
5. Rinse Your FlexBrew Coffee Maker
When the FlexBrew coffee maker has finished brewing, empty the carafe and rinse it thoroughly to remove all the vinegar solution. Now fill the reservoir with fresh water and run another brewing cycle. You will need to run 2-3 brewing cycles to remove the vinegar flavor from your coffee maker.
Pro Tip
Clean the carafe by sprinkling baking soda onto the bottom. Add a small amount of water to form a paste and scrub the carafe with it. The baking soda paste will create a gentle abrasive substance that will remove the stains. When you’re finished scrubbing, rinse the carafe.
How to Clean the Single-Serve Side of Your FlexBrew
Now it’s time to clean the single-serve side of your FlexBrew Coffee Maker.
- Time: 45 minutes
- Difficulty: Beginner
What You’ll Need
- White Vinegar
- Water
- Measuring cup
- 14 oz or larger mug
1. Set FlexBrew to Single Serve
Set your FlexBrew to the single-serve side by pressing the single-serve button.
2. Vinegar Solution
Pour 1 cup of vinegar into the single-serve reservoir. Place a large mug on the hot plate to catch the vinegar solution as it brews.
3. Start the Brewing Cycle
Press the BREW NOW I/O button to start the brewing cycle. Again, you will wait 30 seconds or so before pressing the button once more to stop the brewing cycle.
4. Wait 30 Minutes Then Restart Brewing Cycle
Wait 30 minutes to give the vinegar solution time to work before restarting the brewing cycle. When the brewing cycle is finished, pour the vinegar solution into the sink.
6. Rinse the Machine
Rinse your machine by running 2-3 cycles of water through the single-serve side. Remember to keep the mug in place. This will remove the strong taste of vinegar from your machine so you can enjoy great-tasting coffee in the morning.
Pro Tip
Use lemon juice instead of vinegar to clean your machine. It is an effective cleaner but doesn’t leave the same strong smell and taste in your machine.
Tips To Maintain A Hamilton Beach Coffee Maker
Maintaining your coffee maker will allow it to last for years, and you’ll also enjoy a robust cup of coffee every morning.
Clean Once a Month
Clean and descale your Hamilton Beach Coffee Maker once a month to remove any mineral deposits, coffee oils, and any mold or bacteria that is growing in your machine.
Clean Removable Parts Once a Week
Take the removable parts out once a week to wash them. You will need to soak the parts in soapy water for 1 hour before rinsing the parts. Leave them on a counter to dry.
This will remove any coffee oil residue that may be building up in your machine.
Clean Carafe with Ice, Salt, and Lemon Juice
If you have a dirty carafe with burnt coffee that you’re not able to clean by washing in soapy water, try using ice, salt, and lemon juice to clean it.
Fill the carafe half full of ice. Sprinkle 3 tablespoons of salt over the ice. Then squeeze a slice of lemon over the ice and drop it in the carafe as well.
Let it sit overnight. In the morning, rinse the carafe well using hot water. You should now have a sparkling clean coffee pot.
Replace Cracked Carafe Immediately
If the carafe becomes cracked, replace it immediately.
FAQs
How Do You Unclog Hamilton Beach Flexbrew?
Before you begin troubleshooting your machine, unplug it and make sure it is cooled. Now remove the needle holder by turning it counterclockwise.
Both the back and the front of the needle have holes in them. Use a straightened paper clip to gently push any coffee grinds from the holes in the needle before rinsing the needle under cool water. Return the needle holder to the machine and turn it clockwise to lock it in place.
Finally, brew 2-3 cups of plain water to finish unclogging and rinsing your machine.

Does Descaler Work Better Than Vinegar?
Descaler is designed and formulated to descale coffee makers and keep them running for years. However, both descaler and vinegar work equally well to remove mineral scale from a coffee machine.

How Often Should You Clean Your Coffee Maker?
You should clean your coffee maker every month to remove any mineral build-up and bacteria growing in your machine. Removable parts should be cleaned weekly.

Is Cleaning Vinegar The Same As White Vinegar?
No, cleaning vinegar has 6% acidity while white vinegar has 5% acidity. In addition, cleaning vinegar is not safe to ingest as it’s not regulated for impurities. So use white vinegar that’s safe for cooking when you’re cleaning your coffee maker.

Why is My Hamilton Beach Coffee Maker Not Brewing?
Your Hamilton Beach Coffee Maker is not brewing because it is scaled with mineral deposits. Water leaves a white residue that coats the inside of you coffee maker, hindering its ability to boil.

Does Vinegar Damage a Coffee Maker?
Vinegar can damage your coffee maker because it is acidic and can corrode metal internal components. For the safest results, always dilute the vinegar with water.