Has your Dyson vacuum started to smell funky? Is there a sudden loss of suction? When was the last time you cleaned your vacuum?
Before you rush out and buy a replacement, your Dyson might just need a good clean.
Don’t worry; we’re all guilty of letting this household chore slip. But it’s important to know how to clean a Dyson vacuum to maintain this expensive investment.
Cleaning your Dyson regularly is essential for maximum operating efficiency. It may also extend the lifespan of your vacuum.
Key Takeaways
- Regularly clean your Dyson vacuum for better performance and longer lifespan.
- Empty and scrub the dust canister, and wash the filters with cold tap water.
- Untangle the brush bar, and unclog the hose for improved suction power.
- Wipe down the outer parts of the vacuum and sanitize the soleplate and wheels.
How to Clean a Dyson Vacuum
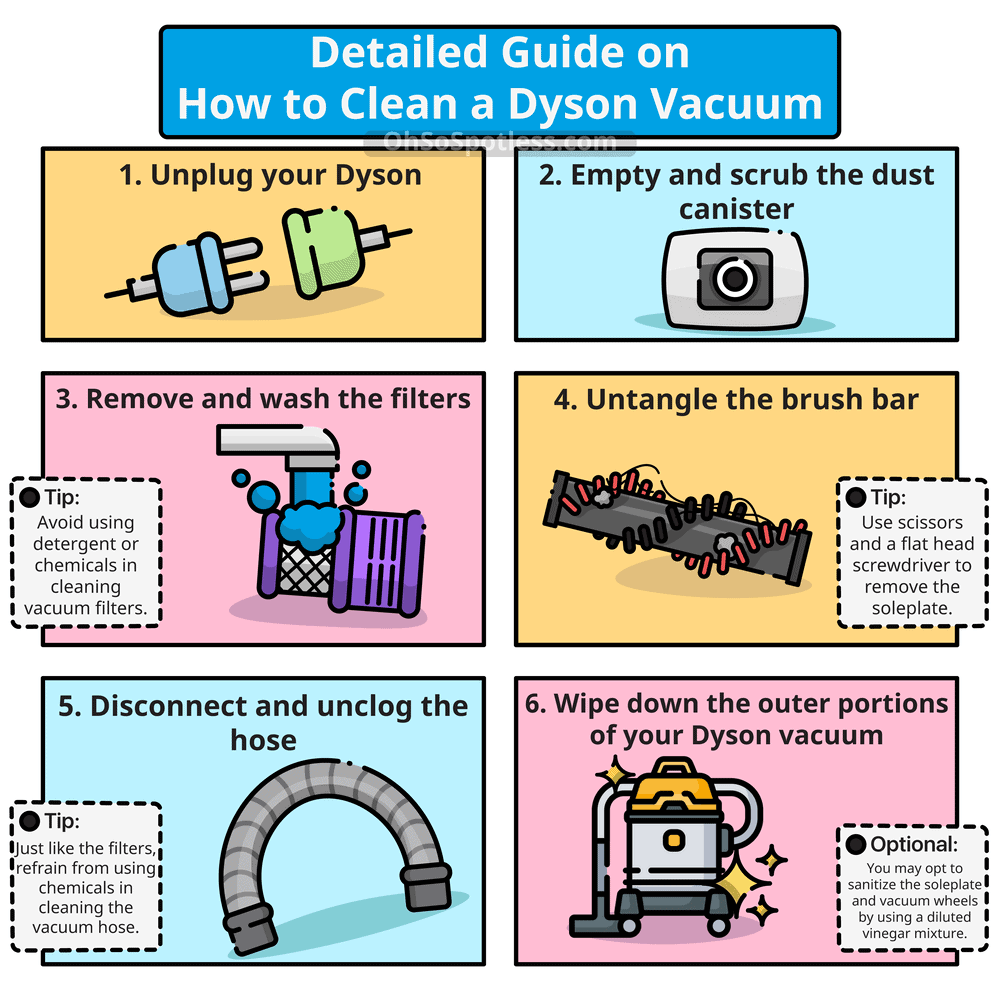
Cleaning your Dyson vacuum is a simple task when you know what you’re doing. You can follow our step-by-step guide every one or two months — perhaps more if you vacuum regularly.
- Time: 45 minutes
- Difficulty: Intermediate
What You’ll Need
- Microfiber cloths
- Compressed air (optional)
- Sink or basin
- Scissors
- Screwdriver
- Distilled white vinegar (optional)
1. Unplug Your Dyson
Before you start, make sure you’ve unplugged the Dyson from the power outlet. This will make your job a lot safer, lowering the risk of an electric shock.
2. Empty and Scrub the Dust Canister
Start with the dust canister since all Dyson vacuums are bagless. The dust canister usually is underneath the cyclones. On many models, such as the Dyson V6, there’s a red “bin release” button next to the base.
Press this to release the dust canister from the main vacuum. Depending on the model, it might be in a different place, but it shouldn’t be far away. Check your manual if you’re not sure where it is.
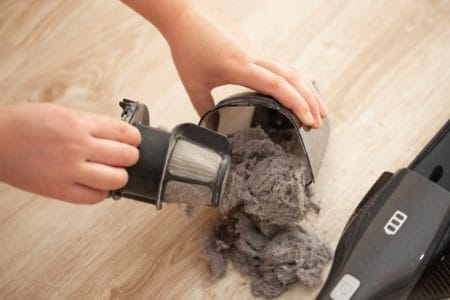
Press the button on the dust canister to release the base and empty debris into the trash. Be sure to shake it to remove as much dirt as possible.
Clean the inside of the dust canister with a damp cloth. Microfiber is a good material as it’s positively charged. This means it can easily capture dust and dirt particles, holding them tight, so they don’t smear back onto the dust canister (1).
Dyson recommends not using any detergent to wash out the dust canister — chemicals may make the material sticky. It’s also stated in some user manuals not to wash any part of the Dyson’s cyclones with water.
So, if there is dirt stuck in the cyclones, you may want to try a compressed air device. This lets you blast away debris for maximum suction.
If washing the dust canister, always make sure to dry it thoroughly. Leaving excess moisture and dampness in there might cause mold to grow (2).
3. Remove and Wash the Filters
The filter of your Dyson vacuum cleaner has a critical role to play in keeping your home clean. It traps dust, pollen, bacteria, and dirt particles from the air.
This means that it’s necessary to clean out the filters over time. A lot of Dyson filters are purple and located near the cyclone.
Some Dyson upright vacuums will have more than one filter. This might include another one in the “ball” or back of the machine. Lift filters out and remove them for cleaning.
Run the filter under the cold tap water to clear dust and debris. It’s best not to use any detergent or chemicals.
You can gently squeeze the water out and keep repeating this process until the water runs clear. You’ll know when it’s clean just by looking at it.
Before you insert the filter back into the vacuum, it’s necessary to let it dry thoroughly. It can be damaged in a tumble dryer. So, you can just leave it in a warm area of your home for around 24 hours.
Some Dyson manuals say you should wash the filter every three months. However, if you use your vacuum a lot and on heavily soiled floors, it might need more frequent cleans.
With our Dyson filter, we simply remove the filter and check how dusty and dirty it is. If it is filthy, we clean it right there and then.
4. Untangle the Brush Bar
The brush bar collects all the hair, debris, and dirt from your floors and carpet. After a while, this builds up and gets tangled, reducing cleaning efficiency. So, grab a pair of scissors and a flat head screwdriver for this step.
You’ll need to remove the soleplate on some Dyson vacuums in order to clean the brush bar. Various models require a flat head screwdriver to remove the screws.
There will be other models where you can simply use a coin to unscrew it. For example, this is the case for the Dyson DC39 Animal vacuum. Then you simply pull out the brush.
You can also manually remove large debris from the brush. Next, use the scissors to cut out hair and anything else twisted around it.
You can use a damp microfiber cloth for cleaning out the brush bar compartment. Just make sure it’s completely dry before inserting the brush back in and fixing it on the soleplate again.
5. Unclog the Hose
Over time, your hose can become clogged, and this can affect suction power. While you’re cleaning your Dyson, disconnect the hose. There’s sometimes a button to detach it from the wand.
Visually check inside the hose to spot debris. You can also use a mop handle and push it through to clear the hose.
It’s best not to use any harsh chemicals on the vacuum hose. This might cause irreversible damage. Instead, you can make your own household cleaner with distilled white vinegar to kill germs and bacteria lurking inside.
Fill up your kitchen sink with warm water and one cup of vinegar. Submerge your hose in the mixture. After 10 minutes, flush the hose with warm tap water. It may be easier to do this by holding your hose in a U shape.
Let it dry before reconnecting to your vacuum. This may take around 24 hours — you don’t want to take any risks.
6. Wipe Down the Vacuum
Don’t forget to wipe down the outer portions of your Dyson vacuum. Again, a damp microfiber cloth is all you need for this one — avoid oversaturating your machine.
You might want to consider sanitizing the soleplate and wheels of your vacuum. Trailing over dirty floors and carpets may mean they harbor grime too.
A mixture of diluted vinegar also works for this task. Just remember to let your vacuum dry thoroughly before you use it again.
FAQs

Where Does the Dust Go In a Dyson Vacuum?
The dust in your Dyson vacuum goes up the hose and enters the waste canister using centrifugal force. This causes the air and dust to rotate, dropping the heavier particles to the base of the bin. The smaller dust particles get captured in the filter.

How Do You Take Apart a Dyson Vacuum to Clean It?
Start by unplugging the vacuum cleaner. Release the clip that holds the waste bin and remove it. This reveals the filter, which you can swap for a new one. The hose unclips in sections to make it easier to clean.

How Do I Get My Dyson to Stop Smelling of Dog?
Your Dyson smells of dog because it is not maintained properly. The filter is dirty and needs replacing, and you need to empty the waste bin regularly.
Clean Vacuum, Clean House
Cleaning your Dyson is an important task you should complete at least once a month. This can improve your cleaning sessions and help your vacuum last longer.
Always ensure your vacuum is unplugged before you begin. Start with the dust canister and a damp microfiber cloth before moving onto the filters.
Then you can tackle the brush bar and make sure it’s tangle-free. Don’t forget to clean out the hose too. Finally, ensure everything is dry before using your vacuum again.