Cast iron skillets are a dream to cook with. You can use them on the stove and in the oven. Food tastes wonderful when it’s cooked on an iron skillet.
However, a cast iron frying pan will require more care than simply rinsing it and tossing the pan into the dishwasher. So today, we’re chatting about how to clean a cast iron skillet.
Key Takeaways
- Clean cast iron skillets after every use, using gentle dish soap and a nylon brush. Avoid soaking and using steel wool.
- Dry the skillet immediately after washing to prevent rust, and apply a light coat of vegetable oil to maintain seasoning.
- To deep clean a skillet with stuck-on food, use kosher salt, a nylon brush, and warm water to gently scrub the surface.
- Season the skillet with low-saturated-fat oils like grapeseed, flaxseed, canola, or vegetable oil, and maintain it by cleaning and oiling after each use.
Do You Have to Clean a Cast Iron After Every Use?
Yes, the cast iron pan should be cleaned after every use to remove any food residue that’s left in the pan. Sometimes a light rinse and a wipe down will be enough. Other times you will need to scrub your cast iron skillet to remove all the food.
Best Way to Clean a Cast Iron Skillet
When you’re cleaning a cast iron skillet or griddle, you can wipe it down with a paper towel once it’s cooled. Then you can rinse and dry your pan or hand wash it to remove any remaining food particles. Immediately dry your cast iron pan to prevent it from rusting.

Can You Soak a Cast Iron Skillet?
No, it’s best not to soak a cast-iron skillet. This will cause the pan to rust. Instead, you should hand wash the pan using a nylon brush or pan scraper to remove the food.

Can You Use Dish Soap on Cast Iron?
Yes, you can clean your cast iron skillet with dish soap. The soap will not remove the seasoning that’s on the pan since the oil has bonded to the surface of the metal.

Can You Use Steel Wool on Cast Iron?
No, do not use steel wool on your cast iron pans unless you are using fine-grade steel wool to remove any rust on them. The steel wool will strip away the seasoning on your pans.

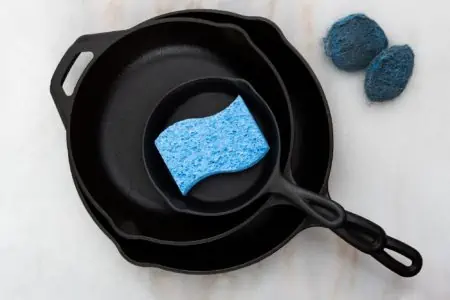
Best Scrub Brush for Cast Iron
The best type of scrub brush for cast iron is one that includes nylon bristles. The nylon bristles are gentle enough that they won’t damage the seasoning on your cast iron pan. However, they will remove any food particles that are stuck on the pan.
Look for a brush like the Full Circle Tenacious C Cast Iron Brush and Scraper. It will remove the burnt-on food particles without removing the seasoning on your pan.
How to Clean a Cast Iron Skillet After Use
A dirty cast iron skillet needs to be hand-washed after cooking rather than placed in the dishwasher. The dishwasher will leave water on the pan for a longer length of time increasing the risk of your cast iron skillet rusting. Here’s how to wash a cast iron skillet properly.
- Time: 5-10 minutes
- Difficulty: Beginner
What You’ll Need
- Gentle or mild dish soap
- Nylon brush
- Dark-colored towels
- Paper towels
- Vegetable oil
1. Rinse the Skillet
Once your cast iron skillet has cooled down, you will need to rinse your pan to remove all of the residual food scraps. Another option is to wipe down your pan with a paper towel to remove the food particles.
Sometimes a pan looks like the food will congeal and be hard to remove if the food cools on your pan. If that’s the case, you can pour a glass of hot water into the pan while the pan cools on the stove to keep the food from congealing.
Warning: do not pour cold water into your pan as it may shock the pan causing it to warp or crack. Also, be careful not to leave the pan with water in it or place the pan into a sink of water as a cast iron pan is not rust-proof and will rust if it’s in contact with water for too long.
2. Scrub Skillet
After you’ve rinsed your cast iron skillet, use dish soap, a nylon brush, and elbow grease to remove all stubborn scraps of food. Do not use scouring pads or steel wool to remove these scraps of food as this will remove the seasoning on your skillets.
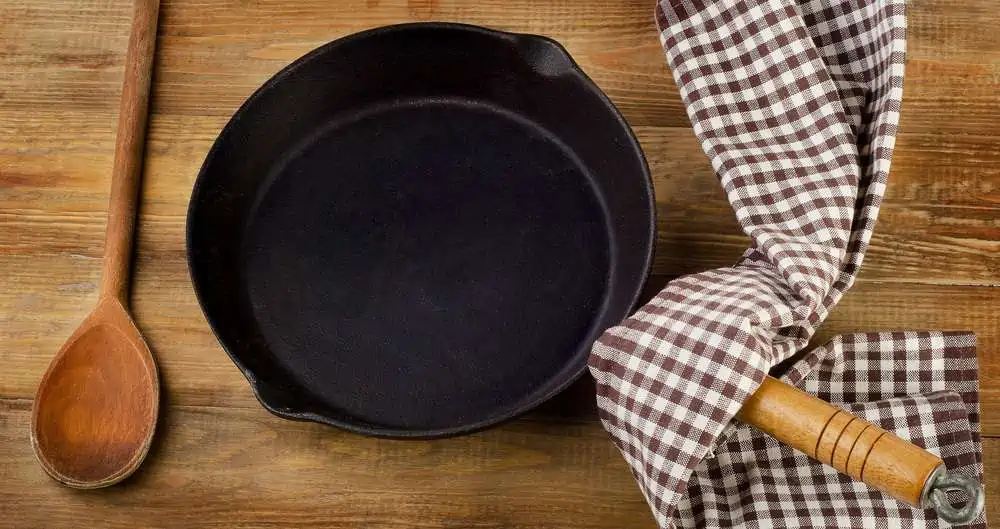
3. Dry Skillet
Once the skillet is washed clean, you will need to dry it properly as soon as possible. Do not leave it on a rack to dry as this will increase the chance of the pan rusting.
Use a dark-colored towel to wipe your pan dry as a light-colored towel may be stained by the cast iron pan. Make sure that no drops of water are left on the pan.
4. Oil Your Pan
Oil your pan by applying a light coat of vegetable oil with a paper towel. Rub your skillet all over the inside and the outside of the pan including the handle. Be careful not to apply too much, as you don’t need the oil pooling on your pan.
Use a clean paper towel to remove any excess oil.
How to Restore a Rusty Cast Iron Skillet
Despite your best care, sometimes a cast iron skillet can become rusty. If this happens to your favorite pan, you can strip the rust from the skillet, season it again, and use your skillet again in the future.
The best way to prevent rust from developing on your cast iron skillet is to minimize its contact with water. Dry your skillet immediately after washing it and never leave it to soak in the sink.
- Time: 1-2 hours
- Difficulty: Beginner
What You’ll Need
- Rust eraser
- Dish soap
- Dark-colored towel
- Vegetable oil
1. Remove the Rust
Gently rub the eraser over the rusty areas until the rust is removed. Don’t push too hard because you could cause your skillet to develop microcracks in it. The microcracks will make your pan more likely to break in the future.
Continue rubbing the rust away until all the rust is gone.
2. Wash the Pan
Wash your pan using soak and hot water.
3. Dry the pan
Dry your pan using a dark-colored towel making sure that all of the water droplets are removed.
4. Reseason the Pan
Reseason your iron skillet by rubbing vegetable oil all over the pan including the outside and handle with a paper towel. Then use a clean paper towel to remove all the excess oil. You don’t want too much oil on your skillet as that will cause your pan to be sticky and greasy.
Bake your pan upside down for 1 hour at 350 degrees.
How to Deep Clean a Skillet With Stuck On Food
Sometimes you have food stuck to your skillet or a black residue that won’t come off. The best way to clean your skillet is with salt, a nylon brush, and some water.
- Time: 15 minutes
- Difficulty: Beginner
What You’ll Need
- Kosher salt
- Nylon brush
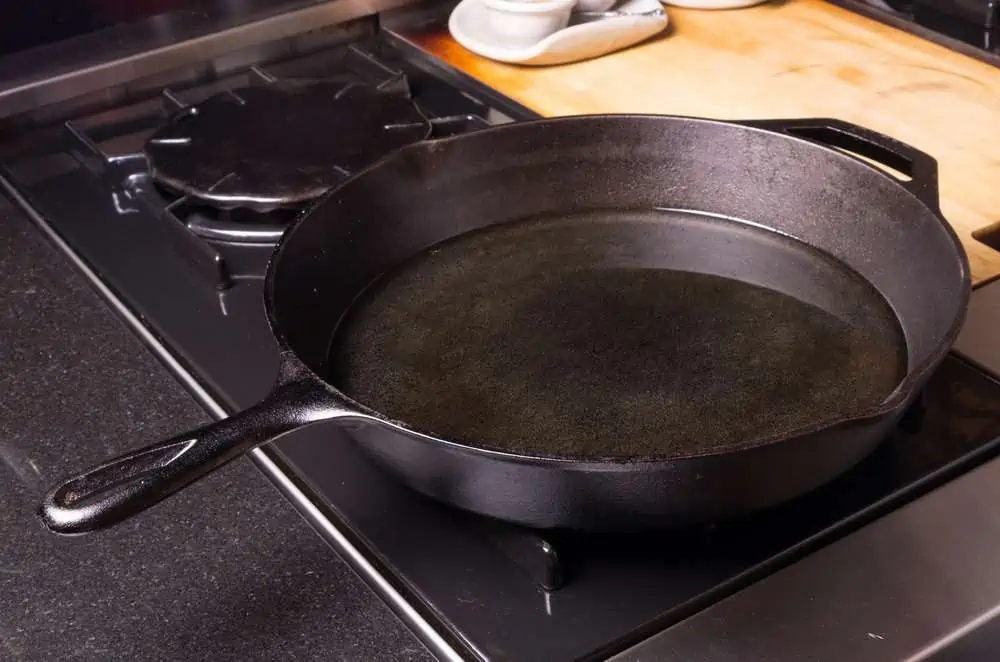
1. Warm the Pan
Your pan will need to be warm, but not hot, to remove the stuck food. If it’s not already on the stove, place it there and warm the pan.
2. Sprinkle Kosher Salt
Sprinkle ¼ cup of kosher salt over your skillet and add a few drops of water.
3. Scrub the Pan
Use your nylon scrub brush to scrub the iron skillet and remove the stuck food from the surface. The salt won’t damage the seasoning of your pan and will dissolve away in the water.
4. Wash and Dry
When the iron skillet is clean, wash, dry, and oil your pan as you normally would.
How to Season a Cast Iron Skillet
It’s important to season your cast iron skillet with oil. The oil settles into the pores of the metal. When it’s heated, the fatty acids in the oil react with the metal forming larger molecules that bond with each other and with the metal.
This forms a tough coating that will protect your cast iron skillet from rusting when it comes into contact with air and water. The coating gets thicker each time you season it which makes the pan smooth, slick, and nonstick.
What is the Best Oil to Season Cast Iron?
The best oil to season a cast iron skillet is an oil that is low in saturated fats such as grapeseed, flaxseed, canola, or vegetable oil.
- Time: 1 ½ hour
- Difficulty: Beginner
What You Need
- Dish soap
- Dark-colored towel
- Vegetable oil
- Paper towel
1. Wash the Skillet
Wash the skillet with dish soap and hot water to remove any food particles or dirt that may be on the pan.
2. Dry the Skillet
Dry the skillet with a dark-colored towel to remove all of the water from your pan.
3. Oil the Skillet
Place a small amount of oil on your skillet and rub it all over your pan. Make sure you cover the outside and the handle with the oil.
Do not use too much oil as it won’t improve the seasoning of your skillet. Instead, you’ll end up with a sticky and greasy pan.
4. Buff the Skillet
Buff the skillet to remove the excess oil. You don’t want your skillet to look oily or greasy when you’ve finished buffing it.
5. Bake the Skillet
You can heat your skillet on the stovetop, but this may create an uneven finish as the pan will not heat evenly on the burner. Instead, put your skillet upside in the oven at 350 degrees for 1 hour. You may wish to put a cookie sheet or aluminum foil underneath the pan to prevent oil from dripping on the bottom of your oven.
6. Repeat to Season a New Skillet
A new pan will need to be oiled and baked 3 or 4 times to season your pan well. Allow your pan to cool slightly before you oil it, then bake it again. Each time you oil and bake your pan, you will end up with a stronger coating on your pan.
How to Maintain a Cast Iron Skillet
A bit of daily maintenance will allow you to keep your cast iron skillet in good shape.
- Clean your cast iron skillet after every use.
- Do not leave water drops on your skillet when you put it away.
- If you’re stacking your skillet with other pans, place a paper towel between each pan when you stack them
- Don’t store food in your cast iron skillet.
- Season your skillet 2-3 times a year.
- Remove any rust spots immediately.
- Avoid using abrasive scrubbers as they will scrape away your seasoning.
When to Replace Your Cast Iron Skillet
You will need to replace your cast iron skillet when the base becomes wobbly and the skillet will not sit firmly on the stove. It will also need to be thrown out if it develops a chip, hole, or crack as well.
FAQs

How Do You Get Sticky Grease Off Cast Iron?
Too much oil on your cast iron pan may make it sticky and greasy to the touch. Wash your pan with soap and hot water to remove the sticky grease. Then season your pan again making sure that you only use a small amount of oil.

How Do I Know If My Cast Iron is Seasoned?
A cast iron pan that is seasoned will not have any rust or dull patches on it. Instead, it will have a dark, semi-glossy finish without being sticky or greasy.

Can I Season My Cast Iron Pan In the Oven?
Yes, you can season your cast iron pan in the oven. Place a sheet of aluminum on the bottom of your oven or put a cookie sheet under where you’ll be putting your pan. Then cover your pan with a light sheen of oil. Bake it upside down in the oven at 350 degrees for one hour before allowing it to cool.

What Should You Not Clean a Cast Iron Skillet With?
You should not clean a cast-iron skillet with steel wool. It will scratch the surface and remove any seasoning. You should also not soak it in water because that causes it to rust.

Why Do Eggs Stick to My Cast Iron Pan?
The most common reason why your eggs stick to your cast-iron pan is because eggs form proteins that stick to metal as they cook.

Do You Have to Oil a Cast Iron Skillet After Each Use?
You do have to oil a cast-iron skillet after each use to keep it from rusting and to protect the surface and seasoning.