Air fryers took the market by storm a few years ago. People love them because they provide a healthier way of cooking, they’re versatile and quick to use. But are they easy to clean?
The good news is, yes, they’re easy to clean! The news that might make your heart sink a little is that you should be cleaning your air fryer quickly after each use.
Not something you’ve made a habit of? Don’t worry. We’ll show you how to clean an air fryer after each frying session. We’ll also show you how to deep clean an air fryer if you haven’t kept up to date with your daily cleaning sessions.
Key Takeaways
- Clean air fryer after each use for hygiene and preventing food rot.
- Deep clean monthly to remove grease and grime build-up.
- Use a baking soda paste for stubborn stains and grease.
- Avoid using metal utensils or abrasive cleaners to protect the non-stick coating.
How Often Should You Clean an Air Fryer?
You should do a general clean of your air fryer after every use. After all, it’s been in contact with food. If you don’t clean it out, the food will start to rot, leading to some pretty nasty issues.
As for deep cleaning, you should carry this out when the air fryer is noticeably dirty or not working as well as it used to. If your food takes longer to cook, isn’t as crispy or evenly cooked, it’s time to perform a deep clean.
Another sign that your air fryer needs a clean is if the heating coils and fan are greasy and grimy.
The Bottom Line
Clean your air fryer after each use. Deep clean it when it’s noticeably dirty. To make a good habit and prevent further issues, deep clean the air fryer every month.
How to Clean an Air Fryer After Each Use
Thankfully, frequent cleaning won’t take too long. This routine method is ideal after each use. Of course, enjoy your food first. Then come back to clean!
- Time: 10 minutes
- Difficulty: Easy
What You’ll Need
- Jam jar or tin
- Dish soap
- Sink or basin
- Cloth or sponge
1. Let the Air Fryer Cool
Don’t clean an air fryer right away. It will be too hot, and you could get burned. Wait for it to cool down a little.
Top Tip
If you have cooked something with a sticky sauce — such as honey — you might want to clean the air fryer while it’s warm. It will be easier to clean. Just leave it to cool down for around 10 minutes, so it’s not super hot.
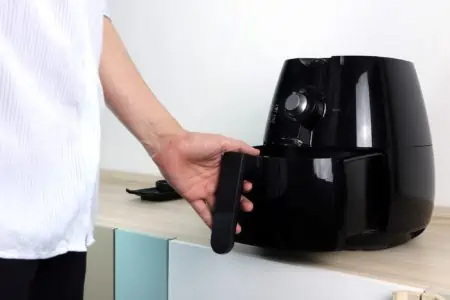
2. Clean Removables
With an air fryer, the basket and drawer are removable. First, empty the crumbs and debris into the garbage can.
Pour excess fat into a jam jar. Close the lid and store it in a cupboard. When the jar is full, and the grease is hardened, you can toss it in the trash can.
Then wash these components as you normally wash dishes in a sink with some warm soapy water. Use a cloth or sponge to scrub them clean.
Some removable components are dishwasher safe if you’d rather clean them that way.
3. Don’t Forget Nooks and Crannies
While washing the basket and drawer, you might notice food stuck in the grates. Use a toothpick or wooden skewer to work these out.
4. Wipe Air Fryer Unit
Dampen a cloth with soap and water. Wipe down the interior and exterior of the air fryer before putting the basket and drawer back in place.
Now is a good time to check the heating element for dirt and grease. Wiping it clean after each use prevents grease build-up.
Use a separate dry cloth to dry down the unit.
Return the drawer and basket to the unit when all the parts are dry.
How to Deep Clean an Air Fryer
If it’s been a while since you cleaned your air fryer, it might be time for a more thorough scrub down. When grease and grime are baked on, you need to whip out the big guns.
We recommend doing this once a month anyway to stay on top of your cleaning regime.
Note that while these methods work for various brands of air fryers — Power XL, Instant, Ninja, Cosori, and more — you should always read the user manual first.
- Time: 30 minutes
- Difficulty: Intermediate
What You’ll Need
- Jam jar or tin
- Dish soap
- Sink or basin
- Cloth or sponge
- Soft-bristled cleaning brush or textured sponge
- Baking soda
- Small cleaning brush or toothbrush
1. Cool Down and Unplug
Before getting started, turn the air fryer off, unplug it and let it cool down completely.
2. Clean Removables
Following step two from above, clean the removables.
To recap, empty the crumbs and debris into a garbage can. Pour excess fat into a jam jar. You can dispose of it when the fat has hardened.
Wash the removable components with warm soapy water or in the dishwasher. Use a cloth or sponge to remove sticky debris. Use a toothpick or wooden screwer to poke out debris stuck in the grates.
3. Deep Clean Interior
This is the part that will help to clean your air fryer thoroughly. Now’s your chance to remove build-up, grease, grime, and other nasties that you would perhaps ignore during your daily clean.
First, make a paste with three tablespoons of baking soda and one tablespoon of water. Apply it to any burnt areas, baked-on grease, and other stains using a small cleaning brush or toothbrush. Gently scrub to remove the stains. Rinse away with a damp cloth.
Next, turn the air fryer upside down so that you can get a good look at the heating element. It might be subject to grease and grime build-up, too. Use a larger scrubbing brush or textured sponge to clean this element and remove dirt, grease, and fat.
You might want to dispose of the sponge or brush after, as it could be covered in fat. Alternatively, you can keep it specifically for this cleaning task.
Warning
Never use metal utensils when cleaning your air fryer. This can damage and scratch the non-stick coating.
4. Rinse and Dry
Dampen a cloth in warm soapy water and give the interior and exterior of the unit one more wash. Dry it well with a separate cloth. Return the basket and tray to the unit once the unit is dry.
What to Avoid When Cleaning
There are some things you should never do when you’re following the best way to clean an air fryer.
- Wait: Many people say don’t wait before cleaning your air fryer. However, we recommend letting the air fryer cool down at least a little because you don’t want to burn yourself.
- No metal: Don’t use metal utensils or steel wool to clean your air fryer. While it might be effective at removing burnt-on bits, it’s going to damage your non-stick coating.
- No abrasives: The only slightly abrasive things you should use to clean your air fryer are baking soda or a textured sponge. Don’t use salt or scrubby sponges. The coarse texture can scratch the nonstick coating.
- Don’t submerge the unit: This might seem obvious, but we thought we’d explicitly say it. Don’t submerge the main unit in water. It’s electrical, so you will damage it or even injure yourself.
- Read the user manual: Some air fryers have dishwasher-safe pieces, but others don’t. So always read the user manual to check the specific instructions for how to clean your air fryer basket.
Tips For Keeping an Air Fryer Clean
While the deep-cleaning method doesn’t take too long, it’s better to prevent nasty grease and grime build-up in the first place.
We have some great hacks for keeping your air fryer clean over time. This gives you less to do when it comes to your monthly deep clean.
Less frustration equals more love for this awesome kitchen tool.
- Line with paper: This life-changing hack makes it easier to clean your air fryer after each use. Parchment paper catches mess and stops food from sticking to the basket. Cut a sheet of parchment paper to the size of your air fryer basket, fold it, punch holes in it, then lay it down. This is your DIY liner.
- Clean after every use: The 10-minute cleaning method is terrific at keeping your air fryer hygienic between uses. It will prevent sticky grease and grime build-up, saving you time later.
- Make the dishwasher the last resort: While some manufacturers allow for dishwasher use, it should be your last resort. Air fryers have a nonstick finish, and too many cycles through the dishwasher can cause this to wear down faster. Wash the air fryer basket and tray by hand whenever you’re able.
- Soak to remove baked-on bits: Sometimes, a simple washing method doesn’t remove stubborn food debris. Soak the basket in soapy water for 10 minutes to loosen debris. Then scrub it off with a soft sponge or cloth before rinsing and drying.
- Tackle smells: If you have sickening smells coming from your air fryer, wipe down the basket and interior with fresh lemon juice. Let it sit for 30 minutes before rinsing.
- Spritz with olive oil: We know the point of an air fryer is to reduce fats and oils. But if you spritz a little olive oil into the basket, it can prevent food from sticking. This makes cleaning up easier!
DIY Air Fryer Cleaning Spray
While soapy water or baking soda does the trick when cleaning an air fryer, you can also make a DIY spray with vinegar. This homemade recipe is great at degreasing your air fryer, inside, outside, and for the basket.
Mix the following in a spray bottle:
- One cup of distilled white vinegar
- Two tablespoons of baking soda
- ¼ cup of Castile soap
- One cup of water
- Lemon essential oil (optional)
This eco-friendly and non-toxic cleaner is great at deep-cleaning your air fryer as well as your countertops, stove-tops, and other areas of the home.
FAQs

Can I Put Water In My Air Fryer to Clean It?
There’s a viral hack about cleaning your air fryer with soapy water.
In this hack, users fill the basket up with warm water and a few squirts of dish soap. They set the air fryer to 370 degrees for three minutes. When they remove the basket, the water is dirty, the grease and grime are loosened, and the interior is easier to wipe clean.
We recommend checking with your user manual before doing this trick. Also, be aware that the soap residue can cling to your air fryer, which will make your next meal taste weird.

Can You Put an Air Fryer Basket in the Dishwasher?
If the user manual allows, you can wash the basket in the dishwasher. This is great for quick and easy cleaning. However, doing this too often can wear down the nonstick coating on the basket.

Can You Use Oven Cleaner to Clean an Air Fryer?
Never use oven cleaner in your air fryer. Firstly, it can damage the air fryer. But worst of all, it’ll leave fumes in the unit which is unhealthy for you and your family.

How Do You Remove Cooked on Grease?
Washing the air fryer basket with soap and water, and scrubbing well with a cloth or sponge, is usually enough to remove grease.
You can also try using your degreaser spray to remove grease.
Our final hack is to make a baking soda paste, as suggested above. However, leave the baking soda on the greasy area for 30 minutes to help loosen the grease.
Air Fryer Revival
Now that you know how to wash an air fryer and clean the basket, you can bring some life back to this beloved kitchen unit.
Some air fryers do have a self-cleaning mechanism, but our methods might be more thorough!
The daily cleaning hack is super important and only takes 10 minutes. If you do this after each use, you can avoid rotten food, grease build-up, and other nastiness.
We recommend deep cleaning the air fryer monthly to stay on top of grease and grime build-up.
With these easy cleaning hacks, your food will taste so much better.