After a delicious meal, doing the dishes is a very boring thought. But with the right methods, it’s easy and not too time-consuming.
We’ll share tips on how to wash dishes by hand and in the dishwasher. By the next time you wash your dishes, you’ll be armed with new facts, methods and tips!
Key Takeaways
- Scrape and rinse dishes before washing, and avoid pouring grease down the drain.
- Wash dishes by hand in hot soapy water, starting with smaller items and working up to larger, dirtier ones.
- For dishwashers, properly load the machine and use the right detergent and rinse aid.
- Don’t overcrowd the dishwasher and be aware of items that should be hand-washed instead.
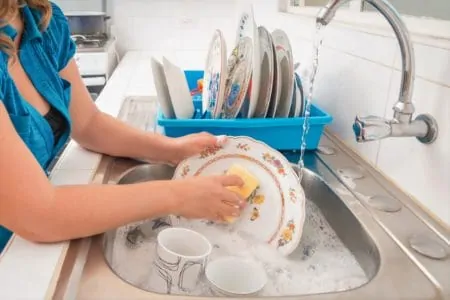
How to Wash Dishes by Hand
Don’t have a dishwasher? Or perhaps you have some fancy cookware and tableware? Then washing dishes by hand is the way forward.
Before you start, we recommend putting on some good music or a podcast to keep you occupied.
What You Need
- Warm water.
- Dish soap.
- Dish cloth, brush or sponge.
- Scouring brush (optional).
- Rubber gloves.
- Drying rack.
- Dish cloth.
Something To Note
Step by Step Instructions
1. Scrape and Rinse
Before you get to washing the dishes, make sure that you scrape all the food into the compost or garbage. If you have a garbage disposal, you can use that, too.
Next, rinse the dishes. This makes it easier to deep clean when it comes to it. Get rid of sauce, crumbs, and other bits of food or drink.
Caution
2. Fill
Fill your sink or basin with hot water and dish soap, until about three-quarters full.
3. Wash Small Items
We recommend starting with the smaller, less dirty items first, such as cutlery. This ensures your water doesn’t get as dirty quickly. That way, you don’t need to change the water as often.
Put all the cutlery into the sink and let it soak for about a minute. Then, one item at a time, wearing your rubber gloves, take your sponge and scrub off dirt, food and residue.
Rinse the item under the tap for a quick second. If you have a second tub or basin, fill that with lukewarm water and dip the item in there to rinse before moving onto the next step.
Put the item on the drying rack, and repeat the steps for each item.
Move onto cups, then bowls, and then plates.
Top Tip
4. Wash Bigger Items
Now it’s time to wash the bigger, dirtier items, like pots, pans, mixing bowls and utensils. If your water is quite dirty, dump it out and refill the sink, adding more dish soap, until about three-quarters full.
For fancy non-stick pans, check the manufacturer instructions. These may require smaller amounts of dish soap and a non-scouring brush.
Let the items soak in the water for about 10 minutes. Then scrub the dishes clean with your sponge, cloth or dish scrubber. Get into all nooks and crannies, in between spatula gaps, along with pot handles, and the bottom of pans, too.
Rinse items under the tap or in a second sink.
Put the items on the drying rack as you go. For pots and pans, and wooden utensils, dry immediately with a dish towel.
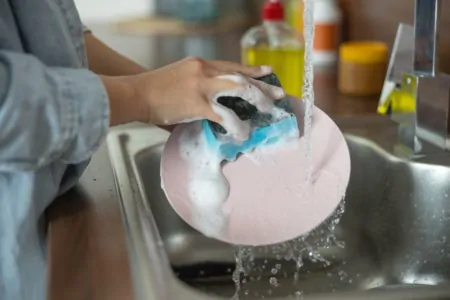
5. Wash Delicate Items
Drain the water away. Run the hot tap, but keep the sink plug open so it doesn’t fill with water. Add a bit of dish soap to your sponge or cloth and get it damp so that it suds up. Now, it’s time to wash delicate items such as knives, fancy glasses and antiques.
Rinse the item first. Then scrub the item with your soapy cloth or sponge. You may need to use more elbow grease on stubborn or sticky spots. Rinse the suds away, then place the item on the drying rack. Repeat for each item.
No Wet Knives
6. Dry Dishes
You can air-dry your dishes which is easier and more hygienic (1). This doesn’t take too long, so check back in about an hour to put the dishes away.
However, if you’re running out of space on the drying rack or want your kitchen to appear tidier, you can hand dry the dishes. Use a clean, dry dish towel and wipe the dishes dry. Change the towel as it becomes damp. Let it air dry before putting it in the laundry hamper to prevent mold growth.
Dry pots and pans immediately to prolong the lifespan of these items.
7. Clean Up
Now that the dishes are clean, clean the sink. Remove food bits, then rinse the sink. Wash with a commercial cleaner and sponge, or just use some dish soap!
Leave your sponge, cloth or other dish tools out to air dry. You should replace these every couple of weeks.
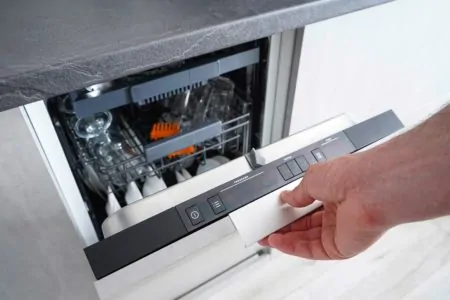
How to Wash Dishes in the Dishwasher
A dishwasher can save you lots of time and it may be more energy-efficient than hand washing dishes (2). Plus, it prevents that after-dinner argument of “Who’s doing the dishes?”!
What You Need
- Dishwasher.
- Dishwasher detergent or tablet.
- Rinse aid (optional).
Step by Step Instructions
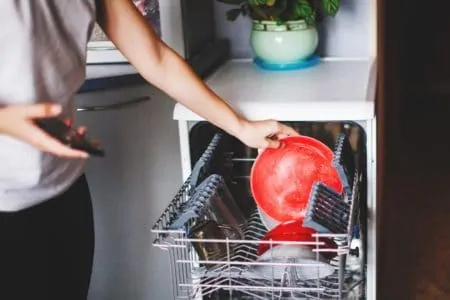
1. Scrape and Rinse
Before loading the dishwasher, make sure there aren’t big chunks of food on the dishes.
You may want to rinse the dishes, but that’s not always necessary. If you’re going to be turning on the dishwasher that day, that doesn’t give the dirt time to cling stubbornly to the dishes. The dishwasher can handle this.
However, if you only use your dishwasher a couple times a week, definitely rinse the dishes before putting them in the dishwasher. Otherwise, the food can cling to the dishes and the dishwasher might not be able to clean it all off. Plus, it can smell bad.
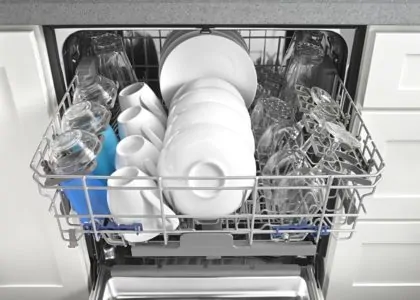
2. Load the Dishwasher
It’s important to load your dishwasher properly so your dishes get super clean but stay protected.
Put larger items like cutting boards on the bottom edges of the dishwasher. This prevents them from hitting the water arm, making sure all the dishes get clean.
Put bowls on the top rack, upside down, at a slight angle. This saves space and allows the water to run off the bowls rather than sit inside.
Stack your plates on the bottom rack. We recommend switching between large and small plates as this provides better water flow.
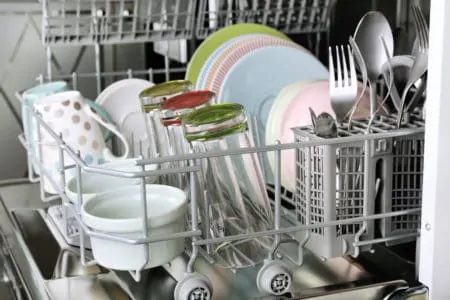
Add your cutlery to the cutlery holder. The more space between the cutlery the better. Alternate between facing forks and spoons face up or face down to help with water flow. Knives should always be face down to prevent damage to other items.
If your pots and pans are dishwasher safe, place them face down on the bottom tier.
For wine glasses, they can go on the safety rack if your dishwasher has that. Otherwise, they should be handwashed.
Place your mugs and glasses face down between the tines. This keeps them in place so that nothing breaks during the cycle. Cooking utensils can go between the tines as well, horizontal and facing down.
For other things, you can just fit them in where possible. Keep in mind that the bottom rack gets hotter than the top. So for plastic Tupperware, that could possibly melt or warp, we recommend putting that at the top.
What To Avoid
3. Add Detergent
Use the right detergent for your machine. Your manufacturer will most likely recommend a brand. However, you can try out a few different detergents to find which works best for you.
Add the recommended amount to the detergent slot and close it over.
4. Add Rinse Aid (Optional)
If your machine has a rinse aid dispenser, add your rinse aid. This helps to prevent spotting and film residue. It also can remove cling-ons so they don’t get stuck during the drying cycle. You can also add white vinegar to this dispenser, which is helpful if you have hard water.
5. Check the Garbage Disposal
Turn your garbage disposal on before using the dishwasher. This ensures that the drain is clean and clear so that nothing gets transferred into your dishwasher.
6. Turn on the Machine
Use the desired setting for washing your dishes. Normally, you can use the eco or daily setting, but if you have dirtier dishes, adjust accordingly.
We recommend turning on your machine at night and emptying it in the morning. This helps you get into a good routine and keeps the machine empty during the day. So you can just stack it during the day as you go!
7. Run and Empty
After the cycle, check everything is clean and empty the dishwasher. If there is any food stuck in the filter or at the drain surface, empty that out before running the next cycle.
More Tips for Washing Dishes
Before you go, keep in mind some of our top tips for washing dishes. These tips can help you get the most out of your dishwashing routine.
- Remove food as quickly as possible: The longer you wait, the stickier the food will be. This is especially true for things such as rice, pasta, porridge and eggs.
- It’s not necessary to pre-rinse your dishes before putting them in the dishwasher: But if you only run your dishwasher a few times a week, you should. Otherwise, the residue can cling on and it won’t come off during the washing cycle.
- Always check the construction of your pots and pans: Some, such as cast iron, can’t be washed with soap. Read the manufacturer’s advice to prolong the lifespan of your dishes.
- How do you clean a blender? You may be able to put the main blender part in the dishwasher. But a quick tip is to fill the blender with warm water and a drop of dish soap and start blending! This gets into all the nooks and crannies, and speeds up your washing time.
- Never put these things in the dishwasher: good knives, insulated mugs and cups, anything silver or gold, crystal glasses, disposable aluminum or plastic containers, cast iron and non-stick cookware, and wooden utensils.
- Don’t stack dishes in the sink throughout the day: This is intimidating, but it also means you can’t use your sink as easily during the day. Either stack the dishes in the dishwasher as you go, or have a basin for dirty dishes.
- Wear rubber gloves: This can protect your skin from the ingredients in dish soap, but it also allows you to use hotter water which can speed up your washing time.
- Put toys in the dishwasher: Yep, toys! If your kids’ toys need a good clean, you can put them in the dishwasher. Just make sure there’s no risk of them melting, and keep them on the top rack to prevent them from getting too hot.
- Do dishes while you’re cooking: Doing your dishes all at once can save water. However, doing dishes as you go, while you’re cooking, can make the job more bearable. While your onions are frying, wash the knife and chopping board. Multi-tasking is the way forward!
- Opt for dish brushes instead of dish sponges: While sponges are very popular, they take longer to dry so can harbour more bacteria than dish brushes. Dish brushes use synthetic bristles and dry very quickly, making them more hygienic.
Washing Dishes FAQs

Can Microfiber Cloths Be Used to Wash Dishes?
Yes! We love using microfiber cloths to wash dishes. They’re gentle, absorbent and get the job done. Plus, they can be washed and reused many times.

Does Dishwashing Liquid Kill Bacteria?
Most dishwashing liquid doesn’t kill bacteria, but instead lifts it off the dishes so it can be rinsed away with water (3). You can buy antibacterial dish soap which will kill bacteria. However, washing it away is effective enough.

What Temperature Is Best to Wash Dishes?
As long as it’s hot, it’s good. Because the soap is what’s going to be removing germs and dirt, you don’t need the hot water to sterilize the dishes. That may be too hot for your hands anyway. The water just needs to be warm enough to be able to loosen and remove grease, grime and other sticky situations.

Should Dishes Be Rinsed After Washing?
Yes, rinsing the dishes removes the suds. This can remove bits of bacteria that the soap has clung to as well as any remaining food. Rinsing also ensures that there’s no filmy residue on the dishes.

What Can You Use to Wash Dishes When You Run Out of Dish Soap?
Ran out of dish soap but need to tackle some dishes? Here are some things you can use instead:
- Lemon: Fill the sink with warm water and add two tablespoons of lemon juice. Soak the dishes in the solution for 30 minutes before washing as normal.
- Salt: Add two tablespoons of salt to every cup of water. Mix to combine and wash dishes as normal. Salt is abrasive, so it can remove burnt or stubborn bits on dishes.
- Baking soda: Rinse your dishes and then sprinkle some baking soda over them while they’re wet. Using a soft cloth to gently scrub the dishes. Baking soda is abrasive, so it will help to remove food, dirt, and other residue.
- Vinegar: Combine two tablespoons of distilled white vinegar for every cup of warm water. Soak the dishes for a few minutes before washing as normal.

Should You Wash Dishes Under Running Water?
When it comes to washing your dishes under running water, there is no evidence that it is better. It helps remove larger food debris but can be wasteful because it uses a lot of water.
Do the Dishes
With these tips, doing the dishes isn’t as overwhelming. Now you know the best methods for hand washing and using the dishwasher, you’re better equipped.
Although, if we’re honest, the best way to do the dishes is still to ask somebody else to do it! This is no one’s favorite household chore.
Otherwise, invest in a dishwasher. It may save you money over time, but it will definitely speed up the cleaning process in the evenings!