Is your coffee starting to taste bitter while your machine is taking longer and longer to brew? Then it’s time to clean your machine!
Don’t worry, cleaning your Ninja coffee maker isn’t difficult, and when it’s done you’ll be able to enjoy a delicious cup of coffee.
Key Takeaways
- Clean your Ninja Coffee Maker regularly to avoid bitter taste and maintain efficiency.
- Use white vinegar or descaling solution to clean the coffee maker and remove mineral deposits.
- Run the cleaning cycle by pressing the CLEAN button, then rinse and flush the machine 2-3 times with fresh water.
- Keep your machine clean by washing removable parts after each use and deep cleaning every 1-2 months.
How to Know When It’s Time To Clean?
There are a few ways to know when it’s time to clean your Ninja Coffee Bar. The first method, which is also the easiest, is when the indicator light turns on. This is a sure sign that your coffee maker needs to be cleaned.
A second method is when your coffee begins to taste bitter from the mineral deposits and mold lurking in the depths of your machine.
Coffee makers often also start struggling to make coffee when they need to be cleaned. If you discover that your Ninja coffee maker is taking longer than usual to make a cup of coffee or it isn’t making a full pot of coffee when you brew a pot, then it’s time to clean your coffee maker.
Another method is by time, every month or two you should give your coffee maker a deep cleaning to keep it running efficiently.
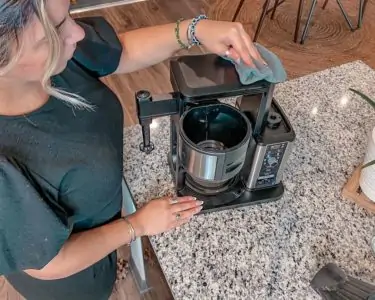
How to Clean a Ninja Coffee Bar
Coffee makers gradually build up mineral deposits from the water used to make coffee. Also, mold and bacteria grow in the recesses of the machine. You’ll need to clean your ninja coffee bar every couple of months to decalcify your machine, remove the mold and bacteria, and keep your coffee delicious.
- Time: 1 – 1 ½ hours
- Difficulty: Beginner
What You’ll Need
- White vinegar or descaling solution
- Dish soap
- Water
1. Discard any water/coffee grounds from Ninja Coffee Bar
The first step is to empty any water left in the reservoir and discard any coffee grounds in the basket. Also, ensure that the coffee filter’s basket is clean before you put it back in your machine.
2. Add Descaling Solution
Now add a descaling solution or vinegar to your machine. If you’re using a descaling solution, follow the instructions printed on the bottle.
If you’re using white vinegar, pour the vinegar into the reservoir until it reaches the 16 oz traveling mug line. Then add fresh water until the reservoir is full. Make sure that the carafe is on the hot plate to catch any solution being discharged from your machine.
3. Start the Cleaning Cycle
To start the cleaning cycle of the Ninja Coffee Bar, press the CLEAN button. This will start the machine’s cleaning cycle. It will brew a small amount of the cleaning solution before stopping as the solution needs time to work on the mineral scale that has built up in your machine.
The timer will continue to count down during this time. Leave the carafe on the hot plate to catch any liquid that will be dripped out of the machine. After 60 minutes, the coffee maker will finish the cycle by working the remaining cleaning solution through the Ninja Coffee Bar.
When it’s finished cleaning, your machine will beep and a FLUSH may be displayed.
4. Rinse or Flush Your Ninja Coffee Bar
Once your machine is clean, you will need to rinse or flush your coffee maker with fresh water.
To do this, empty the carafe. Now rinse the carafe and reservoir thoroughly with fresh water.
Fill the reservoir to the max.
Some Ninja Coffee Bars have a Flush Cycle. If so, then FLUSH will appear on your clock’s display. You will need to make sure that you flush your machine within 15 minutes of the clean cycle ending.
Otherwise, you will need to rerun the cleaning cycle.
To rinse or flush the machine, press the CLEAN button again. An 8-minute countdown timer will appear and the machine will flush itself using the clean water in the reservoir. Repeat the flush cycle a second time to ensure all the vinegar has been removed from your machine.
Otherwise, select the full carafe classic brew to start your machine brewing the water. Run fresh water through your machine 2-3 times to remove the vinegar taste.
5. Wash Reservoir and Coffee Filter
Wash the reservoir, carafe, and coffee filter in warm soapy water. Leave them to dry on the counter as it’s best not to use a cloth to dry them. The cloth may leave lint on the parts.
When they’re dry, replace them in your machine. You’re now ready to brew yourself a fresh cup of coffee.
Pro Tips To Keep Your Coffee Maker Clean
In addition to giving your Ninja Coffee Bar a deep clean every 1-2 months, there are a few hacks you can use to keep it clean and your coffee tasting amazing.
Clean Milk Frother
Clean your milk frother after every use by filling a cup halfway with warm water. You’ll hold this cup up over the milk frother so the frother is below the surface of the water. Turn it on for 20-30 seconds.
Deep Clean Milk Frother
You will also need to deep clean your milk frother periodically. Do this by unlocking the frother, sliding it off of your coffee maker, and washing it in the sink with soap and water.
Clean the Carafe
Sometimes the carafe becomes dingy with burnt coffee. If this is happening to your carafe, fill it with ice and sprinkle salt over the ice. Sprinkle some lemon juice over the ice as well.
Now leave the carafe and let it sit overnight. In the morning, clean the carafe with warm water and dish soap.
Use Lemon Juice Instead of Vinegar
If you don’t care for the smell of vinegar when you clean your coffee maker, try using lemon juice instead. You’ll follow the same instructions as before, simply replacing the vinegar with lemon juice. You can use bottled lemon juice or fresh lemon juice, both will work.
It will smell more pleasant as it cleans your machine. Also, lemon juice doesn’t leave a foul taste in the machine so you’ll only need 1-2 rinses to clean your coffee maker.
Wash After Every Use
Wash the removable parts in soapy water after every use. This includes the carafe, frothing whisk, brew-through lid, coffee, scoop, and water reservoir. Wipe down the rest of the machine with a damp cloth to remove all of the coffee oils.
This will help to keep your coffee from developing a bitter taste from the coffee oils building up in your machine.
FAQs

Is The Ninja Coffee Bar Dishwasher-Safe?
Parts of the Ninja Coffee Bar are dishwasher safe. Check your user manual of your particular Ninja Coffee Bar before tossing the parts into the dishwasher. Usually, the glass carafe, frothing whisk, brew-through lid, water reservoir, and coffee scoop are able to be washed in the dishwasher on the top rack.
Can You Make Ninja Coffee Bar Cleaning Solutions At Home?
Yes, you can use white vinegar instead of a cleaning solution to clean your Ninja Coffee Bar at home. Simply fill it to the 16 oz traveling mug line then add water until it reaches the maximum the reservoir can hold. Now clean your machine.

How Do You Use The Clean Cycle On A Ninja Coffee Maker?
You will add 16oz of vinegar to your reservoir before filling the reservoir the rest of the way with water. Then push the button to start the clean cycle. The timer will count down until the clean cycle has finished. Rinse your machine 2-3 times to remove the taste of the vinegar.

Why Does My Ninja Coffee Maker Keep Saying It Needs To Be Cleaned?
Sometimes vinegar doesn’t remove all the mineral scale in the machine after the first clean. This is why it keeps saying that it needs to be cleaned. In this case, you will need to clean your coffee maker for a second time. If this still doesn’t work, try cleaning with a descaling solution to remove all the mineral deposits inside your machine.
What Can I Use Instead Of Descaling Solution?
You can use white vinegar instead of a descaling solution in your NInja Coffee Maker.

Why Won’t The Clean Light Turn Off On My Ninja Coffee Maker
Most of the time the clean light won’t turn off because the machine hasn’t been cleaned regularly. You may need to clean your machine a couple of times using vinegar or descaling solution before the light will turn off because of the build-up in your machine.

How Do I Reset My Ninja Coffee Maker After Cleaning?
To reset your Ninja Coffee Maker to its original condition after you’ve cleaned it you will need to unplug it. Now, wait 5-10 minutes before plugging it back in. Be sure to reset the clock.
In Conclusion
Pour white vinegar into your reservoir until it reaches the traveling cup line. Then fill the reservoir to the max line with water. Push the CLEAN button and wait. When it’s finished, rinse and flush your coffee maker with fresh water 2-3 times to remove the vinegar from your machine.