Nothing is worse than starting your Keurig coffee maker only to discover that it made you half a cup of bitter-tasting coffee because your machine is covered with coffee oil residue and clogged with mineral scaling. The solution is to clean and descale your coffee maker.
Don’t worry, it’s a simple task. So read on to learn how to clean a Keurig coffee maker.
Key Takeaways
- Clean your Keurig coffee maker by washing removable components, cleaning the exterior, and unclogging the K-cup holder and entrance needle.
- Use a 50-50 solution of vinegar and water to clean the coffee maker and remove any bad taste or moldy smell.
- Descale your Keurig coffee maker every 3-6 months to remove mineral buildup caused by water.
- Replace the water filter cartridge every two months and follow regular cleaning tips to keep your machine functioning well and brewing great-tasting coffee.
Cleaning Vs Descaling: What’s The Difference
There’s a difference between cleaning a coffee maker and descaling a coffee maker. Cleaning it cleans the brewing chamber. The goal is to remove the coffee oil residue that accumulates over time.
Descaling removes the mineral build-up that occurs as water is run through the machine. Most water supplies have some minerals in the water. Hard water has quite a bit, so if you live in an area with hard water, the build-up is more likely to occur faster. You will need to descale your machine periodically to remove the mineral buildup.
How to Clean a Keurig Coffee Maker With Vinegar
After a time, you may find that your Keurig coffee maker takes longer to brew coffee. Perhaps it has a bad taste or a moldy smell. This means that your machine needs a proper clean. To do this you need to know how to use vinegar to clean your coffee maker.
What You’ll Need
- Vinegar
- Dish soap
- All-purpose cleaner
- Small toothbrush
- Bowl
- Measuring cups
- Mug
- Clean cloth or paper towel
- Straightened paper clip
1. Empty Water from the Reservoir and Remove the Water Filter
The first step is to unplug your machine and empty any water remaining in the reservoir. Also, remove the water filter from your reservoir at this time.
2. Wash Removable Components
Now disassemble the removable components of your Keurig coffee maker. This is probably the lid, tray, reservoir, milk steamer, and k-cup holder. Check your model’s manual to double-check which parts are removable on your machine.
Now wash these components in soapy water, rinse them, and leave them on the counter to dry. Let the parts air dry rather than drying them with a cloth, because the cloth may leave lint behind which could end up in your coffee.
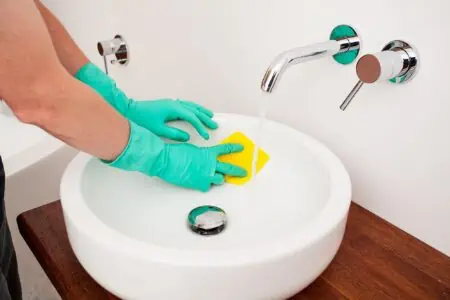
3. Clean Outside Machine
Spray a paper towel or clean cloth with an all-purpose cleaner and use this to wipe down the outside of your machine. If there are any signs of mineral scaling, use a soft toothbrush dipped in vinegar to scrub at any spots. Then wipe the area clean with your paper towel or cloth.
4. Unclog K-Cup Holder and Entrance Needle
Use a straightened paper clip to unclog the K-cup holder by sticking it gently up the tube and carefully wiggling it. Be alert. This is where the pod-piercing exit needle is.
You will also use the paperclip to unclog the entrance needle. Again, be careful. The entrance needle is sharp.
So carefully poke the paper clip into the 2 holes next to the entrance needle to dig out the gunk.
5. Soak Reusable Filter
Pour 1 cup of vinegar into a bowl. Soak the reusable filter in it for several minutes. Then use the soft toothbrush to gently loosen any coffee granules stuck on the fine mesh until the mesh is as clean as you can get it.
6. Reassemble Your Keurig Coffee Maker
Put your coffee maker back together again so it’s ready to brew a cup of coffee. However, you won’t be brewing coffee yet.
7. Put Cleaning Solution into the Reservoir
You will now pour 3 cups of white vinegar and 3 cups of water into the reservoir. Place a mug on the drip tray to catch the hot vinegar water when the Keurig starts to drip the solution in the next step.
8. Brew the Vinegar
Plug your machine in but do not replace the filter yet. Brew mug after mug of vinegar water until the reservoir is empty. Dump out the mug of hot vinegar water after each brewing.
9. Rinse Your Coffee Maker
Rinse your coffee maker by filling the reservoir with fresh water and brewing cup after cup of hot water. You may need to refill the reservoir 2 or 3 times to ensure that the vinegar taste is removed from the machine.
10. Replace the Filter
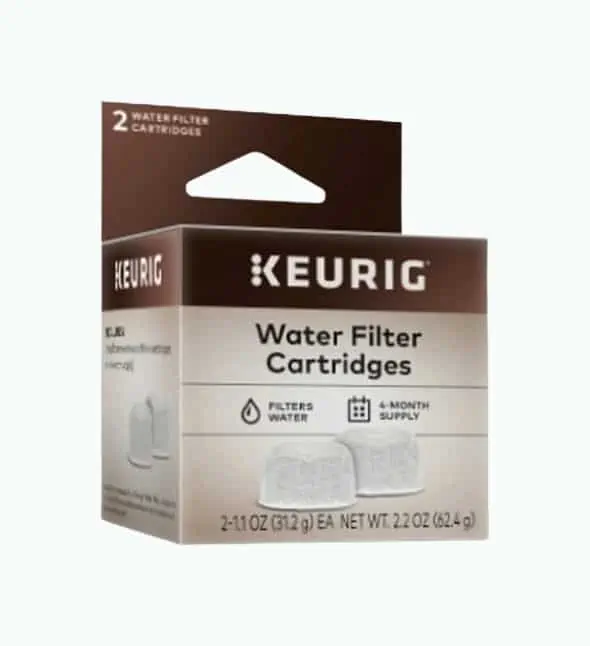
Soak your new water filter for 5 minutes. Now replace the filter in your Keurig coffee maker and wipe the outside one more time. Your Keurig is now clean and ready to brew you some delicious coffee.
Pro-Tip
You can use lemon juice to clean your coffee maker. The best way is to use a 50-50 solution of lemon juice to water. It may require up to 12 lemons to get enough juice to clean your machine. Other than the change in solution, follow the same steps.
The lemon juice will smell much better as it cleans your coffee maker.
How to Descale a Keurig Coffee Maker
When you are descaling a Keurig coffee maker, you’re aiming to remove the mineral scale, or buildup, that has occurred over time. Usually, you’ll need to descale your coffee maker every 3-6 months. However, if you have hard water you’ll need to descale your machine more often.
What You’ll Need
- White vinegar or Keurig Descaling Solution
- Dish soap
- All-purpose cleaner
- Small toothbrush
- Bowl
- Measuring cups
- Mug
- Clean cloth or paper towel
- Straightened paper clip
1. Unplug Machine and Empty Water from the Reservoir
First, you will need to ensure that you have unplugged your machine. Then empty any water left in the reservoir.
2. Remove the Charcoal Water Filter
You will need to remove your water filter cartridge before you descale your Keurig Coffee Maker. Open the reservoir, and pull out the old filter. Discard it.
3. Wash Removable Components
Remove any removable pieces. This may include the lid, tray, reservoir, milk steamer, and k-cup holder, but check your coffee maker’s manual to be certain.
Fill your sink with water and add a squirt of dish soap. You will wash these components in soapy water. Now rinse them and leave them on the counter to air dry. Don’t dry with a cloth so you don’t accidentally leave any lint on the pieces.
4. Clean Outside Machine
Use an all-purpose cleaner to spray a paper towel or clean cloth. Now wipe down the outside of your machine with a cloth or paper towel.
Look for signs of mineral scaling on the outside. If you find some, use a soft toothbrush dipped in vinegar to scrub at the spots. Then use a clean paper towel or cloth to wipe the area clean.
5. Unclog K-Cup Holder and Entrance Needle
Unclog the K-cup holder by sticking a straightened paper clip up the tube and wiggling it. Be gentle so that you don’t damage the K-cup holder. Also, watch for sharp needles as this is where the pod-piercing needle is.
Unclog the entrance needle using the paperclip as well. Poke the paper clip into the 2 holes next to the entrance needle. Dig out any gunk and granules there. Be careful as the entrance needle is sharp.
6. Soak Reusable Filter
Fill a bowl with 1 cup of vinegar and soak the reusable filter for 5 minutes. Now gently loosen any gunk stuck on the fine mesh with a soft toothbrush. Work until the mesh is as clean as possible.
7. Reassemble Your Keurig Coffee Maker
Put your coffee maker back together as if you’re about to brew a cup of coffee.
8. Put Cleaning Solution into the Reservoir
Pour a bottle of Keurig Descaling Solution into the reservoir. Then fill the empty bottle with water and pour that into the reservoir. You want a 50-50 mixture of Keurig Descaling Solution and water.
You can also use a 50-50 mixture of white vinegar and water to descale your coffee maker. Mix 3 cups of vinegar and 3 cups of water, and then fill the reservoir with the mixture.
Put a large mug on your coffee maker to catch the descaling solution as it brews.
9. Run the Machine
Plug your machine in but do not replace the filter yet. Now it’s time to brew the descaling solution. Dump the resulting brew into the sink after each brewing. Continue until the machine’s Add Water indicator lights up.
10. Let the Machine Sit
Now let the machine sit for 30 minutes. Don’t worry about trying to empty the reservoir yet. The goal is to give the descaling solution time to work.
11. Empty the Reservoir
Empty the reservoir of any remaining descaling solution and fill it with fresh water. Be careful not to exceed the maximum amount of water the reservoir will hold.
12. Rinse Your Coffee Maker
Now, brew at least 12 large mugs of hot water. It takes quite a few rinses to remove the taste of the vinegar or descaling solution from the coffee maker.
12. Replace the Filter

Soak your new water filter for 5 minutes before placing it in your Keurig coffee maker. Wipe the outside one more time. It’s now ready to brew you some delicious coffee.
Pro-Tip
Sometimes the Keurig Descaling Solution will cause some foam to be coming from the machine. It’s just a reaction between the solution and the mineral buildup. Don’t worry about the foaming.
However, your machine may be heavily scaled, which may cause your brewer not to fill correctly. So if your machine is also producing only a small stream of liquid or none at all, you will need to turn your machine off and unplug it.
Pour the descaling solution out of the reservoir and rinse the reservoir ensuring that all of the descaling solutions has been removed. Now refill the reservoir with fresh water. Plugin your machine and turn it on.
Brew a mug of hot water. The foaming should have stopped and your machine should be working normally. If not, let it sit for 30 minutes, and then try running another brew of hot water.
Once the machine is working normally again, rinse it by brewing 12 large mugs of hot water to ensure that all the descaling solution has been removed.
How Often Should I Clean My Keurig?
A Keurig machine, whether it is a Keurig drip coffee maker, a Keurig duo, or a Keurig single-serve, needs to be cleaned regularly. This will keep your coffee and espresso tasting delicious and the machine working well.
The needle sometimes needs to be unclogged. If you notice it’s not working properly, unplug your machine. Then use a paperclip to carefully remove any gunk or debris in the needle.
Then plug your machine back in.
Every Week
Every week you should clean your Keurig coffee pot to remove any coffee oil residue that may be sticking to the sides of your machine.
To clean your machine, remove all removable parts. Wash them in a sink of soapy water. Let them air dry so there’s no chance of lint sticking to the parts.
Then wipe the exterior and replace everything in your coffee maker. Plug it back in and you’re ready to brew another cup of coffee.
Every Two Months
The water filter cartridge needs to be replaced every two months. Pollutants and bacteria build up inside the filter causing it to become clogged.
To do this, soak the new cartridge in freshwater for 5 minutes and then rinse it for 1 minute.
Open the reservoir to remove and discard the old filter. While the filter is removed, wash the lower filter basket’s mesh.
Now, insert the cartridge into the machine. Snap the lid on, and return it to the reservoir.
Every Three to Six Months
You will need to descale your coffee maker every 3-6 months. This is because water causes a mineral build-up in your machine. The mineral scale will clog your machine making it difficult to brew a proper cup of fresh coffee.
Scroll up to find the directions on how to descale your coffee maker.
Tips For Keeping Your Keurig Machine Clean
- If you run a brew of something sweet such as hot chocolate or soup, run a brew of fresh water to rinse the machine and prevent bacteria from growing.
- Wipe your machine daily to clean it.
- Stay on top of the regular cleaning so you can enjoy great-tasting coffee in the morning.
- If you have hard water, consider using filtered water in your machine.
FAQs

What’s the Best Way to Clean a Keurig Coffee Maker?
The best way to clean a Keurig coffee maker is to empty the reservoir and fill it with a 50-50 solution of vinegar and water. Then run several brewing cycles until the reservoir is empty or the Add Water indicator turns on.
Let the machine sit for 30 minutes.
Now rinse the reservoir thoroughly before filling it with fresh water. Brew 12 large mugs of hot water to rinse the machine. Now you can enjoy a fresh cup of coffee.

What’s the Best Way to Clean a Keurig Mini?
The best way to clean a Keurig Mini is to unplug your machine, wipe down the outside, remove the clean drip tray and wash it in soapy water. Rinse the clean drip tray and allow it to air dry. Clean the needle with a straightened paper clip.
Next, send a brew of descaling solution through the machine. Discard the liquid and rinse the reservoir. Run 2-3 rinse cycles before brewing yourself a cup of fresh coffee.

Can You Use Vinegar To Descale A Keurig Coffee Maker?
Yes, you can use vinegar to descale a Keurig coffee maker. As to how much vinegar to use, you will want a 50-50 vinegar to water solution.
What Is The Best Descaler?
Keurig Descaling Solution is designed to descale a Keurig coffee maker and is recommended by Keurig.

What Can I Use Instead Of Descaling Solution?
You can use vinegar or lemon juice instead of the descaling solution. You will need to use 1 part of vinegar or lemon juice to 1 part of water. Then follow the directions on how to descale your machine.

How Do I Turn Off the Descale Light On My Keurig?
The easiest way to turn off the descale light on your Keurig coffee maker is to remove the water reservoir and disconnect the machine from the power supply. Next, take out the drip tray to reveal the descaling button. Press and hold the descaling button for five seconds and then replace the drip tray.

What Happens If You Don’t Clean Your Keurig?
If you don’t clean your Keurig coffee maker, the coffee steadily gets more bitter. It also emits a pungent smell, and eventually, it gets blocked.
In Conclusion
Remove the water filter from your machine and put a 50-50 solution of vinegar and water into the reservoir. Run brews of hot vinegar water until the add water indicator lights up. Then let the machine sit for 30 minutes to give the vinegar time to work. Empty the reservoir and fill it with fresh water. Run 12 brews of hot water to remove the vinegar from the machine before you make a fresh cup of coffee.