If you’re looking for a more professional finish to your outfits, then you should be starching clothes. This is a great way to add a crisp edge to your shirts, dress pants, and other items!
You don’t need to take your clothing to the dry cleaner’s to do this task — it’s easy enough to do from home. We’ll teach you how to starch your clothes, plus give you some additional tips to make sure you don’t damage any items.
Key Takeaways
- Starching clothes adds a crisp finish and makes them easier to clean and iron.
- Use spray starch for cotton and linen clothes, and laundry sizing for synthetic clothes.
- Avoid starching delicate materials like silk, wool, or cashmere, and use fabric sizing for durable synthetics like polyester or nylon.
- To starch clothes, wash and dry them, spray with starch or sizing, iron without steam, and hang immediately.
What Does Starch Do to Clothes?
Let’s take a closer look at what starch does to clothes. Basically, it’s a technique used to leave your clothes crisp and free of wrinkles. But with advantages come disadvantages, too.
Advantages:
- It gives your clothing a smooth, crisp finish.
- Dirt and sweat will stick to the starch, rather than the clothing. This makes the clothes much easier to clean.
- Starching your clothes makes ironing easier.
- Your clothes are less likely to wrinkle.
- You can go longer between washes, getting up to three wears from a starched item.
Disadvantages:
- The clothes can feel stiff and scratchy against your skin.
- Starch can break down the fabric of your clothing. Your clothes won’t last as long if you starch them often.
How to Starch Clothes
You can, of course, take your clothes to the dry cleaner’s and ask them to starch your clothes. Or — you can learn to do it yourself.
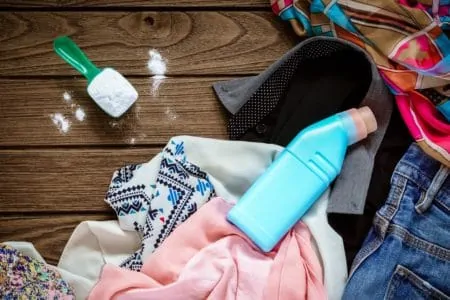
What You Need
- Spray starch (for cotton or linen clothes).
- Laundry sizing (for synthetic clothes).
- Ironing board.
- Iron.
- Clothes hanger.
Step by Step Instructions
- Wash and dry: Thoroughly wash and dry the item you’re going to starch. Make sure it’s stain-free as the iron can actually set stains.
- Place on the ironing board: Lay the garment flat on your ironing board. We recommend using an ironing board with a heat reflective cover to make the job easier.
- Spray starch: Evenly spray the starch or laundry sizing across the garment. Wait a few moments for the starch to settle into the item.
- Iron: Check the fabric care label for the item and iron with the highest heat possible for the specific garment. Do not use the steam setting when ironing as this doesn’t help with crispiness when using starch. Press lightly with the iron.
- Hang the item: After ironing, hang the item on a clothes hanger to fully dry. This will help avoid wrinkling.
So that’s it — easy peasy! You can now starch from home and save money at the dry cleaner’s.
What Not to Starch
Although starching is a relatively easy task, you do need to be careful. Some items cannot be starched because starch is used to stiffen clothes. The rice and maida in starch are great for cotton, but not great for others materials (1). These include anything that you wouldn’t want to be stiffened, like:
- Silk.
- Silk-blends.
- Delicate synthetics.
- Wool.
- Wool-blends.
- Cashmere.
There are also fabrics that can’t be starched traditionally and require a fabric sizing instead. These include durable synthetics, like polyester or nylon since the fabric sizing will protect the material.
Starching Tips
Let’s look at some more tips for starching your clothes to make the task as easy and effective as possible!
- There are different levels of starch products. You can get light, medium, or heavy. If you’re using a heavier starch, soak and launder the item between starching to remove the starch layers. This can lengthen the lifetime of your fabric.
- If you’ve starched an item, don’t put it into storage or keep it in your wardrobe for a long time. Only starch items you’re going to wear. This is because starch can attract nasty bugs (2). Always clean an item thoroughly to remove starch before storing it.
- If using liquid starch, mix two cups with three gallons of water. Dip the item into the solution and hang to dry. Then iron while it’s still slightly damp.
- If the label says dry cleaning only, this includes starching the item. Always take it to a dry cleaner and ask them to do it for you.
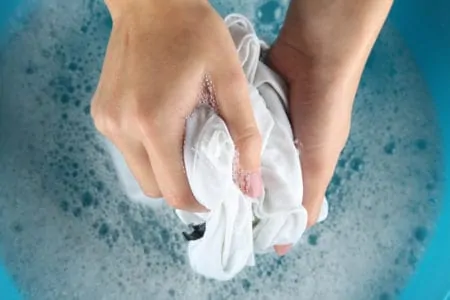
- You can use cornstarch instead of a store-bought product since it stiffens well (3). Mix 1.5 tablespoons of cornstarch with two cups of water to make a milky paste. Fill a sink with warm water before adding your starch solution. Soak the shirt in the water before hanging to dry. Iron while the clothing is still slightly damp.
- If you make your own starch solution, try storing it in a spray bottle. This will save you some time when you next go to starch clothes. You can just spray it while it’s on the ironing board instead of soaking it in the solution and hanging it to dry again.
FAQs
Still, have more questions? We can help with that.

Is Starch Bad for Your Shirts?
In the short run, starch can protect your clothes from stains and dirt. Do you know that nasty sweat stain around your shirt collar? You can kiss that goodbye if you use starch! It’ll be so much easier to wash away since the dirt sticks to the starch rather than the shirt.
However, over time, starch can break down clothing fibers and start fraying your shirts. But if you love that crisp finish, it is probably worth it just to stock up on new shirts every so often.

Should You Starch Dress Pants?
Starch can help dress pants remain crisp and accentuate the creases. However, check the material first. If it’s made from a synthetic material, use laundry sizing. If there is any wool in the dress pants, then it cannot be starched.

Does Starch Washout of Clothes?
Yes. Starch dissolves in water so it’s easy to wash it out of your clothes. Just wash the item normally according to the fabric care label instructions.

Do You Let Starch Dry Before Ironing?
Nope! Spray the item with starch and leave it for a few moments to let the starch settle in but it doesn’t need to be fully dry. In fact, if the garment is slightly damp, it will be easier to iron out creases and wrinkles.

Can You Put Liquid Starch in the Washing Machine?
If you add liquid starch to your final rinse cycle, it can help prepare the clothing for ironing. This will help you get out wrinkles and creases while saving you time — you no longer have to spray each individual item before ironing!
Just pour 1.5 cups of liquid starch into the dispenser or straight into the drum during the final rinse. Hang the clothes to dry before ironing while they are still slightly damp.

Does Starching a Shirt Prevent Wrinkles?
For sure! This is why we love starching shirts. You can rest assured that your starched shirt will stay wrinkle-free during your work hours. Plus, it can protect it through the night if you have after-work drinks! If you notice that it doesn’t work, use a little extra starch next time.

How Do You Starch Black Clothes?
Perhaps you’ve tried starching your black clothing only to find white flecks and streaks. But what if you have to wear black clothes at work? Well, there is a quick, easy way to starch black clothes.
Flip the garment inside out and starch the inside rather than the visible side of the clothes. This might be more uncomfortable on your skin, but if you need to starch a black item, this is the best way.

Can You Starch Your Clothes In the Dryer?
Starching your clothes in the dryer is not a good idea because the heat from the dryer might melt the starch, causing it to melt into the fabric. The best way to starch clothes is to let them air dry.
Be Professional
We love starching clothes because it gives you a crisp, professional finish. You’ll look good, and, therefore, feel good when you go to work.
However, you should also be professional when it comes to starching, so make sure to follow our instructions. Don’t stray away from these tips as making the wrong move, or starching the wrong material, can damage clothes.