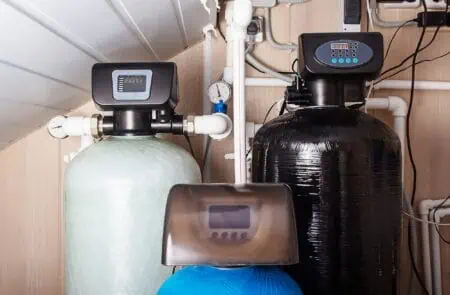
When you turn on your tap and encounter a foul smell, it’s often a problem within the water tank. This is a major issue for many people, so it’s crucial you know the best solutions.
We’ll show you how to remove smells from a water tank using seven different methods. We’ll also share how to identify the cause of the smell and what to do if these methods don’t work.
You can count on our researched methods backed by experts to ensure that your water is fresh, safe, and odor-free.
Key Takeaways
- Bad odors in water tanks can be caused by sulfur bacteria, chlorine, decaying organic matter, iron bacteria, or contaminated water supply.
- Determine if the smell is from the hot water tank or the water source by checking if the odor persists in both hot and cold water.
- To remove smells, sanitize the water tank with hydrogen peroxide or bleach, and drain and refill the tank multiple times until the odor is gone.
- If the odor persists, consider replacing the anode rod in your water tank every four years to reduce rust and bacteria buildup.
Why Does My Water Tank Water Smell?
Many factors can contribute to bad odors in a water tank. We’ll walk you through the main culprits:
- Rotten eggs or sewage odor: This is caused by sulfur bacteria within the water supply, water source, drain, or the water heater itself. This can be caused by food waste building up, stagnant water, or a defective septic system. It can also be down to a degraded anode rod.
- Bleach or chemical odor: This is due to high levels of chlorine in the system, which is usually safe, but if it’s over 2.0 parts per million, you will need to contact your water supply authority. You can test the levels with a water quality tester.
- Fishy smell: Usually, this smell is harmless, but it can be caused by decaying organic matter within the drain, well storage, or pressure tank. It can also be caused by pollution from surface drainage.
- Earthy or musty smell: This is caused by iron bacteria within the water. It’s not usually harmful but can lead to a bad taste.
- Gasoline or fuel odor: If you experience this smell, it’s a more serious issue. This odor can be caused by a leaking fuel tank, discharge from landfills, or agricultural run-off contaminating the water supply. If you notice this odor, stop drinking the water immediately and inform your county health department of the issue.
- Electrical smells: If the water tank has short-circuited, this can lead to a burning smell. Unplug the water heater and call a trained technician to fix the problem.
Hazard
Other smells include detergent, methane gas, or a sharp chemical odor. These are all serious hazards and should be dealt with by a professional.
How to Identify the Cause of the Smell
You’ll first notice a bad odor from the faucets themselves. When you want a fresh glass of water and you’re met with a gasoline or fishy smell — count this as your first warning sign.
But you need to determine whether the smell comes from the hot water tank or the water source.
If the odor only comes out of some faucets and it disappears after running the tap for a few minutes, then the odor is likely in the fixtures or pipes supplying those specific faucets.
If the odor comes from all faucets, this is a different problem. When you run the faucet for a few minutes and the odor goes away, the source is likely in the overall plumbing system — not the water tank.
But if the odor doesn’t dissipate after running the faucet, it’s either coming from the hot water tank or the water source.
If it’s only the hot water that smells, then it’s likely a problem within the water tank.
But if it’s stinky for both hot and cold water, then it’s likely coming from the water source.
To summarize, we’re showing you how to remove smells from water tanks if it’s just the hot water that smells. If you have odors in both cold and hot water, you can still use these methods, but you must report the cold water odors to your local water utility company.
How To Remove Smell From a Water Tank
It’s time to learn how to bust these odors from your water tank so you can enjoy a nice glass of water or a long bath. We have seven methods to share that should take your water from stinky to sanitary.
What You’ll Need
- Garden hose.
- Bleach or hydrogen peroxide.
- Measuring jugs.
- Replacement anode rod.
- Sump pump system (optional).
- Flathead screwdriver.
- 1-1/16th-inch socket.
- Cheater bar.
- Rags and towels.
- Teflon tape.
- Socket wrench.
- Hacksaw (optional).
- Water softener (optional).
- Bypass valve (optional).
- Nugget, pellet or coarse solar salt (optional).
- Pipe wrench or channel lock.
- Pipe cutter (optional).
- New water heater (if replacing the unit).
- Pipe dope.
Sanitize the Tank
The first thing you might want to try is sanitizing the tank. You can do this with hydrogen peroxide or chlorine bleach.
- Turn off the water: Turn the water off at the tank or the main water supply.
- Turn on hot water valves: Open the nearest hot water faucet in the house to prevent air locks and open the temperature and pressure valve located on the top of the tank.
- Turn off the tank: Turn the tank off. If electric, turn it off at the breaker. If you have a gas tank, set it to pilot or “vacation mode” to make it easier to fire up after you’ve drained it..
- Attach garden hose: Connect your garden hose to the tank’s drain valve and twist the valve open. Drain the tank enough to compensate for the hydrogen peroxide. Make sure the hose is draining into something, such as a floor drain or a sump pump basin.
- Remove one water pipe: While the tank is draining, remove one of the water pipes at the top of the tank. This is so you can add your sanitizing product. It doesn’t matter which pipe you remove — just take off whatever is easiest.
- Close the water valve: When the tank has drained enough, close the drain valve.
- Add bleach or hydrogen peroxide: Measure out your bleach or hydrogen peroxide. If using bleach, use ¼ cup of bleach per 15 gallons of water. If your water tank has a 45-gallon capacity, use ¾ cup of bleach. When using hydrogen peroxide, use one or two gallons of three percent solution for every 40 gallons of water capacity. Pour it directly into the gap from the water pipe you removed in step five.
- Turn on the water: Reattach the water pipe and turn the water supply back on. You should hear the water tank filling back up.
- Turn off the water: Once you hear the tank is full and the nearby faucets are running, turn off the water again and close the hot water faucets. Leave the mixture in the tank for a maximum of three hours before opening all hot water faucets in the house again. This allows the mixture to run through the pipes.
- Drain the water: Let the water drain through the hot water faucets, or if that is going to take too long, empty the solution from the tank via the drain valve with a garden hose. Open the hot water faucets elsewhere in the house to prevent air locks.
- Refill the tank: Close the drain valve and turn the water supply back on to refill the tank with fresh water.
- Drain the tank: Repeat the process to drain the tank again. This completely rinses out the inside of the tank.
- Refill: Refill the tank and turn on the hot water faucets. If the bleach or hydrogen peroxide odor is in the water, rinse the tank until the smell is gone. Use a water quality tester to ensure the water is safe to drink.
- You can repeat this process as many times as you want until the smell has gone. However, if the odor persists, there may be another cause.
Safety First
If you’re in any doubt of your ability to do this, call a professional.
Replace the Anode Rod
The anode rod in your water tank can reduce rust build-up, leaving you with better-quality water. However, over time, this can react with the system’s heating element and lead to bacteria within the tank. The odor it creates can be a sulfur-like, rotten egg smell.
Before we get into the process of replacing the anodes, you need to know what anode types there are and which one you have.
- Aluminum: These anodes are typically found in older water tanks. They are less common today, but still in use in hard water areas. If you live in an area with high mineral water content, you may have an aluminum anode.
- Magnesium: Magnesium anodes are commonly used today, especially in metal water tanks. Magnesium anodes are not suitable for hard water areas. They may add to your problems by corroding the tank liner, creating an electro-chemical reaction that produces hydrogen gas.
- Zinc: Zinc anodes are a mixture of one-part zinc to ten parts of aluminum. Zinc minimizes the smell of sulfur in the water, although zinc anodes are not typically fitted as factory standard.
- Impressed current rods: Impressed current anodes use electricity to attract corrosion, so they lack sacrificial metal. It means that they don’t need to be replaced, although infrequent cleaning is needed to keep a strong electrical charge.
- Combination: Combination anodes are a pain for maintenance purposes because they are typically located in unusual places like inside the pipe. Most other anodes attach to the top of the tank. You are unlikely to have this type unless it’s been retrofitted.
You should replace the rod every four years, even if you have no weird odor issues. Here’s how:
- Turn the power off: Turn the power off to the water heater at the circuit breaker. If you have a gas heater, turn off the gas supply.
- Turn off the valves: Turn the shut-off valve at the cold water inlet or at the main water supply. Open the nearest hot water faucet to prevent air locks.
- Connect a hose: Attach a garden hose to the drain valve on the tank. Ensure the other end of the hose empties into a floor drain or sump pump system. Drain about two gallons of water from the tank — this should only take about a minute.
- Locate the anode rod: Find the anode rod on your system. This is usually underneath a plastic cap located on the top of the tank. The rod might be exposed on older models. Using a flathead screwdriver, remove any insulation from the plastic cap.
- Remove the anode rod: Use a 1-1/16-inch socket and cheater bar to remove the anode rod. You might want a rag nearby to clean up water seepage. Once the anode rod is loosened, remove it from the tank. Be careful because the metal rod will be hot.
- Prepare the new rod: Wrap six layers of Teflon tape around the new rod’s threads, moving clockwise. This seals the threads.
- Insert the rod: Simply insert the new rod into the hole and turn it clockwise to secure it in place. Tighten it another half-turn with a socket wrench. If the rod is too long, you will need to cut it with a hacksaw so that it fits.
- Turn on the water: Making sure a hot water faucet is on somewhere in the house, turn the cold water supply back on and refill the tank. After a minute, turn the hot water faucet off and check for leaks around the rod. If there aren’t any leaks, replace the plastic cap. If there are leaks, ensure that the anode rod is secure.
- Turn on the power: Turn the power to the water tank back on.
Caution
Before opening the drain valve, ensure nobody is around, as the water will be very hot. This can cause injury, so let your family and neighbors know before you do this.
Flush Your Water Heater
Sometimes, a simple drain and rinse can remove odors. You should do this twice a year to remove sediment from your water tank. Here’s how:
- Turn off the heat: Turn the heat off for your water tank. For electric heaters, switch them off at the breaker. For gas heaters, turn the temperature setting to pilot or vacation mode.
- Turn off the water supply: Turn off the cold water supply by turning the inlet valve.
- Connect a garden hose: Connect a garden hose to the drain valve.
- Open a faucet: Open a hot water faucet anywhere in the house to prevent air locking.
- Open the drain valve: Open the drain valve that’s attached to the garden hose. You should hear water flowing. If not, you might have a backflow preventer installed. In this case, you will need to open the preventer (pressure relief valve) — usually, you do this by flicking up the relief valve arm. Make sure to put that back at the end of these steps.
- Check the water: The water will start draining out the other end of the hose. Make sure that it is going into a floor drain — outside is easiest. Again, ensure nobody is around to be scalded by the water, as it is super hot. Let this drain for about 15 to 20 minutes.
- Open cold water supply: Open the cold water supply for 20 seconds to spray water to the bottom of the tank and clean out sediment buildup. Turn it off for 20 seconds to let that drain out. Repeat this process until the draining water runs clear.
- Refill the tank: Turn off the drain valve and refill the tank by opening the cold water valve again. Close the pressure relief valve if you opened that earlier.
- Drain the tank: Once you can no longer hear the tank refilling, open the drain valve and close the water supply valve. Let the tank fully drain. If necessary, open the pressure relief valve.
- Remove the hose: Close the drain valve and remove the hose.
- Return the water supply: Return the water supply to the tank. Leave the pressure relief valve open for about five minutes. You may want to stand near the tank to be sure the tank doesn’t fill past the pressure relief valve, as this will leak.
- Turn the heat back on: Turn the heat back on.
- Open a hot water faucet: Turn on the nearest hot water faucet until the water runs normally without spitting and bubbling.
Top Tip
Turning off your water tank several hours before you drain it means the water cools to pose less of a safety threat.
Raise Your Water Temperature
Raising your water temperature can kill bacteria within the tank and remove — or prevent — odors. Follow these steps to increase the temperature on your water heater:
Gas Water Heater
Gas water heaters are easier to adjust than electric models. Here are the simple steps:
- Locate the temperature dial: The water temperature dial should be located at the base of the water heater. You should see a single knob control.
- Adjust the dial: Twist the dial counterclockwise to raise the temperature to between 90 and 130 degrees Fahrenheit to kill the bacteria. You can adjust the heat to 149 degrees Fahrenheit, but that would be too hot for most people.
- Trial and error: If you have a dial without numbers, adjusting it could be a matter of trial and error. Twist it counterclockwise and wait an hour before checking the water temperature with a thermometer. Continue to tweak as necessary.
Pro Tip
Once you find the perfect setting on your unmarked dial, mark it with a Sharpie to remove the guesswork next time.
Electric Water Heater
Adjusting an electric water heater is more complicated. Follow the steps below for the best results:
- Turn off the power: Turn the power off to your water tank.
- Locate the access panel: Locate the access panel and remove it. Pull back the insulation until you can operate the thermostat.
- Adjust: Adjust the temperature settings. You may have to use a flathead screwdriver to do so. If you have two thermostats, adjust them both, ensuring the top thermostat is a few degrees higher than the bottom. You normally want the water to be between 120 and 125 degrees Fahrenheit, but for killing bacteria, you want it to be around 149 degrees.
- Reassemble: Replace the insulation and reinstall the access panel. Turn the power back onto your water tank.
Warning
If you crank the temperature up to 149 to kill bacteria, let everybody in the house know. It will not be safe to turn the hot water on very high for washing hands or taking showers. Once you’ve let the tank run at 149 for a few hours, turn the temperature back to between 120 and 125 degrees.
Install a Water Softener
Installing a water softener is a great way to remove odors from within your water system, as they can remove odor-causing bacteria. They will also ensure your water tastes better, cleans better, and isn’t as irritating to your skin and hair.
Just note that installing a water softener does require some DIY skills. We recommend calling a plumber if you aren’t skilled in this area.
- Install the bypass valve: With many water softeners, you will need to install a bypass valve. Some include a bypass valve so you can shut the water off to the softener when needed. Simply push it in. Make sure to install it in the direction of the water supply. For instance, if the supply comes from the ceiling, face the valve upwards. Once you’ve pushed it in, attach the holding clips.
- Attach the plumbing adapters: Slot your plumbing adapters into the valve and secure them with the holding clips.
- Attach grommet: Attach the grommet to the hole in the back of the softener. Then push the overflow elbow into the grommet.
- Shut off the water: Shut the water off in your home and drain the pipes.
- Attach the water softener: To attach the water softener, you will need to cut out a section of the water supply line, so the adapters fit the tubes. Connect the main water pipes to the water softener bypass valves. Make sure the hard water supply pipe feeds to the water softener valve inlet side (this is marked on the softener unit).
- Connect the drain line: Connect the included drain line to the softener’s valve drain fitting. Hold the hose in place with a hose clamp. Then connect the drain hose to the floor drain. Repeat these steps for the salt storage tank overflow hose, connecting it to the salt storage tank overflow elbow instead.
- Open faucets: Fully open a few cold water faucets throughout the home.
- Push in the bypass valve: Push the bypass valve inwards to the softener until it stops. This allows the water to bypass the softener.
- Turn the water on: Open the main water supply lines and let the water run until it’s flowing steadily without air bubbles.
- Remove the bypass valve: Pull the bypass valve out and let the water run for three minutes.
- Open a hot water faucet: Turn on a hot water faucet until the water is flowing steadily. Turn it off once you’ve ensured a steady water flow.
- Turn off cold water faucets: Turn off the cold water faucets throughout the house.
- Check for leaks: Check for leaks around the connections. If there are any, ensure all connections are secure.
- Add salt and water: Follow the manufacturer’s instructions for how much water and salt to add. Use nugget, pellet, or coarse solar salt with less than one percent impurities.
- Start the system: Follow the manufacturer’s instructions for starting the system.
- Run a backwash cycle: Check the instructions for how to perform a backwash cycle. This removes air from the system and loosens resin beads in the mineral tank, allowing the softener to run smoothly. Once the cycle is complete, check the water level in the brine tank and make any adjustments recommended by the manufacturer. This varies depending on the softener you have.
Caution
Check with your local authority before installing a water softener. States like California, Massachusetts, and Texas restrict the use of saltwater softeners because they damage the environment.
Replace the Water Heater
Typically, water heaters can last anywhere between six and 15 years, with 10 years being the average. A tankless heater can last beyond 20 years. If you notice banging noises, tinted hot water, poor water temperatures, leaks, or smells that won’t disappear, it might be time to replace the water heater.
We recommend hiring a professional to replace your water heater. But if you’re able to do it yourself, here are some basic instructions:
- Turn everything off: Turn off the water heater, gas valve, and cold water valve.
- Open hot water faucets: Open a couple of hot water faucets throughout the house.
- Drain the water: Attach a garden hose to the drain valve and position the other end over a floor drain inside or outside. Open the drain valve and let the water flow until the tank is empty. Then close the drain valve again.
- Disconnect the water lines: Use a pipe wrench or channel lock to disconnect the incoming and outgoing water lines on the top of the tank. If you have fixed copper pipes, it’s easier to cut them with a pipe cutter. Then attach flexible lines for the new water heater.
- Disconnect everything: Disconnect the gas line, the vent hood, earthquake straps, the pressure release valve, and anything else connecting to the tank.
- Remove the tank: Pull the tank out of the space, walking backward slowly while carefully lifting the tank with you. Be cautious of all the other lines and connections — you don’t want to damage these since you need them for the new water heater. This step is easier with two people.
- Position the new tank: Position the new tank in the open space.
- Attach the water lines: Attach the incoming and outgoing water lines to the new tank using three rotations of Teflon tape in a clockwise direction. Then screw in the water line pipes.
- Attach the gas line: Screw the gas line back in place. Once connected, turn the gas on and check for leaks. If you smell gas, turn the gas off and tighten the connection further. If you don’t smell gas, spray soapy water onto the connections. If there are expanding bubbles, there is a gas leak. Tighten the lines further and apply pipe dope if necessary.
- Reconnect the vent: Many water heaters come with a new vent connection which you can secure with screws. Make sure you maintain an upward angle between the water heater and the vent’s exit so the heat can escape properly.
- Fill and test: Turn the hot water on in a sink far from the water heater. Open the cold water supply for the water heater. Check for drips or leaks at the water connections. Tighten the connections if necessary. The open faucet will sputter and spit until the tank is full and everything is running smoothly.
- Turn the water tank on: Turn the water tank on according to the manufacturer’s instructions. If you have a gas tank, the instructions should be on the tank itself. Remember that it can take about 30 minutes for the water to heat up.
Treat the Water Source
If the water source is contaminated, contact the water supply authority or county health department. They will test the water and carry out the treatment if necessary.
If you have well water, it’s important to contact a licensed pump installer or well driller. Do not attempt to treat the water source yourself.
What to Do When Water Still Smells
If none of the above methods fix the smelly problem, even replacing the entire water tank, you must call a plumbing technician. You may need to get a filtration system installed in your home.
You should also contact your water supply authority and inform them of the problem. If there is contamination in the water, you should only drink or use the water once the problem is fixed.
Water Tank Maintenance Tips
Removing odors from a water tank is challenging stuff. It’s much easier to prevent odors in the first place by taking good care of your water tank. Here are top tips for maintaining the tank so that it lasts for years and works a charm:
- Flush regularly: Flush the water heater twice a year to remove sediment in the tank. If you leave your home for long periods of time, letting the water become stagnant, you may want to flush the tank out every three months instead.
- Check the anode rod: Check the anode rod once a year to ensure that it’s not disintegrated. If it is damaged at all, replace it.
- Check for leaks: Regularly check for any leaks. This is usually caused by a loose connection. Tighten all connections with a wrench to prevent leaks.
- Book a service: Book a yearly service for tankless water heaters.
- Insulate the tank and pipes: It’s a good idea to insulate your water tank and pipes to extend their lifespan and lower energy bills. When you insulate your tank and pipes, they retain heat better, so the tank doesn’t have to work as hard to produce hot water.
- Check the temperature: Ensure the temperature is between 120 and 125 degrees Fahrenheit. If it’s higher than this, the tank will be working harder, and it can also scald you when you run hot water.
- Test the pressure relief valve: Place a bucket beneath the temperature pressure release valve and lift the lever. If water comes out when you lift it and stops again when you lower it, the valve is working correctly. If no water comes out or you have a large leak, you will need to replace the valve.
FAQs

Can I Shower If My Water Smells Like Rotten Eggs?
We recommend not using the water if it smells like rotten eggs. There is a chance of harmful contamination in the water, so it’s better to be safe.
Try and remove the smell yourself following our tips, but if the smell remains, contact a professional.
Keep in mind that if the smell only occurs when you turn on the hot water, it’s likely an issue within the tank and not the water source. In this case, you can usually solve the problem yourself using our tips.

Does Boiling Water Remove Sulfur?
No — sulfur has a boiling point of 832.3 degrees Fahrenheit, so boiling the water won’t remove the sulfur (1). It might cut back on some of the sulfur smells, but the actual sulfur will still be present.

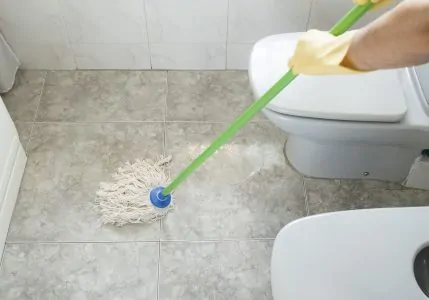
How Do You Get Rid of a Sewer Smell In an RV?
First, you need to find the cause of the smell. There are many possible reasons your RV smells like sewer.
Firstly, flush out your water tank and refill it. If you leave the water tank empty, the solid residue will remain, leading to awful smells. A good rule of thumb is to add water to the tank each time you flush the toilet.
You may want to add holding tank chemicals to the toilet. This can break down waste and kill odors. Make sure to choose the right chemicals for your RV, according to the instruction manual.
Another reason your RV smells like sewage could be due to a clog. Check for clogs right away — this is often caused by regular toilet paper. You should always ensure to use RV-grade toilet paper.
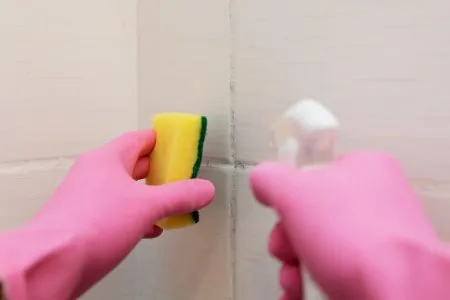
Next, deep clean the water tank with bleach or hydrogen peroxide. Then give the toilet and flapper a deep clean. You might want to clean the entire bathroom to remove any lingering odors.
If the smell persists, call a professional.

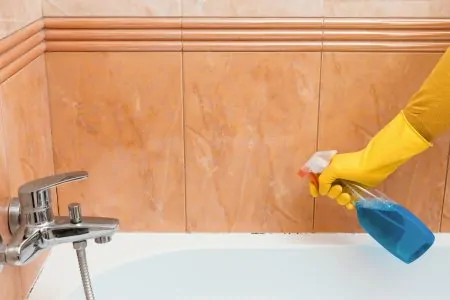
Can I Use Vinegar To Clean My Water Tank?
It’s safe to use distilled white vinegar to clean out your water tank. It’s a natural odor killer.
However, you typically need to use it undiluted or in a 1:1 ratio with water. That means if you have a 45-gallon water tank, you will need at least 22.5 gallons of white vinegar — this can be super expensive!
Fresh Water Awaits
Now that you know how to remove smells from a water tank, you can try these methods before calling in a professional. Once you’ve identified the smell coming from the tap water, you can start by sanitizing the tank. If that doesn’t work, replace the anode rod.
You will regularly need to flush the water tank out and, in extreme cases of hard water, install a water softener. If odors persist, call a professional who may advise you to replace the entire water heater tank. These typically last between six and 15 years, depending on the type you have.