Mopping may seem like an easy task, but if you’re disappointed with the way your floors look after a cleaning session, we can help.
We’ve discovered 10 popular mopping mistakes — are you guilty of any of them? Well, today you’ll find out.
Let’s look at these common mopping mistakes and show you the best ways to avoid them. Soon your floors will be cleaner than ever before.
Key Takeaways
- Vacuum before mopping to remove dust and debris, preventing scratches and a less effective clean.
- Use a damp mop instead of soaking floors to avoid streaks, long drying times, and potential damage.
- Wash the mop pad after each use, ensuring a clean pad for a properly sanitized floor.
- Avoid wet mopping unsealed wooden floors, as water can cause warping and encourage mold growth.
Top 10 Mopping Mistakes
It’s the moment of truth — here, you’ll find out what you might be doing wrong. Or maybe you’re one step ahead and already mopping the right way.
1. Not Vacuuming Before Mopping
Vacuuming before mopping seems like double the work, but it results in a more effective clean. Having loose debris on your floor may lead to scratches as your mop drags it around. You might leave dirt behind you, too, meaning you’ve got more scrubbing to do later on.
It’s recommended to avoid sweeping with a broom. This is due to dust particles becoming airborne and simply spreading around the room (1).
The powerful suction of a vacuum captures an effective amount of dust, removes grime, and gets into nooks and crannies. If you’ve got hardwood floors, it may be best to use a canister vacuum to avoid unnecessary damage.
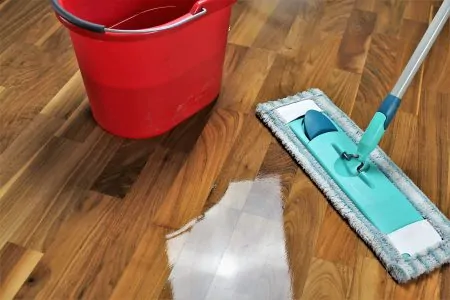
2. Soaking Your Floors
It can be tempting to dunk your mop in your bucket and transfer this moisture to your floor.
But the problem is, soaking your floor might leave streaks. It also takes ages to dry and becomes a hazard in a family home.
While your hardwood floor might say it’s waterproof, using too much water every time still risks penetrating the seal. The last thing you want is to damage your flooring or dull the finish.
Damp mopping may be the best way to get rid of marks and dirt. You can look out for a mopping bucket with a spin or wringer to make the job easier.
3. Not Washing the Mop Pad After Use
Many people get lazy and think you don’t have to change the mop pad after every cleaning session. It’s only a little dust, right? Well, the general rule is that you can’t sanitize a dirty floor with a dirty mop pad.
Of course, you’ve got to wash the mop pad properly to ensure its cleanliness too. If you’ve got disposable mop pads, throw them in the trash after one use.
If you’ve got reusable microfiber mop heads, clean them in your washing machine. We recommend washing them separately from clothing so you don’t transfer dirt.
You should also wash them separately from cotton and synthetic products since they naturally lose fiber during washing (2). These fibers would then be transferred onto the microfiber cloths, making them even dirtier for the next cleaning session.
In addition, try not to overfill the wash load. We know you want it all done at once, but this can limit circulation during the cycle. This results in a less effective clean.
It’s best to leave around a hand’s worth of space at the top of the load once it’s in and ready to go. Wash your mop heads after each use, even if it’s only a quick clean.
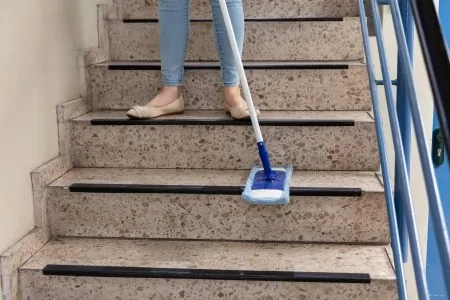
4. Wet Mopping an Unsealed Wooden Floor
Unsealed wooden floors and water don’t go together. You should only clean linoleum, tiles, and other sealed surfaces with a wet mop.
Water can distort and warp wood. You should even be careful with sealed floors since excess moisture can break down the seal over time.
In addition, dampness encourages mold and mildew to grow on wood, resulting in discolored patches. This may aggravate allergies and make you sick (3).
Consider dry buffing with a microfiber mop if you have wooden floors. Wet mopping and steam mopping can shorten a wooden floor’s longevity and durability.
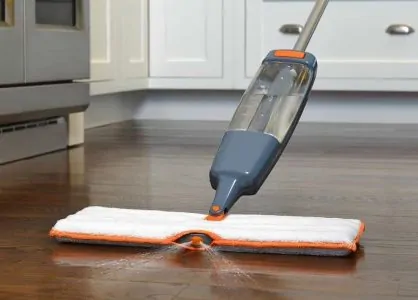
5. Using Cleaning Solution in a Steam Mop
Topping up the water tank in a steam mop with a cleaning solution does more harm than good. It can actually damage your mop and your flooring.
The fantastic thing about steam mops is that they don’t require any chemicals to kill bacteria. The steam does this all on its own, getting rid of A. baumannii, VRE, and MRSA (4).
Take Note
6. Mopping With Warm Water
If you’re washing the floors with a mop and bucket, fill your bucket up with warm water. But, something to bear in mind is that hot water evaporates quicker than colder water (5).
This means that you may be left with more soap residue on the floor than you would like. This might make your surfaces streaky and sticky. So, you might want to consider using cold water to begin with.
Washing your hands at 59 degrees Fahrenheit will kill bacteria just like washing in 100 degrees Fahrenheit (6). The same goes for flooring.
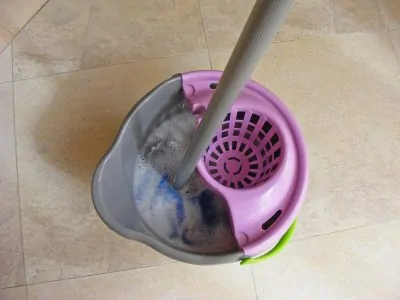
7. Not Refilling the Bucket
Cleaning with dirty water means you’re spreading the contaminants around your flooring. Swap it out for fresh water when the water starts to look murky and change color.
The number of times you’ve got to refill the bucket will vary. If you’ve got a heavily-soiled floor, you may need to empty and refill a few times. Some mopping buckets have a drainage plug making them easier to empty.
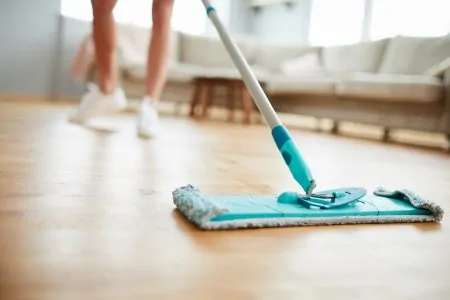
8. Mopping in Swirls
Mopping is mopping, right? Actually, there’s a knack for cleaning your floors. It may be tempting to zigzag around or mop in swirls, but this means you’re using more water in the same area.
As a result, you could be left with pesky streaks. Plus, you won’t know where you’ve cleaned already and could end up doing double the work.
Start in the far corner furthest from the door. Work in straight lines, being careful not to oversaturate the floor with water. Work backward towards the door. This prevents you from standing on clean spots and making them dirty again.
9. Not Following the Correct Dilution Ratios
Do you think that the more cleaning solution you use, the cleaner your floor will be? Don’t worry, many people believe this common mistake, but this isn’t true. It can actually make a mess of your home.
Using too much floor cleaner can make the floor sticky, streaky, and squeaky underfoot. Over time, it may also destroy the natural shine of your flooring. Alternatively, not using enough solution might not clean effectively at all.
Until you’re confident, try to avoid measuring any ratios by eye. The ratio is normally around two parts water to one part cleaning solution, though this could vary slightly.
Always follow the instructions on the product. You may also want to double-check that it’s suitable for your type of flooring too.
10. Manually Drying Floors Too Quickly
After cleaning the floors, some people get impatient. While you may be tempted to throw down a towel and quickly dry them, this could be a mistake.
Studies show that microorganisms are killed when they’re in contact with a disinfectant for around 10 minutes (7). While it could take a shorter amount of time, you don’t want to risk it.
So, avoid the temptation and let your floor air dry on its own to make sure it’s sanitized effectively. If it’s taking forever, open a window to let in more airflow and circulation.
FAQs

Can You Mop Too Much?
You can mop too much, which causes the floor to become waterlogged. Hardwood floors are susceptible to water damage, so you should limit your wet mopping. Also, ensure the mop is well wrung out to avoid excess moisture penetration.
If the water gets into gaps and cracks, it will swell the wooden boards and cause them to warp.

Should You Mop With Just Water?
You should mop with water and your chosen cleaning agent if you want to kill bacteria on your floor. Using just water will only remove dirt but not the bacteria. Plus, excess water is damaging to laminate and hardwood floors.

Can You Use Vinegar to Mop the Floor?
You can use distilled white vinegar to mop the floor. Products like this Heinz All-Natural Distilled White Vinegar are an excellent choice because it disinfects and cleans. Plus, it’s 100 percent natural, so it doesn’t damage your floor or the environment.

Should You Rinse After Mopping?
You should rinse the mop head after mopping to remove the dirt and clean it for when it next gets used. If you don’t rinse the mop, it will dry covered in bacteria and dust, which you will transfer back to your floor the next time you mop.

Why is My Floor Not Clean After Mopping?
The main reason your floor is not clean after mopping is you haven’t used enough cleaning agent. If you have sticky floors after cleaning, the reverse is true, and you’ve used too much detergent.
Everybody Makes Mistakes
So, how many mopping mistakes have you been making all this time? We bet you’re glad you’ve found out now, and you can switch up your routine!
Vacuuming is the best way to begin the mopping process. While you’re cleaning, work in straight lines for effectiveness. Follow the correct cleaning-solution ratios and refill your bucket with clean water often.
Don’t forget to wash your mop pads after every use and give your floor time to dry. Avoiding these widespread mopping blunders may help you achieve a pristine home.