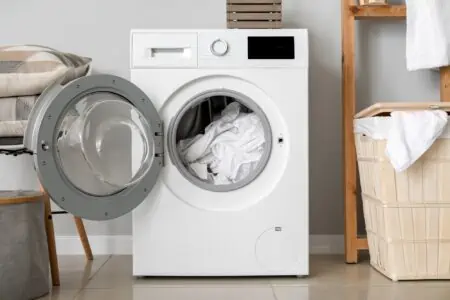
Does your washing machine sound like it’s playing the drums during each wash cycle? It’s noisy, loud, and vibrating like crazy. The drum of your washing machine may be wobbling causing problems when you’re doing your laundry.
This may be caused by problems with the drum itself or because your washing machine isn’t level. You will need to learn how to tighten a washing machine drum.
Key Takeaways
- Check drum bearings, shock absorbers, and suspension rings for damage in a loose washing machine drum.
- Make sure your washing machine is level by adjusting its legs and using a spirit level.
- Inspect and replace broken suspension springs, snubber rings, dampening straps, and driver bearings if needed.
- Prevent drum issues by balancing loads, running smaller loads, and periodically tightening nuts and bolts.
Why Is My Washing Machine Loose?
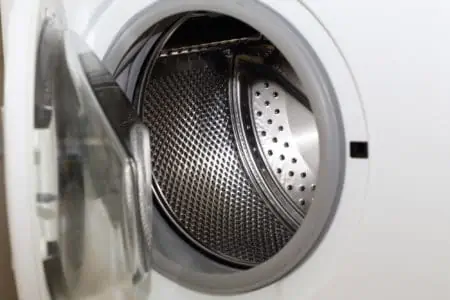
Washing machine drums can become loosened due to problems with the inner tub which is also called a basket. Washing machines have a rear drum that includes ball bearings which allow the basket of the drum to spin smoothly. When the bearings wear out or become broken, you will find that your washing machine will produce a loud sound and the performance is reduced.
Another reason the washer drum may be loose has to do with the tub bearing. If the tub is broken or worn out, then the drum will also become loose. This will reduce the performance of your washing machine.
Your washing machine may also be loose if the washer isn’t level.
How to Tighten a Front Load Washing Machine Drum
Tightening a washing machine drum begins with making certain that the machine is level. A washer that is not level will make banging noises when spinning. Here’s how to level a front load washer.
- Time: 20 minutes
- Difficulty: Intermediate
What You’ll Need
- Wrench
- Pliers
- Spirit Level
- Consider a helper to help lift your washing machine.
1. Lay Spirit Level on Washer
Lay the spirit level on top of your washing machine. Make sure that it’s on a flat surface. Now note the bubble inside the level. The bubble will be on the side of the machine that is higher.
2. Loosen the Locknuts
If you have metal legs, you will need to loosen the locknuts which are just under the dryer on the legs. You may need a wrench to do so. Turn it clockwise until it’s about ½ inch below the washing machine.
Plastic legs do not have locknuts to loosen.
3. Raise or Lower the Legs
Turn the metal legs clockwise to shorten them and counterclockwise to lengthen them.
Use pliers to grab the bottom of the plastic leg. Again you will turn the legs clockwise to shorten them and counterclockwise to lengthen them.
Shorten the leg on the bubble side of the spirit level and lengthen the leg on the opposite side of the spirit level. Check the level frequently to see when your washer is level.
4. Tighten the Locknuts
Use the wrench to tighten the locknuts on the metal legs by turning them counterclockwise until they’re tight against the machine. Be careful not to make them too tight as that will make it difficult to loosen the locknuts should you need to readjust your washer’s legs.
There is nothing else you need to do with plastic legs.
How to Tighten a Top Load Washing Machine Drum
- Time: 20 minutes
- Difficulty: Intermediate
What You’ll Need
- Wrench
- Pliers
- Spirit Level
- Consider a helper to help lift your washing machine.
1. Lay Spirit Level on Washer
Place the spirit level on the top of your washing machine making sure that it’s on a flat and level surface. Check the bubble which should be in the middle of the level if your washing machine is level. The bubble will swing to the side of your washer that’s higher.
2. Loosen the Locknuts
Metal legs will need the locknut to be loosened. Use the wrench to turn the locknut clockwise until it’s about ½ inch underneath the machine.
Plastic legs do not have locknuts.
3. Raise or Lower the Legs
You will turn the legs clockwise to shorten them and counterclockwise to lengthen them. Use the pliers to help you get a good grip on the plastic legs. You will likely be able to turn the metal legs without pliers.
You will shorten the leg on the bubble side of the spirit level and lengthen the other leg. Frequently check the level to see if your washer is level. If you have plastic legs on your washer, then you are now finished.
4. Tighten the Locknuts
Use the wrench to tighten the locknuts on the metal legs by turning them counterclockwise until they’re under the washer. Hand-tighten them the rest of the way, being careful not to make the locknuts too tight.
Tips For Fixing a Loose Washing Machine
Here are some tips on how to repair a washing machine drum when you have a loose washing machine drum.
Shock Absorbers
Make sure that the shock absorbers on your front load machine are not leaking fluid. They are placed between the outer tub and the base frame. If one of the shock absorbers is broken, it is best to replace all of them.
Suspension Springs
Both top load and front load washing machines have suspension springs. They hold the tub to the base or suspend the tub from the top.
You will need to make sure that these are connected. Again, if any one of the springs is loose or damaged, it is advised that all of them get replaced.
Snubber Ring
Top load washing machines have a snubber ring that’s made of plastic or felt. When it wears out, the tub will begin to touch the metal base below it.
In order to check the snubber ring, you will need to remove the suspension springs so it’s best to check both at the same time. You’re looking for dust or clumps on the snubber ring. This is a sign that the ring is wearing out and it needs to be replaced.
Dampening Straps
Washing machines have 4 dampening straps. These straps hold the washer tub to each corner of the machine. If any one of the straps fails, the washer will begin to vibrate. If this happens, all of the straps will need to be replaced at the same time.
Driver Bearings
Some washing machines have ball bearings between the tub spindle and motor shafts. If the casing wears out, the bearings will dislodge causing the tub to vibrate. This is a major repair that will require you to take your washing machine apart.
It’s recommended that you replace the entire unit if the bearings are worn.
How to Prevent Washing Machine From Getting Loose
To prevent your washing machine drum from going off balance and becoming loose, you will need to make sure that all of your loads are balanced. This means you will need to distribute the clothing evenly in the washing machine.
Run smaller loads. Avoid washing unusually heavy items or weighted blankets as they cause the drum to become off balance.
Make sure that your washer is level so that the machine doesn’t vibrate. You will also need to check for loose nuts and bolts periodically and tighten any loose nuts and bolts that you find.
Avoid moving your washing machine. However, if you must move it, be careful that it doesn’t fall.
FAQs

How Do You Know If Your Washing Machine Drum is Broken?
You will know that your washing machine drum is broken when you hear loud banging noises coming from it. The drum will hit the side and you may notice that the drum isn’t centered.
Laundry may also be coming out of the washing machine with rips and tears. This means that you may have a perforation in the drum.

What Holds a Washing Machine Drum In Place?
A washing machine drum is held in place by a hung suspension system that uses 4 suspension rods.

How Much Should a Drum Move In a Washing Machine?
A drum should have some movement inside a washing machine. In a top load washer, the drum should be able to be pushed from side to side easily.
You will also be able to gently push a front load drum from side to side as well. If you push up on the drum just behind the door of the washing machine, the drum will not move up and down very much. However, you will see more movement if you push up on the drum at the back of the machine.

Why Does My Washing Machine Shake Violently During Spin Cycle?
There are several reasons why your washing machine shakes violently during a spin cycle. You may have overloaded the drum, or the feet are not level, causing the washer to rock.

How Much Does it Cost to Replace Washing Machine Drum Bearings?
The cost of replacing a washing machine drum bearing ranges between $120 and $190 depending on the make, model, and your location.

Is it Worth Repairing a 7-Year-Old Washing Machine?
Knowing whether it’s worth repairing a 7-year-old washing machine depends on cost. If you paid a lot of money for the machine, it is worth repairing it. If it was a budget model, it could make sense to get a new one.
Tightening Washing Machine Drum
No matter what make or model of washing machine that you have, whether it’s a Samsung, Maytag, Whirlpool, or GE, sometimes the washing machine drum becomes loose. The first step is to make sure that the washing machine is level so it doesn’t bang excessively on the sides of the washing machine.
If the drum is not turning or reminds you of a tumbler, then you will need to troubleshoot the issue so you can tighten your drum and have a functioning washer again.