If you want to restain your deck, change the color, or remove old deck stains, you might be wondering where to start.
Learning how to remove stain from a wood deck is super important. Decks can add a lot of value to a home, so maintaining them is important. That means occasionally removing the existing stain and restaining.
We’ll share a nine-step method for removing stain from your decking, preparing the deck for new stain, and finding the right products. Soon enough, you’ll be well-versed in the world of deck staining!
Key Takeaways
- Remove old deck stain before restaining to ensure a durable and even finish.
- Use a stain stripper, power washing, and sanding to effectively remove old stain from a wood deck.
- Prepare the deck for restaining by cleaning it, checking for damage, and ensuring the wood is porous.
- Choose a deck stain that suits your environment, has low VOC, and comes in the desired type and color.
Do You Have to Remove Deck Stain Before Restaining?
It’s important to remove old deck stain before restaining.
First of all, this allows the new stain to absorb into the deck better, leaving you with a beautiful and durable finish. It also ensures that the new stain applies evenly without bumps, flaking, and holes.
However, if you are staining it the same shade or darker, you can go without stripping. But if the existing deck is in poor condition, we definitely recommend it.
How to Remove Stain From a Wood Deck
When undergoing this project, following the correct method is essential for outstanding results.
Blow your neighbors and guests away with results that have them asking, “Who did you hire to do this?” When you tell them you did it yourself, they’ll be mesmerized!
We’ll show you how to remove old stain via power washing, applying a stain stripper, and sanding.
- Time: 1.5 hours (plus waiting time).
- Difficulty: Intermediate.
What You’ll Need
- Stain stripper for deck coatings.
- Paint tray.
- Tarp.
- Push broom.
- Nylon paintbrush or long-handled roller.
- Stiff-bristled brush (optional).
- Putty knife (optional).
- Garden hose.
- Pressure washer.
- Long-handled sander.
- 120 or 150-grit sandpaper.
- Protective wear.
1. Prepare the Area
Remove all furniture from the area. Let your family know what you’re doing so that kids and pets don’t wander into the area. Cover surrounding vegetation with a tarp to avoid damage.
Since you’re working with power tools, you might also want to wear protective gear — like a face mask, safety glasses, and protective gloves. Since you’re outside and the ventilation is good, this isn’t necessary, but we recommend it.
Weather Tip
Make sure you carry this project out on a dry day that isn’t too cold. You don’t want to add rain or cold into the mix, as this could complicate the project. We recommend working in temperatures of at least 50 degrees Fahrenheit, but check the advice from the supplier of your stain stripper.
2. Sweep the Deck
Remove dirt and debris from the deck using a push broom.
3. Test the Stain Stripper
Pour the stain stripper into a paint tray. Apply it to a small area of the deck using the nylon paintbrush to ensure it doesn’t cause damage. If you notice that the stripper damages or pulls up the wood fibers, choose a different product.
If all is good, you can move on to the next steps.
4. Apply the Stain Stripper
We recommend applying the stain stripper with a long-handled roller, as this will dramatically decrease the time spent on the project. Evenly apply it to the decking moving in the direction of the wood’s grain.
5. Wait
It takes some time for the stripper to dissolve the previous stain. Check the manufacturer’s instructions for the recommended time. This is usually about 30 minutes, but some brands take much less time, while others take longer.
Keep an eye on the stain stripper. If it’s drying, then move on to the next step. You don’t want it to dry, as this makes it hard to remove the stain and stripper.
6. Remove the Coating
Use your garden hose to rinse the old coating away. You might need a putty knife or stiff-bristled brush to remove the coating in stubborn areas. Move in the direction of the wood grain when working in these areas.
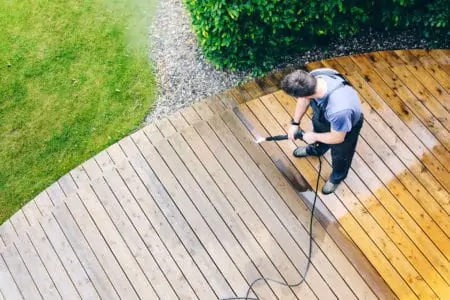
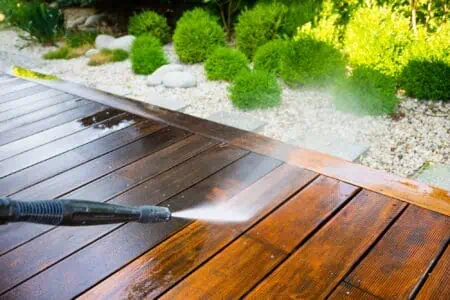
7. Rinse the Wood
When you’ve removed the old stain, wash down the deck with a pressure washer. Make sure that the pressure is no higher than 1200 PSI. Otherwise, you could damage the wood.
Hold the nozzle about 12 inches away from the wood to avoid damage. If you aren’t confident in your pressure-washing ability, hire a professional.
8. Dry the Deck
Leave the deck to dry for about 24 hours. Wait to move on to the next step until the wood is thoroughly dry.
9. Sand the Wood
Use 120- or 150-grit sandpaper to sand the entire deck.
Using a long-handled sander will make this task easier. But you may need to get on your knees to sand some harder-to-reach spots.
Continue until the deck is smooth — this prepares it well for the new stain.
How Do I Fix the Wrong Color on My Deck?
If you’ve gone through the laborious process of staining your deck, but dislike how the color turned out, don’t panic. Yet. There are things you can do to fix the situation.
If the color turned out too light, you can grab a darker color and apply it over the existing stain. To check that this will turn out how you would like, you can test the project on a scrap piece of wood. First, stain it with the original color; once it’s dry, add the new stain.
If you like the new color, apply it to your entire decking. On the off chance you don’t have any scrap wood, test this hack in an inconspicuous spot of your deck.
If the color turned out too dark or black, fixing it is a little trickier. However, you can lighten the color by sanding the deck with high-grit sandpaper.
Start with 220-grit sandpaper and work down to a lower number until you’re satisfied with the color.
Keep in mind that if you use a really coarse sandpaper — such as 100 or 80 — you will take off the existing stain.
The final option for lightening the stain is by using wood bleach. Follow the manufacturer’s instructions for application, and make sure to rinse the decking well with a garden hose or pressure washer.
Once the surface is dry, test a different semi-transparent stain on an inconspicuous spot of your deck. Once you’ve found your preferred color, apply it to the entire decking.
Tips and Tricks For Stain Removal
When learning how to remove deck stain from wood, we want to get it right.
While our above methods share almost everything you need to know, we wanted to give you some extra tips. This will help you with the overall process, as well as figuring out what to do if the deck paint or stain doesn’t come out properly.
- Remove peeling stain: Before stripping the wood, remove any peeling, flaking bits on your deck. Use a paint scraper to do so — this will make the overall process more manageable.
- Pay attention to the weather: If the weather is too dry, too hot, too cold, or too wet, the stripper will react to the humidity levels, and it won’t work. Read the manufacturer’s advice carefully to determine the best type of weather to work in.
- Tip for water-based strippers: When using a water-based stripper, don’t apply it with a natural fiber roller. This will result in an uneven application. Instead, use a nylon paint roller with a standard nap.
- Don’t apply with a sprayer: Always use a roller or brush to apply the stripper. Applying it with a sprayer might be tempting, but the stripper will block the nozzle.
- Be generous: Apply the paint stripper liberally. The more you apply, the easier it will be to remove the old stain.
- Using the correct water pressure: Make sure to use a low PSI (between 500 and 1200) and a 40 or 60-degree nozzle. Personally, we recommend a PSI of 500 or 600, but if you know your deck is made of harder wood, you can try it up to 1200. Too much pressure can damage the decking. If you’re in doubt about pressure washing, a garden hose will do just fine.
- Repeat: If the step-by-step method doesn’t remove all the stain, repeat the process. You might only need to apply the stripper to the stain that remains.
- Don’t slip: This is more of a safety tip but be aware that the deck stripper is slippery! Work in the far corner away from the exit and move backward, so you don’t go over the fresh stain stripper.
- Clean the deck: You might want to clean the deck with a specialized deck cleaner before sanding. This removes all evidence of the stain stripper and loosened residue. While it’s not necessary for every job, some people find it hugely beneficial.
How to Prepare a Deck for Restaining
Once you’ve removed the previous stain to reveal the bare wood, you might be thinking about restaining the deck. It’s super important as this can prevent moisture damage, stains, and breakage.
- Check the weather: It’s important to schedule your restaining project on a dry day. It takes around 24 hours for stain to dry, so you must have dry weather in the forecast too. We also recommend that it isn’t too hot (above 90 degrees) or too cold (below 50 degrees).
- Inspect the deck: Make sure that the deck is in good condition before restaining it. You want to remove nails or screws popping out, replace or repair warped deck boards, and check that the beams and joists are in good condition. Replace any soft, rotting wood before restaining.
- Test the stain: Before applying the stain to the entire deck, test it in an inconspicuous spot. Make sure that you like the look of it and that it adheres to the wood well.
- Sweep: Clear the area or furniture and plants. Sweep the deck with a push broom.
- Clean the deck: Clean the deck with a wood deck cleaner. Follow the manufacturer’s guidelines for specific instructions.
- Check the wood is porous: The wood must be porous for the stain to adhere properly. So while you’re cleaning the deck, check for mill gaze by pouring some water over the wood. If the drops of water don’t soak into the wood after eight minutes, the wood has mill gaze and it isn’t porous enough. Go over the area with a sander gently to smooth the surface — this should help to strip the wood back and open up the pores.
- Rinse: Rinse the deck well.
- Dry: Leave the deck to air dry completely.
- Blow debris: Use a leaf blower to remove any dust, debris, and organic particles. You’re now ready to restain!
Extra Tip
It’s a good idea to position a tarp or protective cover over your house siding. Nobody wants to be cleaning deck stains from brick, aluminum siding, or vinyl. This is just another task in this crazy series of events!
What to Look For in Deck Stain
When buying a new deck stain, it can be hard to know which one to get. There are so many options on the market. We’ve created a quick buying guide, so you know what to consider when shopping.
Compatibility With Your Environment
Depending on where you live and what the weather is like in your area, you will have to choose a specific deck stain. If you live in a wet area, choose one with a built-in protective sealer to prevent water damage.
If you live somewhere with high humidity, choose a mildew-resistant deck stain.
For hot, sunny areas, choose a stain with built-in UV protection. A semi-transparent, semi-solid or solid color stain can also prevent UV rays from damaging the wood.
Chemical Formula
When applying your wood deck stain, you might feel dizzy or lightheaded. This is usually because it contains too many chemicals. We recommend looking for something with low volatile organic compounds (VOC).
You won’t find something completely without chemicals. However, most new wood stains meet updated environmental rules, but always double-check.
Type
There are three main types of wood stains:
- Solid wood stain: This is the most durable type of wood stain, lasting up to five years. Note that it will hide the wood grain, giving it a more artificial finish. If you have exotic wood, like tigerwood, you might not want to use something that hides the naturally gorgeous grain.
- Semi-transparent: This type of stain lets you see some of the grain, which is a great choice if you don’t want to hide all the natural beauty of the wood. It still provides excellent protection; just note it’s not as durable as solid wood stain.
- Clear sealer: This type of wood stain doesn’t contain pigment or water repellent. So it’s not the most durable, and you will need to reapply it every year. However, it lets you see your wood’s natural beauty, which is great if you have something stunning or exotic.
Within these categories, you’ll also find oil-based or water-based stains. Oil-based stains penetrate the wood deeper, are easier to apply, and show off the grain better. It takes longer to dry, though.
Water-based stains have a wider choice of colors, and they dry quicker (within a few hours). Plus, they are less toxic to breathe in and easier to clean.
Color
Wood stains come in all sorts of shades and colors. It doesn’t matter which color you choose as long as you like it! You can find something natural, such as cedar or walnut, or go crazy with bright hues.
Lifespan
Lastly, check how long the stain is supposed to last. Does it need to be reapplied annually? Or is it supposed to last for five years?
On average, you can expect a stain to last three years. But if you want something more durable, don’t choose a stain that needs to be reapplied yearly, like a clear sealer.
FAQs

Do I Need to Remove All Deck Stain Before Restaining?
We think it’s a good idea, especially if the stain is over a few months old. This will provide a smooth and professional finish. However, if the stain is new and you want to add more or go darker, you don’t need to remove the deck stain.

Can You Remove Semi-Solid or Solid Deck Stain?
Yes, you can remove all types of deck stain using our methods.

Can I Use Water-Based Stain Over an Oil-Based Stain?
If you apply a water-based stain over an oil-based stain, it won’t penetrate the wood. It’s best to strip the oil-based stain off first. However, if you’re using a water-based topcoat over the oil, then it’s fine as long as you wait 72 hours for the oil-based stain to dry.

Will Vinegar Remove Deck Stain?
Vinegar is not strong enough to completely remove the deck stain. However, you can try a homemade deck stain remover that includes vinegar (though it might take a while)!
- Make a DIY paint stripper: Mix ½ cup of cold water and one cup of cornstarch to create a paste. Boil four cups of water and pour into a separate container. Add ¾ cup baking soda and one tablespoon of distilled white vinegar and stir together. Add the cornstarch paste. Increase the quantities as necessary.
- Apply: Apply the mixture to the wood in place of a stain stripper.
- Scrub: After a few minutes, scrub the deck well with stripping pads or a wire brush.
- Sand: Sand the deck with 60-grit sandpaper before increasing it to 80. Continue until the deck is smooth.

Can You Pressure Wash and Stain a Deck On the Same Day?
No — you must wait until the deck is 100 percent dry before staining. This usually takes 24 hours in ideal weather conditions.
Recapping the Deck Advice
When it comes to our outdoor spaces, we want to make them as beautiful as possible. If you have a deck that is peeling, or old, dark, flaking boards, it might be time for a new deck stain.
Following our method for how to remove stain from a wood deck can help you prepare for new stain. Once it’s done, it’s time for the fun part — choosing a new color and sprucing up your outdoor space!
Within a few days, you’ll have an excellent area for barbecue nights, romantic evenings stargazing, and watching the sunrise with a hot coffee.