You may spend time every day cleaning the inside of the house: doing dishes, catching up with laundry, dusting the surfaces. But what about the outside of your house?
Houses can get really dirty, whether that’s from weather elements, mud, or your kids playing with chalk or water balloons.
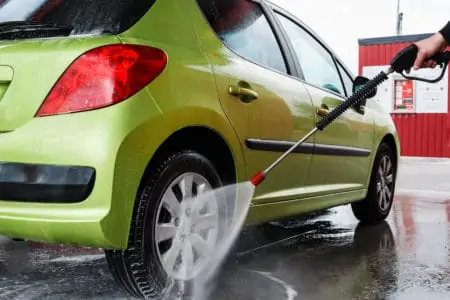
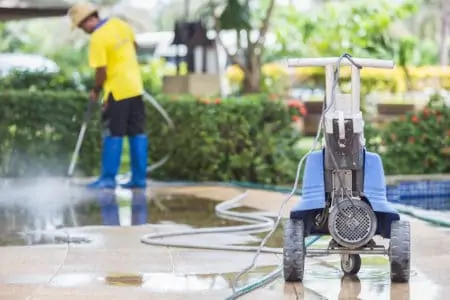
The best way to clean the outside of your house is to use a pressure washer. This gets the job done quickly and effectively. We’ll show you how to pressure wash a house so you’re clued up and prepared.
Key Takeaways
- Pressure wash your home every 2 years for a clean exterior.
- Use proper equipment: pressure washer, detergent, nozzles, and protective clothing.
- Prepare your house by covering vents, furniture, and plants, and turning off electrical outlets.
- Follow a 5-step process: scrub and rinse, fill up the pressure washer, spray, rinse, and let it dry.
Is Power Washing Bad for Your House?
Before you dig out your pressure washer, we do need to warn you about some potential damages. If you don’t pressure wash properly and safely, you could risk damaging your house.
Firstly, if the pressure washer is too strong and has a very high PSI (exceeding 1500), then you could risk breaking or cracking the siding of your home.
Another big risk is water damage. Some homes, especially those made from wood or brick, can easily let water into the walls. This will cause rot and moisture build-up if the water doesn’t evaporate quick enough.
Lastly, since you’re shooting the water upwards, you could also risk allowing moisture into your attic.
If you’re unsure, then a garden hose and some soap is an effective way to clean your house, even if it takes a bit longer.
However, following the proper precautions and steps means that pressure washing is still a great idea!
What You Need to Pressure Wash a House
So you want to pressure wash your home. Let’s gather the right materials first. That includes:
- Pressure washer detergent: You need detergent for cleaning your house as this will make it easier and quicker to clean. Also make sure to buy a detergent specifically for your house’s siding whether that’s vinyl, cement, stucco, or something else. We also recommend choosing an eco-friendly formula so you don’t damage grass, wildlife, and flowers nearby.
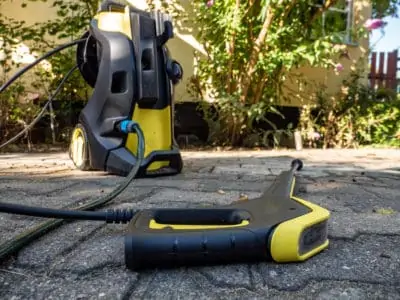
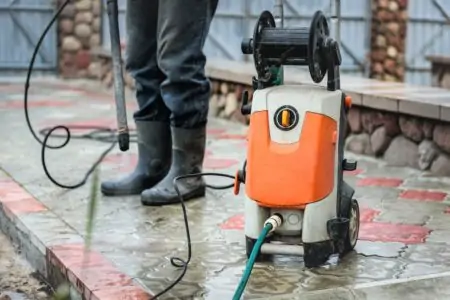
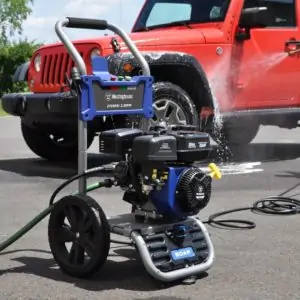
- Pressure Washer: Of course, you need a pressure washer, but not just any old pressure washer. We recommend choosing one with 2.3 GPM, which means that the pressure washer will be quite strong — roughly around 2,600 PSI. If that’s the case, you will need to stand quite far back when pressure washing to avoid damaging the house’s siding. If in doubt, choose one with a lower PSI, between 1200 and 1600, for softer siding such as wood or aluminum. Vinyl, and other strong surfaces, can handle higher PSI. You also must make sure it has a soap tank so that you have somewhere to put the detergent.
- Attachments: We recommend getting a brush attachment as this makes it easier to clean houses, especially with removing build-up and grime. You may also want an extension wand so that you have more flexibility.
- The Right Nozzle: When washing a house, you should use the 25 or 40-degree nozzle tip which gives you a wider stream of water. This can cover more of the house siding at once and prevent damage.
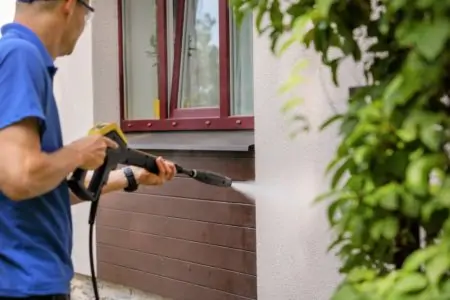
- Protective Clothing: We recommend wearing protective eye equivalent and thick sturdy clothing, rather than light loose clothing.
- Plastic Sheeting: You may want to use plastic sheeting to cover air vents to avoid water damage. You should also cover any nearby furniture, shrubs, and flowers to protect those as well.
What to Do Before You Start Pressure Washing Your House
Here are some things you should do before you start pressure washing:
- Put on your protective clothing.
- Remove or cover furniture. Also cover plants, shrubs, and flowers.
- Cover air vents.
- Avoid ladders. They’re not necessary and if you use them, you are risking your life as the side of your house will be slippery and you should not be using power tools while on a ladder.
- Check that the extension hose you’re using isn’t long enough to contact any power lines.
- Clear the area around you. Remove necessary furniture, other power tools, bikes, and more. You should also ensure that no kids or pets are nearby.
- Check if your house is painted with lead paint. If so, you should contact a professional to get rid of it before you start pressure washing.
- If you think or know your house has asbestos, contact a professional to test this. If you have asbestos, you may risk disturbing it with your pressure washer which can be a safety hazard.
- Turn off all electrical outdoor outlets and appliances. If you accidentally spray them, you could damage your home’s electricity system or cause a spark.
How to Pressure Wash a House
Now that you’re prepared, it’s time to get into the steps. Before you start, avoid doing this on a super sunny day as direct sunlight can dry the cleaning solution, making it very hard to rinse off.
1. Scrub and Rinse
If you have a long-handled brush, you should start with brushing the house’s siding to remove surface-level debris.
Then rinse the house’s siding with a regular garden house working from the top down. If you don’t have a garden hose, use a wide spray angle and low pressure with your pressure washer, standing far back.
Let the siding dry before moving onto the next step.
Top Tip
2. Fill Up the Pressure Washer
Add your detergent to your pressure washer, following the manufacturer’s advice on ratios.
One More Thing
3. Spray
You can now start spraying the siding. Work from the bottom up to avoid soap running over dry spots.
Move in horizontal sweeps along the house, gradually moving upwards but keeping a downward angle where possible while you are spraying. This will become impossible as you move higher up the siding.
Once you have applied the detergent, let it sit for 10 minutes before rinsing it off. This allows it to really tackle any mold, mildew, or dirt buildup.
4. Rinse
After the detergent has sat for at least 10 minutes on all areas of the house, you can now rinse it off. You should use plain water in your pressure washer to do this.
Instead of going bottom up, this time you’ll be working from the top down to properly rinse away all the soap. This also prevents dirty water from running over clean areas of the siding.
You may want to step a bit closer or use a higher pressure setting for this bit to ensure that all the detergent is rinsed away.
If you notice any kind of damage occurring, back up and use a wider spray nozzle.
5. Let It Dry
Let the siding dry completely before you do anything else to the side of your house, such as painting. This may take up to 48 hours, but we recommend waiting around a week if you’re going to paint.
Did You Know?
FAQs

How Often Can You Pressure Wash Your House?
Every two years is pretty standard. You could also check with the manufacturer of the siding, if possible, to see what the verdict is.
However, some people may need to pressure wash their house more often. If you live near a busy or dirt road, you may need to pressure wash the siding every few months. If you live near trees, you may experience sap build-up.
Storms and high winds can create more dirt and debris, increasing the frequency of how often you should clean your house.
The bottom line is: you don’t need to wash it that often, but if it’s dirty, you could increase the frequency.

How Long Does it Take to Pressure Wash a House?
It depends on the size of the house, but just to pressure wash should take between 30 minutes and two hours. Of course, you then need to let it dry which can take up to 48 hours.

What Is the Average Cost of Pressure Washing a House?
It depends if you already own a pressure washer, is renting one, or hiring a professional.
If you already own a pressure washer, then all you need to buy is the detergent, plastic sheeting, and protective equipment.
The average cost of renting a pressure washer for one day is around $40-100 per day, depending on what kind of pressure washer you go for (1).
Hiring a pro to do it could cost between $200 and $300 per day (2).
If you know you’ll get a lot of use out of a pressure washer, it’s best to buy your own. You can find them on the market in a range of prices, so hopefully, you can get one that suits your budget.

How Hard is it to Power Wash a House?
It isn’t hard to power wash a house, provided you have the correct equipment, extension wands, and have prepared the house exterior properly. You also need to cover electrical outlets and close all windows and doors.

What is the Best Time of Year to Power Wash a House?
The best time of the year to power wash a house in March and November. Cleaning your exterior surfaces after a harsh winter, or preparing them at the start of winter protects the siding and stops algae from forming.
Can You Use Bleach to Pressure Wash a House?
You can use bleach to pressure wash a house. Bleach is an effective remedy to tackle mold and mildew, and it cuts through the toughest algae with ease.
Hygienic House
Now that you know how to pressure wash a house, you can make sure that your outside is immaculate as your inside.
Whether you’re just wanting to spruce up your house, or you’re hosting a party, or you’re preparing to sell the house, it’s a good idea to pressure wash a house. It’s quicker and more efficient than using a garden hose.
Follow our five-step process for amazing results that are safe on your house, you, and the environment.