There’s nothing more satisfying than those amazing before and after pictures of someone’s dirty to clean deck. And how is that achieved? With a pressure washer.
In this post, we’ll teach you how to pressure wash a deck so that your outdoor area looks fresh and rejuvenated! Now you won’t grimace every time you step out the back door.
Instead, you’ll be ready to throw a party, have your morning cup of coffee outside, and enjoy long summer evenings on your beautiful — and super clean — deck.
Key Takeaways
- Use a 600 PSI pressure washer for soft wood and a 1200 PSI pressure washer for harder wood.
- Hold the pressure washer nozzle a few feet from the deck and use sweeping motions with the grain.
- Overlap each area slightly to avoid missing spots and maintain a consistent cleaning pattern.
- Optionally, use a deck-cleaning solution for mold and mildew, then sand and seal the deck for added protection.
Is It Safe to Pressure Wash a Deck?
It is definitely safe to pressure wash a deck, so long as you take the right precautions. If you use a pressure washer with a PSI higher than 1500, you risk damaging the decking. This could cause scratching, splintering, or breaking.
The best PSI for your deck is around 500-600 PSI for soft wood, such as cedar or pine. For harder woods, you could go higher, but don’t exceed 1200 PSI.
Here are some more tips for safely pressure washing your deck:
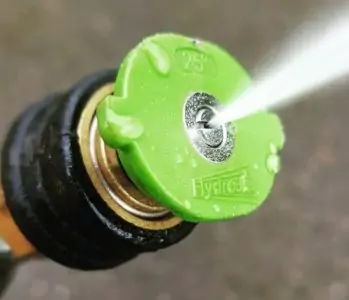
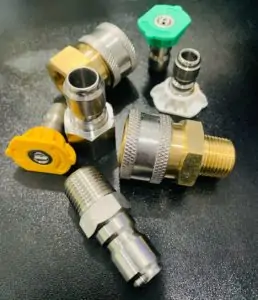
- Use a wide-angle tip when pressure washing. Between 40 and 60 degrees is ideal. This ensures that the water isn’t super concentrated which can lead to damage.
- Go with the grain rather than along it. With any wooden surface, you could also wash with the grain. This prevents unsightly and obvious marks that don’t blend into your surface.
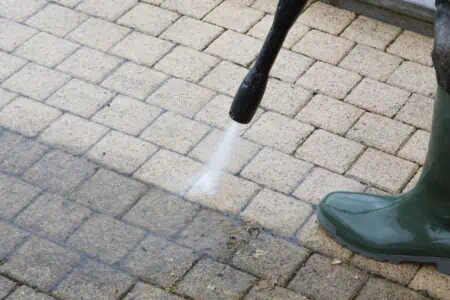
- Keep the nozzle about two feet away from the decking. Maintain that distance while you wash.
- Keep it moving! Don’t stop and keep the nozzle still over one area for long. Even if you are trying to remove a stubborn stain, keep the nozzle moving a little bit.
How to Pressure Wash a Deck
Let’s get your deck sparkling clean!
Keep In Mind
What You Need
- A pressure washer (around 600 PSI for soft wood or 1200 PSI for harder wood).
- A wide-angle tip.
Instructions
With these handy instructions, you’ll have your deck clean in no time.
1. Prepare to Pressure Wash
Before you get started, you need to take the right precautions.
Firstly, you should make sure that all kids and pets are out of the way to ensure they don’t get hurt.
Secondly, you must wear some protective gear. This includes thick and sturdy clothing rather than loose and light clothing. Make sure to wear safety glasses as well in case the pressure washer flicks any particles into your eyes.
Last but not least, remove any furniture and objects from the deck. Protect the surrounding area, such as shrubs and flowers, with some plastic sheeting.
2. Check the Nails on the Decking
Check if there are any nails protruding over the surface of the wood. This can cause you to trip or make it hard to move your furniture around afterwards.
You’ll need to get a drift pin which can be found at your local hardware store. Hammer the nails back into the wood until the nail is level with the wood.
3. Clean the Deck
It might seem a little pointless to clean before you pressure wash, but this helps to ensure that you don’t force any residue or debris into the wood fibers. Simply sweep your deck and then rinse it with a garden hose to ensure that it’s free of debris for pressure washing.
4. Choose Your Settings
Before you get to washing, you need to choose the pressure washing setting. Granted that you’ve chosen the correct pressure washer and PSI for your wood, all you need to do now is choose your fan tip.
We recommend choosing anything between 40 and 60 degrees. You could also use a rotating tip if you know how to use it carefully.
Once you’ve chosen your setting, test it in an inconspicuous area, such as a stair tread, to ensure that it doesn’t etch or damage the wood.
5. Start Washing
Time for the fun part! If you can adjust the PSI, start with a lower number and work your way up. This ensures that you aren’t causing any damage to the wood.
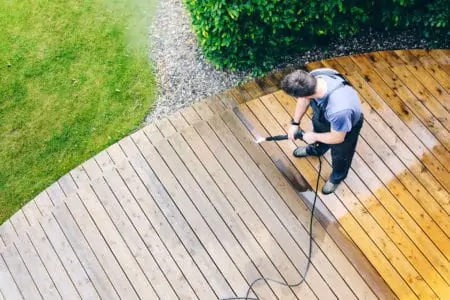
Keep the wand tip a few feet away from the deck surface, and move in sweeping motions slowly with the grain.
It’s important to walk along with your pressure washer, rather than just pivoting or moving your arm. This will create an inconsistent length between the pressure washer and the decking.
We also recommend going from the point opposite the deck’s exit, so that you can retreat back down the stairs or into your home afterwards without walking over your nice clean deck.
Last tip: make sure to overlap each area slightly to avoid hot spots, missed spots, or visible cleaning edges.
6. Get Rid of Mold and Mildew
This step is optional and only necessary if you have mold, mildew, or other dark stains. You’ll need to get a deck-cleaning solution with sodium hydroxide in it to help brighten it and attack stains. Make sure that the product is made for deck wood and can be used in a pressure washer.
You should also ensure your pressure washer has a detergent or soap tank.
Mix the solution following the packaging instructions. Then apply it to the decking using the same method as explained in step five.
Caution
7. Sanding and Sealing
If you’ve followed step six, you’ll now need to sand and seal it.
In fact, even if you have just power washed it, the fibers could still have risen, creating a rough surface that you may need to stand back. This is especially important to note if you’ve power washed handrails.
Before sanding, make sure that the wood is 100 percent dry.
You may be able to spot sand with sandpaper if it’s not too rough. But if you need to sand the entire deck, you should use a random orbit sander with a five-inch sanding pad. Carefully move this along the decking, going with the grain and not spending too long in one area.
When resealing, find a sealer that is suitable for your wood type and apply it following the packaging instructions.
Wait until the deck is completely dry before putting your furniture back.
FAQs

Should You Use Soap When Pressure Washing a Deck?
You should use soap when pressure washing a deck, especially if you are removing mold, mildew, and green algae. You can use plain water, but soap increases the potency of the pressure washer.

Will Power Washing Remove Stain From Deck?
Power washing will remove stains from a deck. Power washing is one of the best ways to lift stains and strip away weather damage.
Dazzling Decking
Now that you’ve learned how to pressure wash a deck, yours should be looking good as new! Be sure to follow the steps thoroughly. Prepare the area, check the nails, clean the deck and choose your settings.
Then start washing along the grain, working your way back to the exit so you don’t need to walk over it. Last but not least, use a stripping or brightening solution to get rid of mold, mildew, or dark stains.
You may need to sand the decking back, too. If not, wait until the decking is 100 percent dry, then return your furniture, and enjoy your new clean deck!