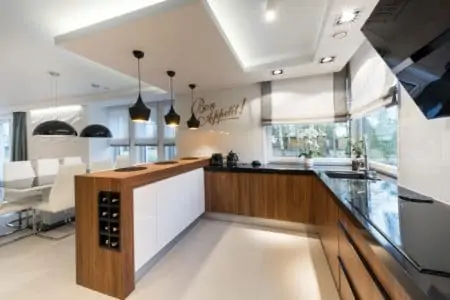
We spend a lot of our time in the kitchen. It can be a pretty overwhelming place if it’s messy, unorganized, and chaotic.
With these 20 organization hacks, we can help you get your kitchen to a state of satisfying bliss. Next time you go into your kitchen, you’ll know exactly where everything is. Plus, it’s much easier to keep it clean when everything has a place.
Keep reading for the ultimate guide on how to organize your kitchen like a pro.
Key Takeaways
- Utilize cabinet shelves: Install cabinet shelves to better organize your kitchen items and maximize space.
- Create zones: Organize items into specific areas, such as a baking cupboard, snack cupboard, and utensil drawers.
- Use wall and ceiling storage: Save space by hanging pots, pans, and spices on walls and ceilings.
- Keep appliances off the counter: Store less frequently used appliances in cabinets or pantries to reduce clutter.
How to Organize Your Kitchen
Here are 20 hacks for organizing your kitchen to perfection. Whether you choose one or all of them, your kitchen should be a much tidier and more manageable place.
1. Mason Jars for Utensils
An easy way to store those ever-scattered utensils is by using mason jars. You can even upcycle old jam and peanut butter jars to save money. An extra tip is to put the mason jars on their side inside of a drawer. Then insert the handles of the utensils into the jars and stop the utensils from slipping and sliding all over the place.
2. Cabinet Shelves
This is a life-saver when it comes to kitchen organization. Instead of stacking everything on top of each other in a crazy fashion, use cabinet shelves. There are tons available on the market so that you can find the perfect size and style for you. It also helps you utilize every inch of the cupboard.
These are great for everything from plates, cups, snacks, tea, medicine, and more.
3. Organize Around Your Stove
The stove is the central part of most kitchens, where cooks spend a lot of their time. It’s important to have the crucial tools and ingredients within reach to make meal prep a lot easier. So here are three tips:
- Keep your utensils to the right or left of the stove, depending on which is your dominant hand. For instance, if you’re right-handed, keep the utensils to the right.
- Keep tools and utensils you don’t use as often to the opposite side. This can include things like a pizza cutter, a can opener, and a garlic press.
- Keep your spices near the stove, too, so you can grab them quickly as you need them.
4. Under-Sink Storage
We recommend dedicating a whole afternoon to under-sink storage. Investing in quality storage solutions and organizing everything will really pay off.
It’s a good idea to get some tiered baskets for storing things you often use, such as cloths, dish soap, and rubber gloves. Keeping things in baskets also makes it easy to group items together, such as laundry supplies, dish supplies, cleaning supplies, and more.
5. Make Zones
It’s helpful to have zones in your kitchen, especially when organizing the different cabinets and drawers. Each of our drawers and cabinets serves a different purpose. For instance, we have:
- A baking cupboard.
- A snack cupboard.
- Non-perishable food cupboard.
- A pots and pan drawer.
- A baking tray drawer (I don’t know why we have so many baking trays!).
- A tea and coffee cupboard.
- A mug cupboard.
- A plates and bowls cupboard.
- A glasses cupboard.
- A miscellaneous cupboard.
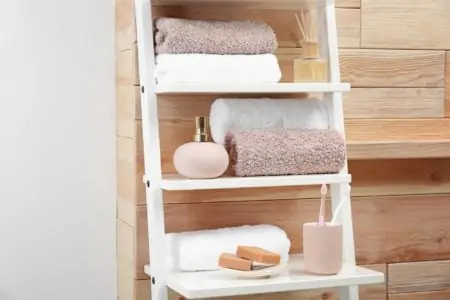
6. Spruce Up Around the Sink
No matter how you organize it, the dish soap, surface cleaner, and other cleaners stacked by the sink just don’t look cute. But transferring everything to cute amber bottles can make this area look 10x cleaner immediately.
7. Hanging Pot Rack
This is definitely something we want to do in our kitchen soon. Shoving pots and pans into a cupboard is both chaotic and not as good for the durability of your pans. They can get scratched and damaged. Instead, why not hang your pots and pans on a drying rack? It saves space and is super cute.
8. Storing China
If you have any china items, you should store them properly to prevent damage. We recommend wrapping everything in paper before storing it. Then put them in a box on their side as this prevents the most damage and pressure. Cardboard dividers also come in handy to ensure the china doesn’t bump against each other.
9. Lazy Susans and Turntables
Using Lazy Susans or turntables in your cabinets can save space and keep everything organized. Have one for spices, condiments, curry pastes, and more.
10. Dry Ingredients in Jars
Invest in some quality jars for storing dry ingredients like cereal, pasta, flour, popcorn, and more. This is a fantastic way to organize your kitchen, especially once everything is labeled. Not only is it super practical and can actually save space, but it’s so cute!
Don’t Forget
Write the expiration date on the back of the jar. You may want to keep the cooking instructions and tape that to the back or bottom of the jar, too.
11. Keep Appliances Off the Counter
Okay, obviously, your toaster and microwave and other daily items should stay. But other appliances such as a blender, slow cooker, and milk frothing machine should stay off the counter to minimize clutter. Keep it in a kitchen cabinet or pantry instead.
12. Cupboard Walls
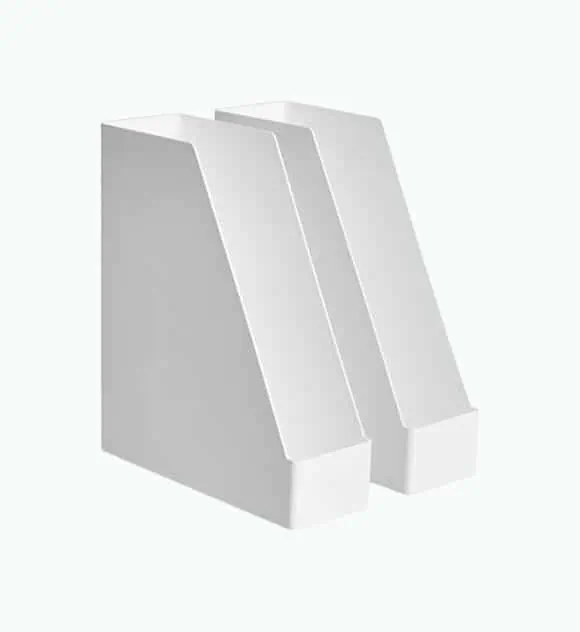
Make use of your cupboard walls by tacking magazine racks to the inside of the cupboard. If you just have tons of stuff, this can be a great way to utilize dead space. You can use these for storing cloths, dish towels, various utensils, and more.
13. Wall-Mounted Spice Rack
If you’re anything like us, you have a ton of spices. Too many to count! They can quickly take up a ton of cupboard space. That’s why we recommend a wall-mounted spice rack.
Go even further by putting them into cute glass jars and label them. Why not alphabetically, just to be an organized pro?
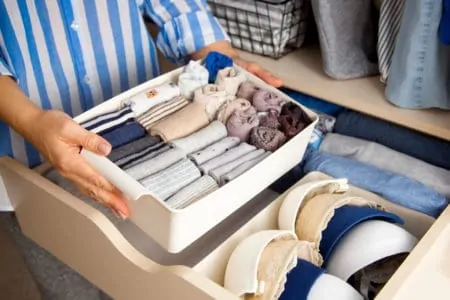
14. Drawer Bins
Drawer bins are a life-saver when it comes to organizing drawers. You can use these for cutlery, all the miscellaneous stuff that builds up in a kitchen, but also — snacks! Separate snacks in these bins and keep track of what you have and what you’re running out of.
15. The Right Drying Rack
Don’t waste a precious inch of counter space by choosing an over-the-sink drying rack. These save space by utilizing the space above the kitchen sink. Plus, the wet dishes can drip dry directly into the sink! They also tend to hold a lot more than a normal drying rack, so you’ll love this if you have a big family.
16. Hooks. Everywhere.
You can really tell we’re into utilizing dead space here. Putting hooks everywhere is a great way to utilize every inch of every cupboard. Install these and use them to hang cups, mugs, and utensils.
17. Organize Your Fridge
An organized fridge can make all the difference and help you utilize space.
Here are three tips for an organized fridge:
- Make an “eat me first” box or area with items that are expiring soon.
- Label boxes with leftovers with what’s inside and when you made it, so you don’t wait too long to eat it.
- Use fridge bins to organize groups of food together.
18. Sort That Tupperware
Tupperware is probably one of the most annoying things to organize in the kitchen, but our top tip is: keep the lids and the tubs separate. This may seem counterproductive because you’re more likely to lose the lids rather than if you kept the lids on the accompanying container. But it saves you space.
Stack your Tupperware inside of each other, starting from biggest to smallest. Then keep your lids in a separate basket or tub to keep them all together.
19. Make It Make Sense
Don’t put items somewhere just because it looks cute. Think practically. If you can’t reach the highest shelves in your kitchen, don’t store your cups and plates up there. Instead, put the things you use most often at eye level.
20. Pet Food
Last but not least, this one’s for the pets! It’s no secret that pet food doesn’t come in cute packaging, but that doesn’t mean it needs to stay that way. Transfer the pet food to cute containers like mason jars. Or put the pet food inside a larger cute container like a wicker basket or a kitchen cabinet.
Top Tip
Make sure to write the expiration date on the boxes or jars.
FAQs About Organizing Kitchens
How Do You Decide Where to Put Things in Kitchen Cabinets?
We think the best way to do this is to create zones. Have separate cupboards for appliances, tableware, tea and coffee, snacks, non-perishable foods, baking, etc.
Ensure that the stuff you use the most (for us, that’s mugs, tea, coffee, and plates) is the easiest to access. Cupboards that include stuff you don’t use as often should be the furthest or highest.

How Do I Organize My Deep Corner Kitchen Cabinets?
Oh, those dreaded deep corner kitchen cabinets. How on earth should we use them? Well, there are a few options.
- Lazy Susan: Firstly, you can get a tall lazy susan with a few tiers on a rotating pole. This allows you to spin the plate round to access what you need when you need it.
- Super Susan: This goes one step further than the Lazy Susan. It has a pie-shaped wedge cut from it so you can shut your cupboard door, and it’s on a fixed shelf with a rotating ball. This allows you to place heavy objects on it. Many cabinets come with these pre-installed, or they’re available for installation from your manufacturer.
- Don’t store the essentials: If you don’t want to install other storage methods into these cupboards, utilize the space sensibly. Store items you don’t use as often in these cupboards. That’s what we do! We keep our slow cooker, food processor, and our serving dishes back here. Yes, it’s a pain to get them out, but it’s a pain we only need to suffer 1-2 times per month.

What Do You Store in Kitchen Drawers?
Here is a list of things you can store in your kitchen drawers:
- Utensils.
- Baking trays.
- Oven dishes.
- Pots and pans.
- Spices.
- Snacks.
- Tea and coffee.
- Charging station for your electronics.
- Takeaway menus.
- Tote bags.
- Dish towels and clothes.
- Batteries and other such items.
- Bibs and baby supplies.
How Can I Organize My Kitchen Cabinets in My Small Kitchen?
Thankfully, you can use all of our tips for small kitchens. Making use of dead space is our number one tip, so add hooks, cabinet wall storage, and use cupboard shelves. Some more tips include:
- Less is more: Don’t overfill your cabinets, and don’t buy too much stuff at once. Instead, eat what you have already before stocking up on more food.
- Use wall storage: Hang things up like pots, pans, spices, and utensils.
- Add extra shelves: Who says you can have too many shelves? Adding more shelves gives you more storage space.
- Use drawer bins and organizers: This will utilize every inch of space while maintaining an organized system.
- Hanging baskets: Instead of storing fruit and veg in bowls on the counter, use hanging baskets to save precious counter space.
- Roll-up drying racks: These are perfect for small kitchens. They go over your sink, saving counter space, and they’re easy to store when you’re not using them.
- Space-saving sink caddies: These will also save precious counter space while providing a great place for your soap, dishcloth, and other such items.

Why It is Important to Properly Organize the Kitchen?
It is important to properly organize the kitchen because it helps you to keep it clean, speeds the cleaning process, and you can find what you need when cooking.

How Many Hours Does It Take to Organize a Kitchen?
The amount of time it takes to organize a kitchen depends on the size of the space. On average, it should take between one and four hours to complete the task.

How Do I Organize My Fridge?
The best way to organize your fridge is to create zones like an “eat me first” compartment. Group foodstuffs together, and label everything clearly.
Keep Calm and Organize Your Kitchen
Taking time to spruce up your kitchen, create zones and organize the chaos will help you long term. It creates a more functional and pleasant environment. So go turn on some tunes, get the family involved, and get to organizing using our 20 amazing hacks.