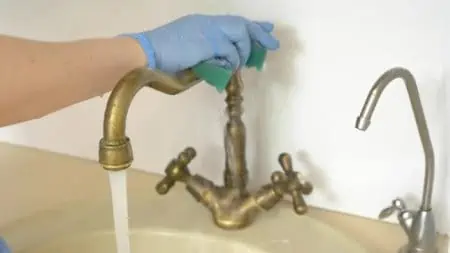
Is your Xbox One covered in dust? Is it running slow? It might be bogged down by dirt and debris.
Don’t worry — we can help you fix it. We’ll show you how to clean an Xbox One, including the interior.
Keep reading for the best cleaning methods and top hacks for maintaining your console. Remember that these tips are for the Xbox One. So if you have the 360, original, or Series X, we don’t recommend following these methods.
Key Takeaways
- Regularly clean your Xbox One to prevent overheating, loud noises, and slow performance.
- Use a microfiber cloth and unused toothbrush to clean the exterior, and compressed air to clean the fan.
- Clean Xbox controllers by removing batteries and using rubbing alcohol, cotton buds, and a toothpick.
- Avoid using too much water, harsh chemicals, wire brushes, and disinfectant wipes when cleaning your Xbox.
Why is it Important to Clean an Xbox One?
If you want your Xbox One to run smoothly, you need to clean it. If you don’t, dirt and dust can accumulate in and on the console, causing issues. This includes:
- Overheating.
- Loud noises.
- Lagging, slow games.
- Breakage.
How to Clean an Xbox One Without Taking It Apart
Cleaning an Xbox One can be quick and easy. You can give it a general clean without opening it. We’ll share the best method for dusting and cleaning your Xbox One — this is great for weekly cleaning.
Before you get started, turn off your Xbox and unplug it.
- Time: Five minutes.
- Difficulty: Easy.
What You’ll Need
- Microfiber cloth.
- Rubbing alcohol (optional).
- Unused toothbrush.
1. Dust
Remove excess dust weekly. This is super easy — all you need to do is wipe a dry microfiber cloth across the surface of your console.
Move in circular motions to buff out smudges and fingerprints.
2. Brush Excess Dust
Dust can settle into nooks, crannies, ridges, and tight corners. For this, brush the console clean with an unused toothbrush. The bristles will loosen and remove dirt.
3. Extra Cleaning Power
If you need to remove stains and marks or sanitize your console, dampen a microfiber cloth with rubbing alcohol. Then repeat step one, wiping down the console in circular motions to remove dirt.
Don’t forget to dry the console with a microfiber cloth before you get playing again.
Top Tip
Wear rubber gloves while dealing with rubbing alcohol, as it may dry out your skin and cause irritation.
How to Clean Xbox Controllers
When Xbox controllers are dirty, they can be hard to use. Is your Xbox controller sticky and not working properly? Let’s get it clean.
- Time: Five minutes.
- Difficulty: Easy.
What You’ll Need
- Microfiber cloths.
- Rubbing alcohol.
- Small bowl or container.
- Cotton buds.
- Rubber gloves.
- Toothpick.
1. Remove the Batteries
If you leave the batteries in, it can turn your Xbox One on. When you’re cleaning, you might accidentally start going through your games or settings.
2. Clean the Controller
Pour some rubbing alcohol into a bowl or container. Dampen a microfiber cloth in the solution and wring it out well. You don’t want to oversaturate your controller.
Wipe down the Xbox One controller. The rubbing alcohol will deep clean it, removing germs, grime, and dirt.
3. Clean Nooks, Crannies, and Corners
Dip a cotton bud into the rubbing alcohol and use it to clean the buttons and the sides of the buttons. Make sure to get underneath the joysticks, too.
Use the toothpick to remove gunk from the controller cracks. This includes the side of the controller and around the buttons.
How to Clean an Xbox Fan
Cleaning the fan will help your Xbox to run smoothly without lagging. We’ll be cleaning it with compressed air for the best results.
- Time: Five minutes.
- Difficulty: Easy.
What You’ll Need
- Compressed air.
- Old toothbrush.
1. Turn Off the Console
Start by turning off your console and unplugging it. Move it to an area with good airflow, as there might be some dust swirling around in a minute.
2. Use Compressed Air
Aim a can of compressed air, such as iDuster, at the air vents. Apply the air and watch dust and dirt blast out the vents. Do this for about a minute to ensure the best results.
3. Brush the Vents
Use your old toothbrush to brush the vents and remove any settled residual dust.
How to Clean an Xbox One Disc
Besides cleaning the unit, keeping your game discs clean is important. If you have a faulty disc, try this cleaning method.
- Time: Five minutes.
- Difficulty: Easy.
What You’ll Need
- Microfiber cloths (or lens cloths).
- Water.
- Isopropyl alcohol.
1. Dust the Disc
Wipe the disc with a microfiber cloth from the center to the edges in straight lines. Hold the edges of the disc rather than the middle. You don’t want to add more dirt and dust.
2. Clean the Disc
Dampen a cloth in water. If you want extra cleaning power, make a 1:1 solution of water and isopropyl alcohol.
Wipe the disc from the center to the edges going in straight lines.
Expert Advice
Don’t soak the disc; you could permanently damage it. When dampening your cloth, wring it out well, so it’s just slightly damp.
3. Dry the Disc
Once the disc looks clean, dry it with a microfiber cloth.
How to Open and Clean an Xbox One
When you need to deep clean the interior of your Xbox One, you’ll need to open it. We’ll show you how to disassemble the controller and the console to tackle interior debris. Keep in mind that this is a bit of a risky experiment, so you might want to take the unit to a professional cleaning service.
- Time: One hour.
- Difficulty: Expert.
What You’ll Need
- Plastic prying tools.
- Screwdriver.
- Old toothbrush.
- Compressed air.
- Cloth.
- Toothpick.
1. Unplug
Make sure to turn the unit and the controllers off. Unplug the console.
2. Remove the Grill
First, remove the grill near the eject button. Insert your plastic prying tool (such as a plastic screwdriver) into the back left gap and lift the grill off.
3. Lift the Cover Off
There’s a small black cover over the eject button. Simply pull this out to remove it.
4. Unclip the Xbox Cover
You will need to remove the back casing. This is quite tricky. On the back left, you will see a diagonal black cover with a slight gap.
Pull the bottom half while pushing down the top half, and it will start to lift. You will hear the clip pop, which means it’s unattached. However, you can’t remove it yet.
Holding the piece unclipped, grab your plastic screwdriver and insert it where the warranty sticker is or was. This will unclip the back cover.
With your plastic screwdriver, push the cover above the grill fan at the side of the unit. Push it upwards, and the clips will keep coming undone. Keep going down the fan until the cover comes off.
Warranty Info
If you rip or remove the sticker by doing this, you will void your warranty. You can remove the sticker with a hairdryer, so it doesn’t rip. Once your console is back together, put the sticker back on the unit.
5. Open Cover Carefully
You must be extremely careful during this step. At the front of some Xbox Ones is a ribbon cable that attaches the front plate to the circuit plate. If the ribbon cable gets damaged, your touch buttons won’t work, so you won’t be able to turn your Xbox back on.
To open the Xbox, lift the cover from the back, ensuring not to move the case too much at the front.
With your free hand, you will need to unplug the ribbon cable. Notice the blue part that is wrapped around the control board.
Get your finger into where it connects, and flick the blue part up. Then pull the cable out gently. Don’t force it.
Thankfully, the newer Xbox Ones don’t have the ribbon cable, so your Xbox cover might be much easier to remove.
6. Access the Fan
If your Xbox One has a plate covering the fan, undo it with a screwdriver. Keep the loose screws in a little jar, so you don’t lose them.
7. Brush the Fan
Use a soft-bristled brush to clean dust from the interior and around the fan. Lift the metal casing off to make sure you clean both sides of the casing.
Gently brush the fan blades, too. Use an old toothbrush to get a deeper clean of the fan, nooks, vents, and crannies.
8. Use Compressed Air
Use a little bit of compressed air to blow on the fan to remove excess dust and debris.
9. Reassemble the Xbox One
Repeating the steps from above, screw the Xbox One back together and clip it back into place.
10. Disassemble the Controller
Now it’s time to take apart the controller. You can remove the side flaps with your fingernails. Otherwise, use a plastic prying tool.
Unscrew the exposed screws with a screwdriver. Keep them aside in a little jar or bowl, so you don’t lose them.
Behind where the batteries live, you’ll find a little screw. Remove that, too.
Remove the faceplate of the controller.
11. Clean Interior
Use your toothbrush to wipe down the interior of the plates you’ve removed. Don’t run your toothbrush over the control board.
Dampen a cloth with water and wring it out extremely well. Wipe down the interior of the handles (don’t dampen the control board) to remove dirt and debris. Use a toothpick to loosen small pieces of grime and dirt.
Repeat on the inside of the face plate.
12. Reassemble
Using the same method as above, put the controller back together. Screw it in place, and then click the side flaps back onto the controller.
What to Avoid When Cleaning an Xbox
Here are some cleaning products you should avoid. They will cause damage to your expensive and beloved console:
- Too much water: A slightly damp cloth is fine, but too much moisture will saturate your console and permanently damage it.
- Harsh chemicals: Isopropyl alcohol is fine, but you should avoid all-purpose cleaners, bleach, and ammonia.
- Wire brushes: These are too heavy-duty and will cause damage.
- Disinfectant wipes: They produce too much moisture and harsh chemicals.
Xbox Maintenance Tips
Keep your Xbox in the best condition using these hacks:
- Dust often: Wipe your Xbox down with a microfiber cloth as often as possible. We recommend weekly dusting.
- Clean the exterior often: Every three months, dampen a microfiber cloth in soapy water. Wring it out really well and wipe the console to remove dust, debris, and dirt.
- Keep it in a well-ventilated spot: Don’t let dust gather on your Xbox. Keep it in a well-ventilated and clean room.
- Keep away from kids and pets: Don’t leave your Xbox somewhere your cat can scratch it, or your toddler might knock it over.
- Use a controller shell: A controller shell or case can protect your controller from dirt, spills, and dust.
FAQs

Is it Safe to Vacuum Your Xbox?
Microsoft advises against vacuuming your Xbox. The vacuum can transmit static electricity, damaging the Xbox interior.

Why is My Xbox Running Slow?
Here are the most common reasons your Xbox is lagging:
- Slow connection: Keep your Xbox within range of your router or use an Ethernet cable.
- Full storage: The Xbox can run slowly if your hard drive is full. You might need to delete old games or apps.
- Clear the cache: Delete temporary data from your Xbox by clearing the cache.
- Failing internal hard drive: If your games glitch and freeze, or your console doesn’t respond to your control, the hard drive might be failing.
- Dust: Dust is a huge reason why Xboxs run slowly. If the fan is clogged with dust, it could slow everything down.

How Do You Hard Reset the Xbox One?
If you want to reset your Xbox One to factory settings, follow these steps:
- Press the Xbox (power) button on your controller to open the guide.
- Select Profile & system > Settings > System > Console info.
- Select Reset Console.
- You’ll see three options. For a hard reset, select Reset and remove everything.
If you’d like to troubleshoot the Xbox One without removing your games and apps, click “Reset and keep my games & apps” instead.

Why Does My Xbox Controller Keep Scrolling?
This is usually down to an issue called drifting. You should take the controller apart and clean the interior.
Try updating the controller firmware, too. In the accessories app, test the controller buttons.
If this doesn’t work, you might need to get the controller repaired. Otherwise, we recommend ordering a replacement if it’s still under warranty.
Smooth Gaming
When you know how to clean an Xbox One controller and console, your gaming experience will be much smoother. It’s important to dust your console and controller weekly.
You can do deep cleaning around every three months and take your controller and console apart if necessary. But you can avoid this hassle by staying on top of your gaming cleaning routine.
Next time your game is loading, take a microfiber cloth and wipe down your console and controller. You won’t regret it.