To keep your wax warmer working well and smelling good, you need to clean it frequently. So take a break from your spa-like environment and follow our instructions.
We’ll show you how to clean your wax warmer using five different methods. Some are a little easier than others, but it all depends on what cleaning tools you have at hand.
Keep reading for the best methods for getting your wax melter spotless!
Key Takeaways
- Clean wax warmer after every use to prevent debris, dust, and wax residue buildup.
- Methods for cleaning include pouring out wax, using a cotton ball, using a scraper, with a wax liner, or placing in the freezer.
- Reuse old wax for firestarters or DIY projects but not for fragrance purposes.
- Use wax warmer properly, read instructions, and ensure safe placement to avoid accidents.
How Often to Clean a Wax Warmer
You should clean your wax warmer after every use. Cleaning regularly can eliminate debris, dust, and wax residue. In turn, you can start afresh with the next wax melt, ensuring that it burns cleanly and doesn’t mingle with any leftover fragrance.
Another sign that it’s time to clean your wax warmer — for both electric and candle-powered warmers — is when the wax no longer produces a fragrance.
How to Clean a Wax Warmer
- Time: 2-20 minutes (depending on method)
- Difficulty: Easy
By Pouring Out Wax
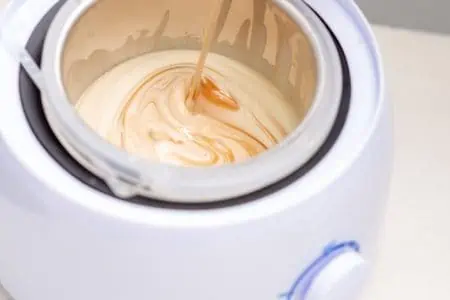
The pour-out method is pretty easy. You simply pour out the wax while it’s still hot and liquidy — or heat it back up to pour it out.
- Heat the wax: If the wax isn’t still hot, heat it back up, so that it’s hot and liquid.
- Pour: Pour the hot wax into a glass jar.
- Wipe: Let the wax burner cool down for a few minutes before wiping it with a kitchen towel to remove the leftover wax.
What do you do with the glass jar? Keep it for your emptied wax in all future pour-outs! Once the jar is full, you can dump the whole jar in the trash. This prevents wax from getting into your garbage, remelting, and making more mess.
With a Cotton Ball
This method is a little bit finicky, but it’s good if you don’t want to touch the hot dish with your hands.
- Heat the wax: If the wax isn’t still hot and liquidy, heat it back up.
- Dip: Dip two cotton balls into the liquid wax. It will soak up some wax. Continue until the wax is all soaked up by the cotton balls.
- Wipe: Once the wax is mostly soaked up, use more cotton balls or paper towels to wipe the wax warmer clean.
With a Scraper
For this method, you can use a butter knife or spoon. We’ll just be scraping the wax out while it’s cool (but not completely hard). Are you wondering how to remove hard wax from your wax warmer? Follow this method:
- Let the wax cool: After using your wax warmer, let it cool down slightly until the wax is soft but not liquidy.
- Scrape: Using your chosen scraper, try to remove the entirety of the wax in one scoop. Continue to remove extra wax until the warmer is mostly clean.
- Wipe: Wipe the wax warmer with paper towels until clean.
Caution
Be careful to not scratch the wax warmer with your scraper. If you do, your melted wax tarts will get into the grooves, making cleaning even harder.
With a Wax Liner
This one involves a little bit of a pre-planning, but it’s definitely a worthwhile hack. For this, you’ll be using wax melt liners which you can buy online or in-store.
- Place wax melt liners down: Before you put in your wax melt, lay down a wax melt liner. Use your wax warmer as usual.
- Dispose of the liner: Once your wax tart is finished, let it cool down and harden. Remove the wax liner and tart, and toss it in the trash.
Repeat each time you use your wax melter. It’ll keep the dish empty of stubborn wax residue. Super convenient!
Using the Freezer
This handy tip involves freezing and shrinking the wax, which makes it easier to remove from the warmer.
- Put warmer in the freezer: Place your wax warmer in the freezer for 15 minutes. The wax will harden and shrink.
- Remove wax: Take the warmer from the freezer and pop the frozen wax out of the dish using the back of a spoon. Toss it in the garbage or store it in a glass jar with other used wax.
Read Your User Manual
Some wax bowls shouldn’t go in the freezer, especially if it’s made of ceramic. The cold air can damage your wax warmer. So always read the instruction manual for advice from the manufacturer.
How to Get Wax Off a Wax Warmer
If you’re clumsy like us, sometimes you’ll get wax on the outside of your pot. How do you clean a wax pot? We’ll show you a handy three-step method.
- Time: 5 minutes
- Difficulty: Easy
What You’ll Need
- Mineral oil or olive oil
- Two microfiber cloths
1. Dampen Cloth
Dampen your microfiber cloth with a little mineral or olive oil.
2. Wipe Wax
Using your oily cloth, wipe the wax drips on the exterior of the wax warmer. You can do this when the wax is still hot or even if it’s hardened. Continue until the pot is clean.
3. Dry Wax Warmer
Using a separate microfiber cloth, wipe the wax melter dry.
Can You Reuse Wax?
You can melt the same piece of wax over and over again until the smell fades. This is usually around one week, but some last for a lot longer. The brand you use should specify how long you can use one wax melt.
When you’re cleaning used wax from your wax melt, is there any way to reuse it? You can’t burn it again because the scent is gone, but you can use it for other purposes.
For instance, they are great firestarters. You can place them in a fireplace, grill, or campfire. Don’t use them in gas-powered stoves or fires. Wood-powered fires are best.
You can also use them to create envelope seals, make jewelry, fix jammed drawers, and other DIY projects.
Using a Wax Warmer Properly
If you’re new to the world of wax warmers, you must use them properly. This will help you get the most out of your new product. Plus, these hacks will help your wax warmer last longer — and also keep you safe. Here are our favorite tips.
- Read the instructions: When you buy a wax warmer, always read the packaging instructions for the best methods for using it and safety tips.
- Break your wax melts apart: Usually, wax cubes come joined together inside the packaging. Make sure you break the cubes apart before placing a couple into the wax warmer. Don’t place the entire wax melt — straight from the clamshell — into the wax warmer.
- No water or oils: Don’t add anything to the wax warmer except for the wax tart. Don’t add water. Don’t add oils.
- Use in a safe place: Make sure you set up your wax warmer safely. Don’t let the cords hang over a counter. Keep out of reach from kids and pets. Don’t let the cord contact any hot surfaces.
- Don’t forget to turn it off: Some wax warmers come with a timer, automatically shutting off after your desired time. If your wax warmer doesn’t have a timer, set one yourself to remind yourself to turn off the warmer.
- Watch for overflows: Sometimes, if you use too many wax tarts at once, they can overflow once melted. So keep an eye on the wax warmer dish!
- Buying replacement bulbs: If your wax melt uses a lightbulb that stops working, always check the brand’s website for replacements. You don’t want to use a bulb incompatible with your warmer.
- Don’t place it on a flammable surface: Avoid placing the wax warmer on a flammable surface. Remember, there’s still an enclosed flame or electricity, depending on the type of warmer you get. So while these warmers are generally safer than candles, they still have some dangers to be aware of.
- Don’t leave unattended: Don’t leave your wax warmer on while you’re not in the room or at home.
