Listening to vinyl records is a relaxing and more authentic way to listen to music. But it’s completely pointless if your vinyl LPs are dirty and won’t play properly anymore.
A build-up of dirt and dust can affect how a vinyl plays since the needle can’t make proper contact with the record.
We’ll show you how to clean vinyl records properly so that there are no more pops, clicks, or skipping. Pure music, in just 15 minutes.
Key Takeaways
- Clean vinyl records to prevent damage and improve sound quality.
- Use a carbon fiber brush, velvet brush, and vinyl cleaner for at-home cleaning.
- Avoid using household cleaners, tap water, and vinegar for cleaning records.
- Dry records thoroughly with a microfiber cloth and air dry before playing.
Why Do You Need to Clean Vinyl Records?
Cleaning your vinyl records regularly also prevents the stylus from becoming damaged, affecting every other record that you play.
As if you needed another reason, keeping vinyl records clean also lengthens the lifespan of your records and the record player.
If you’re unsure about whether your record needs to be cleaned, you can tell it’s dirty by looking at it. If you notice dust or dirt on the vinyl, it’s time to give it a good clean. A USB microscope gives you insight into the crooks and grooves of the vinyl to see where dust and debris might be hiding.
Expert Advice
It’s helpful to examine your record under bright light, such as sunlight or a bright lamp. Tilt the vinyl to see where debris is hiding. Better yet, use a directional LED light to examine the record. Look on both sides of the record. Dust and debris can be very tiny and hard to see, so using these tips is important.
How to Clean Vinyl Records At Home
You don’t need to take your beloved records to a professional. Cleaning vinyl records at home by hand is a straightforward task. This includes 45 RPM records.
Our method will involve a brush and a commercial record cleaning solution to ensure top safety for your records.
- Time: 15 minutes
- Difficulty: Easy
What You’ll Need
- Vinyl record cleaner (such as this one from Big Fudge)
- Carbon fiber record brush (such as Boundless Audio)
- Velvet record brush
- Toothbrush
- Lint-free material (like a napkin or microfiber cloth)
- Microfiber cloths
- Drying rack
1. Prepare Your Space
You must clean your vinyl record on a static-free surface. If you clean it on the record player or just while holding it, the dust will stick to the nearest electromagnetic surface, which is usually the other side of the vinyl record. This defeats your cleaning efforts!
So instead, lay a lint-free piece of material, such as a linen cloth, on top of a table. It helps if the item you’re using has a rubber backing. You can even lay the cloth on top of a piece of rubber, to increase the anti-static properties.
2. Brush the Records
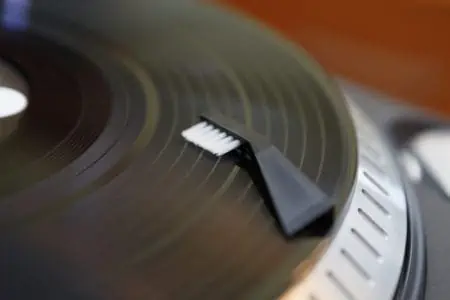
Start with your carbon fiber record brush. You must do this before spraying your record. Otherwise, you will just create a type of mud when you mix dust and liquid.
Keep your record flat on the table and bring it forward so that about one centimeter of the record is hanging over the edge of the table. Start at the top of the record (12:00 point from you) and brush gently towards you, pushing it off the table. Repeat going clockwise and anti-clockwise. Repeat on the other side of the table.
3. Brush Records With Velvet Brush
Time to switch brushes. Using a velvet record cleaning brush after the carbon fiber one, will remove the dust from the surface that the carbon fiber brush lifted.
Brush the record surface, going clockwise, then counterclockwise. Between strokes, clean the pad with a new, unused toothbrush. To do this simply brush the velvet record brush surface with the toothbrush to remove dust. Make sure to be gentle. Repeat this until the record is dust-free.
4. Spray the Record
Using your vinyl record spray, cover one side of the record. Avoid getting cleaner on the label.
5. Wipe the Record
Fold your microfiber cloth and wipe the record in one direction. Fold the cloth to a clean side, and wipe the record in the opposite direction. Lift the record and wipe the edges of the vinyl record, too.
Repeat step four and five on the other side of the record.
6. Dry the Record
Never play a wet record. Step six is ultra-important! Use a clean, dry microfiber cloth to wipe the record dry.
Place the record in a drying rack to let it fully air dry. Wait a few hours until the record is 100 percent dry before you play it again.
How to Deep Clean Vinyl Records
While the above method does a pretty thorough job, you might need to go use extra measures for a proper clean. This is especially useful if your LPs haven’t been washed in a while (or ever). We’ve got three methods to try.
With a Vinyl Cleaning Kit
Buying a DIY vinyl cleaning kit is a worthwhile investment if you own and play records often. It basically has everything you need from the above list, but it’s all in one place. It’ll save you a bit of money. If you’re looking to clean cheaply, this is your best bet.
These usually come with a velvet record brush, a carbon fiber cleaning brush, a stylus brush, and a record cleaning spray. The stylus brush is a handy extra that you will appreciate. Cleaning your stylus is super important.
To use a vinyl cleaning kit, follow our above six-step method. Follow the packaging instructions for cleaning the stylus.
With a Record Vacuum Cleaner
If you’re passionate about your records, investing in a record vacuum cleaner might be a good idea. These powered machines suck out the dirt, dust, and grime, even from the vinyl grooves. They’re gentle but very effective.
To use, you usually place the record on the machine’s spindle. Apply your cleaning solution as instructed and spread it around the record. Flip the record over and turn the machine until it’s clean. Then simply spin the record a few more times until it’s dry. Repeat on the other side.
While this is a handy machine, it takes almost just as long as DIY cleaning, so it’s a pretty pricey investment, in our opinion.
With a Record Cleaning Machine
A spinning record cleaning machine is a cheaper alternative than a record vacuum cleaner. With these types of machines, you fill the base with your cleaning solution and water. Insert your vinyl into the spinner vertically. Spin the record both ways, clockwise and counter-clockwise. The machine helps to clean the grooves with less effort from you.
These machines are handy and very gentle. If you’re worried that you’ll damage your records using our six-step method, then a spinning record cleaning machine might be a good investment since you can’t apply too much pressure. The machine cleans for you.
What to Avoid When Cleaning Vinyl Records
It’s pretty clear that there’s a right way how to clean vinyl records. A specific vinyl record cleaning solution is a must-have. To keep you on the right track, here’s what you should avoid when cleaning your LPs.
- No household cleaners: Don’t clean your vinyl records with household items. For example, don’t clean with soap and water, or window cleaner. Some folk might use Windex, or something similar, to clean their records, but we don’t suggest this.
- No tap water: Tap water, especially if you live in a hard water area, can damage your records due to the mineral content. If you need to use water to rinse your vinyl record, always use distilled water.
- No vinegar: While we love a vinegar cleaning hack here at Oh So Spotless, don’t use vinegar on your vinyl records. Vinegar is acidic, which can permanently damage your record.
- Be careful with alcohol: Some professional record cleaners use isopropyl alcohol to clean their records. Make sure that you use a low dilution. For instance, a 1:10 ratio of alcohol and isopropyl alcohol is a good place to start. If using alcohol for cleaning, do so sparingly. Using alcohol on your records regularly can wear them down over time.
- Lint cloths: While it’s obvious you should use a lint-free cloth, avoid using microfiber cloths that you’ve put through the washing machine with other items. When you wash microfiber with other materials, such as cotton, they can lose their lint-free quality. So always use new or properly washed microfiber cloths.
- Regular vacuuming: You might think you can use your regular vacuum since there are vacuum record cleaners. But your regular vacuum is too strong and can easily scratch the record.
How to Dry Vinyl Records
It’s crucial that you thoroughly dry your records before playing them again. Wipe them clockwise and counterclockwise with a dry microfiber cloth before standing them vertically to dry. Use a drying rack for best results. Let the record air dry for a few hours until it’s 100 percent dry.
How to Clean Old Vinyl Records
Are you dealing with old, vintage LPs?
The good news is that you can clean vintage records using our six-step method. But only if the record is made from vinyl or modern PVC.
Sometimes you’ll find old records made from shellac. Shellac 78s are super fragile. They can easily shatter, so you need to be careful. Never use anything that contains alcohol on them.
It’s best to use warm distilled water to clean the record. Apply a little bit of diluted detergent. A 1:20 ratio is suitable. Again, make sure the detergent doesn’t contain solvents, acid, or alcohol.
After a couple of minutes, use a soft brush — such as a toothbrush or paintbrush — to clean the detergent off of the record. Brush clockwise four times. Rinse the record under warm distilled water. Wipe dry with a microfiber cloth.
How to Clean a Record Needle
We can’t leave you without top tips for cleaning a record needle. It’s super important as a dirty and dusty needle can damage your vinyl and ruin the sound quality.
- Time: 5 minutes
- Difficulty: Easy
What You’ll Need
- Needle brush
- Magic eraser
1. Turn off Record Player
Turn off your record player and position your needle in a horizontal manner.
2. Brush Needle
Brush the record player needle from the front to the back using your needle brush. Repeat a few times. Never brush the needle sideways. You can damage the needle this way. It’s crucial that you brush in the direction that which the needle spins.
3. Clean With Magic Eraser
Cut off a small piece of a magic eraser and lay it on the turntable platter. Hover the needle above it and slowly lower the needle down into the magic eraser. The eraser will hold onto dust and debris to clean the needle. Repeat a couple of times.
How to Care for Vinyl Records
Here are some extra care tips for your awesome albums.
- Store properly: Keep your vinyl records somewhere clean and dry. Avoid high temperatures and humidity. It’s important to store records vertically, as you see in record stores. Avoid stacking records as this can warp them.
- Handle properly: When handling your records, hold them by the edge or the inner label. Your fingerprints can leave behind marks, scuffs, dust, debris, grease, and oils.
- Consider your sleeves: Upgrade the included inner sleeves for polyethylene-lined sleeves. These are cheap and reduce static and dust on your records. Plus, they protect your records better. The sleeve your record comes with is very papery and leaves behind residue and scratches. You might also want to consider a dual-pocket outer sleeve for extra protection. Go for a transparent one so that you can still see the albums in your vinyl record holder.
- Brush before and after: You can use your carbon fiber brush before and after each play. This will drastically reduce the dust build up and keep your records in great condition. If you haven’t noticed, you can’t really care for your records without a brush, so invest in a good one!
FAQs
Play It Again
Now that you know how to clean a record, you can have soulful, static-free music once again. Thankfully, cleaning a vinyl record only takes around 15 minutes.
Remember to invest in a proper vinyl cleaning solution. While you can use isopropyl alcohol, a vinyl cleaner is much safer and more effective.
Now that your records are clean, pop them on your turntable, sit back, relax and enjoy the music.
