Did you realize your vacuum brush could be harboring dirt? Do you want to know how to clean it properly?
Vacuum brushes have stiff, long bristles for scrubbing and loosening grime, hair, and stubborn dirt so it can be vacuumed away (1). Since it’s used for cleaning, the brush tends to harbor dirt.
It’s time to learn how to clean a vacuum brush, so you don’t spread germs and grime around your home.
Key Takeaways
- Clean your vacuum brush regularly to prevent spreading germs and dirt around your home.
- Detach the brush, wash the bristles with mild detergent, and scrub with a bristle brush to remove grime.
- Wipe the brush with diluted vinegar to sanitize and kill household germs.
- Dry the brush with a microfiber cloth and comb through the bristles to remove any remaining debris.
Why Clean Your Vacuum Brush?
While we all like to think our homes are clean, this isn’t always the case. There are many common household germs and microbes you can’t see.
This includes methicillin-resistant Staphylococcus aureus (MRSA), E. coli 0157, norovirus, and Clostridium difficile (2).
This means it’s important to keep on top of the household chores and clean regularly.
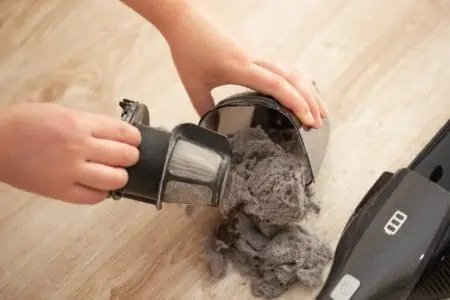
Of course, one of the most common tools you’ll use around the home is the vacuum. Unfortunately, if you don’t clean your vacuum regularly, you can transfer dirt and bacteria from the furniture in your home to your brush.
Brushes typically have horsehair or synthetic bristles that are stiff for scrubbing (3). But this does mean debris gets stuck in them. So, regular cleaning of the vacuum attachments is an excellent way to ensure they’re germ and dirt-free.
How to Clean a Vacuum Brush
Follow our steps to clean your vacuum brush. This ensures it’s hygienic for use on upholstery and other surfaces.
- Time: 30 minutes
- Difficulty: Easy
1. Detach Your Vacuum Brush
First things first — detach the brush from your vacuum. Most designs will disconnect by twisting and pulling them off the hose extension. In some cases, there may be a button to press. Ultimately, though, it shouldn’t require too much force.
2. Wash the Bristles and Plastic
Fill up your sink with warm water. To cleanse the inside of the vacuum brush and the bristles, add a mild detergent to the water.
This might help loosen any debris that stubbornly clings onto the plastic or bristles. If you haven’t cleaned the vacuum brush before, you may be surprised how much dirt comes off.
It’s best to submerge the brush in the water. You can also take advantage of the water pressure from the faucet for cleansing the attachment tool.
3. Scrub with a Bristle Brush
Sometimes, water isn’t enough to remove ground-in and dry dirt on the vacuum brush. These can quickly accumulate in hard-to-reach spots at the base of the bristles. So, this step is where you may need to use some more effort.
If you’ve got an old bristle brush or washing-up brush, this will come in handy. Use it to scrub against the bristles to loosen the dirt and eliminate any tough grime.
4. Wipe with Diluted Vinegar
For an extra clean, you may want to consider using diluted vinegar to sanitize the vacuum brush.
Vinegar contains acetic acid, which is known for being a mycobactericidal disinfectant. It can kill household germs that linger on the brush bristles. Research shows that it can even kill Mycobacterium tuberculosis (4).
Just be sure to dilute your vinegar with water so that it doesn’t damage the bristles. In addition, try your best to avoid prolonged contact with any rubber parts on your vacuum brush. They might break down over time.
5. Dry It Off
Once all the cleaning is done, it’s time to let the vacuum brush dry. An excellent way to remove excess water is to use a cloth. Microfiber is a particularly good material for absorbing water.
This synthetic material can hold up to seven times its weight in water (5). So, it may be better for drying off the vacuum brush bristles than cotton rags or paper towels.
Microfiber is also suitable for capturing oils, grease, germs, and dirt particles that could still be present (6).
First, run the microfiber cloth through the bristles to remove excess water. If you’ve used vinegar, this is a good idea, as you don’t want it to damage any surfaces.
You can also leave the brush on a surface to make sure it’s dry before connecting it back to your vacuum. Let it dry fully for around one to two hours to ensure it’s ready to be used again. After you’ve used the microfiber cloth on the bristles, don’t forget to wash it, so it’s ready for next time.
Remember
Additionally, avoid using bleach as this can damage the fibers. You also don’t want to use fabric softener, as this contains oil that can clog up the material (8).
6. Comb Through the Bristles
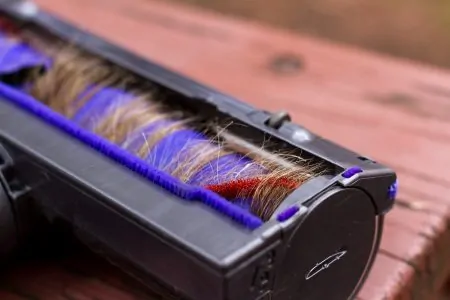
A good way to remove any dirt still attached to your vacuum brush is using an old comb. Hair and debris may be stuck even after all the cleaning steps — using a comb can untangle them. Run the comb through the bristles to complete this step.
FAQs

Do Vacuum Brushes Wear Out?
Vacuum brushes do wear out. They spin at 6,500 RPM, so inevitably, the brushes start to wear down. When that happens, it affects the performance of the vacuum cleaner.

How Often Should You Clean Your Vacuum Brush?
You should clean your vacuum brush every three months. However, if you have kids or pets, you might need to thoroughly clean your vacuum brushes every month.

How Do You Take Apart a Vacuum Brush?
The best way to take apart a vacuum brush is to switch off the machine and remove the top and bottom covers protecting the brush. Unhook the belt from the cog and lift out the brush. You may need a screwdriver because some brushes are held by screws.

How Do You Lubricate a Roll of Vacuum Brush?
The best way to lubricate a vacuum brush is to add a couple of drops of oil or grease to the bristles. This ensures that the mechanism works smoothly.
In Conclusion
A vacuum brush is an invaluable cleaning tool for upholstery, window sills, and surfaces. But just like anything else, it can hold onto dirt and bacteria. Regular cleaning is a way to prevent germs from spreading.
Once you’ve detached it from the vacuum, you can wash the bristles and scrub them with another brush. Then wipe them with diluted vinegar to kill any pathogens. Dry it off and comb through it to make sure any grime is now gone.
30 minutes of work for a much cleaner home. Sounds good to us!