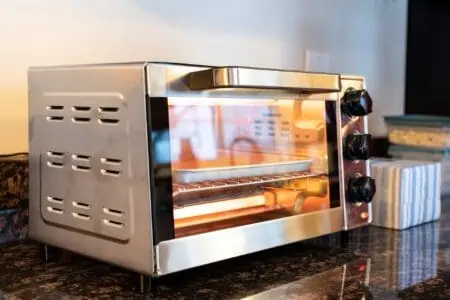
Are you wondering how to remove gunk, dirt, and food residue from your toaster oven? To get your toaster oven back to sparkling clean, you need to know the best methods.
Toaster ovens require a particular approach since they’re not exactly a toaster, nor are they an oven. They’re a little bit of both.
We’ll show you how to clean a toaster oven in nine easy steps. Let’s get cleaning!
Key Takeaways
- Unplug and cool the toaster oven before cleaning. Remove grill and crumb tray for soaking in hot soapy water overnight.
- Clean the inside and outside of the toaster oven using Bar Keeper’s Friend or baking soda on a damp cloth, then rinse and dry.
- Clean the glass door with a solution of distilled white vinegar, water, and lemon juice for a clear, streak-free finish.
- To maintain cleanliness, brush out crumbs after each use and perform weekly cleanings or every five uses.
How Often Should You Clean a Toaster Oven?
To keep on top of the mess inside your toaster oven, brush it out after each use. Check that food hasn’t fallen near the heating element.
We recommend cleaning the inside and outside once a week (or roughly every five to seven uses).
We recommend doing a monthly deep clean — such as removing baked-on food residue and sanitization.
How to Clean a Toaster Oven
For weekly cleaning of your toaster oven, follow these steps. Remember to brush out food after each use so that weekly cleaning is much easier.
- Time: 30 minutes (plus waiting time).
- Difficulty: Easy.
What You’ll Need
- Basin or sink.
- Dish soap.
- Vacuum cleaner (optional).
- Bar Keeper’s Friend or baking soda.
- Microfiber cloths.
1. Unplug and Cool
Toaster ovens are electric, so we need to be safe. Turn off your toaster oven, unplug it and let it cool down before moving on. You don’t want to burn yourself.
2. Remove Parts
Remove the tray, grill, and crumb tray from the toaster oven. It’s much easier to deep clean these when we remove them from the toaster oven.
3. Soak Removable Parts
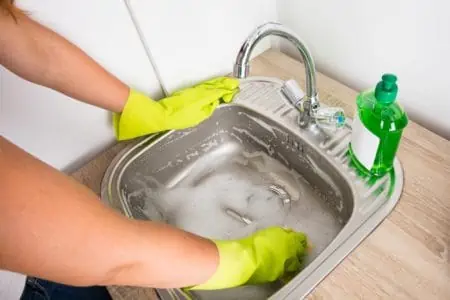
Prepare a sink or basin with hot soapy water. Soak the tray, grill, and crumb tray overnight in the solution.
4. Wash Removable Parts
After soaking, wash the removable parts as you usually wash dishes. Use a microfiber cloth (or your favorite sponge) to scrub them clean.
5. Clean Out Crumbs
While the removable parts are soaking, you need to remove crumbs from the toaster oven. You can shake the appliance over your trash can, letting the crumbs fall in. You could also sweep them out.
A fun hack is to use your vacuum cleaner to suck out as many crumbs and residue as possible.
6. Clean the Toaster Oven
To clean the toaster oven’s interior and exterior, we recommend using baking soda or Bar Keeper’s Friend. Baking soda is excellent if you want something natural and non-toxic. Bar Keeper’s Friend is great for more stubborn stains and grime.
With both methods, dampen a cloth with plain water. Sprinkle either baking soda or Bar Keeper’s Friend onto the cloth.
Gently scrub the inside and outside of the toaster oven, letting the cleaning product loosen dirt and grime and remove stains. Don’t forget the bottom and the ceiling of the appliance.
Expert Advice
You can use this method to clean the glass door, but we recommend avoiding it as Bar Keeper’s Friend and baking soda are abrasive. For the best way to clean the glass door, check the instructions further down.
7. Rinse
Once you’ve deep cleaned your toaster oven, dampen another microfiber cloth with warm water. Wipe down the toaster oven exterior and interior to remove the cleaning solution and loosened grime.
8. Dry
Time to dry the toaster oven and all removable parts. Use a separate cloth to dry the interior, exterior, and removable parts.
9. Reassemble
Put the removable parts back into the toaster oven and leave the door open to air dry further. Don’t use the toaster oven again until it is 100 percent dry.
How to Clean Toaster Oven Glass
It’s important that your toaster oven glass is clean and clear so you can see what’s going on inside. Nobody wants a burnt panini!
- Time: 10 minutes.
- Difficulty: Easy.
What You’ll Need
- Distilled white vinegar.
- Water.
- Lemon juice.
- Bowl or spray bottle.
- Microfiber cloths or coffee filters.
1. Make Solution
In a bowl or spray bottle, combine a 1:2 ratio of distilled white vinegar and water with lemon juice (one tablespoon).
2. Clean the Glass Door
Spray the mixture onto the glass door. If you don’t have a spray bottle, dip your microfiber cloth or unused coffee filters into the solution. Wring it out well and wipe down the glass door.
If you sprayed on your mixture, wipe the door with a microfiber cloth or coffee filter. Coffee filters will help with a streak-free finish, but a quality microfiber cloth will also do the trick.
3. Air Dry
Once you’ve cleaned the door, leave it to air dry.
How to Get Baked-On Grease Out of a Toaster Oven
Maybe you didn’t know the importance of cleaning a toaster oven. If you haven’t cleaned yours in months (or ever), you can still remove all that baked-on grease. It might be a little trickier, but it’s certainly possible.
- Time: One hour and 45 minutes.
- Difficulty: Easy/Intermediate.
What You’ll Need
- Baking soda.
- Water.
- Basin or sink.
- Spoon.
- Bowl.
- Cloths.
- Spray bottle with distilled white vinegar.
1. Create a Paste
Combine equal parts baking soda and water in a bowl until you’ve created a loose paste. You don’t want it to be too thick or grainy so add some extra water if necessary. Use your spoon to mix it well.
2. Remove Removable Parts
It’s easier to remove baked-on grease when you remove the parts, including the tray or grill. Keep them in a sink or basin, as this method works for them, too.
3. Apply the Paste
Use a cloth to apply the baking soda paste to the interior of the toaster oven and the removable parts.
4. Turn the Toaster Oven On
Put the removable parts back into the oven and turn it on low heat for one hour. Around 120 ° Farhenheit will be good.
5. Spray the Toaster Oven
Take out the removable parts again and place them in a sink or basin.
Fill a spray bottle with distilled white vinegar and spritz the inside of the toaster oven. Next, spray the removable parts. The white vinegar will loosen the baking soda, taking away your need to scrub hard.
6. Scrub, Scrub, Scrub
Now that the baking soda and vinegar have worked together to loosen baked-on grease, it’s time to scrub. Use a cloth or sponge to wipe down the interior and the removable parts to wipe off loosened grease.
Pull the grease towards you, so it comes out of the toaster oven. Dispose of it in the trash can.
7. Rinse
Using a cloth or sponge, dampen it in water, wring it out well and wipe down the toaster oven and removable parts.
8. Dry
Use a separate cloth to dry the inside of the oven and the removable parts. Leave the door open to let the appliance further air dry.
How Does a Self-Cleaning Toaster Oven Work?
Even though you know how to clean a toaster oven inside and out, that doesn’t mean it’s fun. You might have heard of self-cleaning toaster ovens.
These work by using high temperatures or steam to soften residue or turn it into ash. This makes it easier for you to wipe it away and discard it.
These cycles still take between two and six hours, which is much longer than our cleaning methods take. Not only does this mean your toaster oven is out of use for a while, but it uses a lot of energy. While you can sit back and relax, leaving the house or falling asleep while this function is on is not advised.
Having the self-cleaning function is nice because it makes cleaning easier for you. So we suggest choosing one with this feature if you like the sound of it. But in our opinion, it’s not super necessary.
How to Keep a Toaster Oven Clean
Cleaning a toaster oven is fairly straightforward, but it’s still time-consuming. You can keep your toaster oven clean between uses with these hacks and tips:
- Brush out crumbs: After each use, brush out crumbs so that they don’t burn into the interior the next time you use the appliance.
- Clean regularly: Clean the toaster oven every week or every five uses. Although it might not look super dirty, it stays on top of messes, so you don’t have burnt-on grease down the line.
- Read the user manual: Before you use your toaster oven, check the user manual. They will provide specific tips for your brand. For instance, many brands advise against laying down aluminum foil, even though it does help keep the toaster clean.
FAQs

Can You Use Oven Cleaner on a Toaster Oven?
Most brands advise against using oven cleaner on your toaster oven. The harsh chemicals aren’t safe for a toaster oven and interior materials.

Can You Use Easy-Off on a Toaster Oven?
Easy-Off manufacturers claim that you can use it on toaster ovens as long as the toaster oven doesn’t contain plastic parts. However, you should always check with your toaster oven brand before using Easy-Off or other oven-cleaning products. In our experience, it’s best to avoid any oven cleaner — instead, use baking soda or Bar Keeper’s Friend.

Can You Steam Clean a Toaster Oven?
Some self-cleaning toaster ovens use steam to clean the interior. However, you shouldn’t take a handheld steamer to your toaster oven as it could melt parts.
You can use a little steam when cleaning but be safe. To use this method, boil a 1:1 solution of distilled white vinegar and water on the stove. Once it’s boiling, pour it into a bowl and transfer it to the toaster oven.
Close the door and let it sit for one hour. Then wipe down the interior of the toaster oven. The steam and heat should have loosened dirt and grime, making it easy to remove.

What is the Easiest Toaster Oven to Clean?
Anything with a non-stick interior coating will be super easy to clean. Always check if the tray and grill are removable, which increases cleaning ease.
Some toaster ovens you might like to consider include:
- Black and Decker Countertop Convection Oven: It’s easy to clean, features a non-stick interior, and has a removable crumb tray. It also has a deep curved design that can fit 12-inch pizzas (and more)!
- Breville Compact Smart Toaster Oven: This features a non-stick interior and a removable front-access crumb tray. It has eight cooking functions, so you can make anything from a roast to toast.
- June Oven Plus: While it does have a stainless steel interior, it’s still easy to clean. There’s a self-cleaning function that dries itself out. Keep in mind that cleaning and removing crumbs from the glass door is challenging. While this is expensive, it’s a smart oven you can control with the app. Plus, it cooks much quicker than other toaster ovens (and doubles as a broiler).
- Cuisinart TOB-40N Toaster Oven: This toaster oven is made from steel, but the interior is non-stick, making it easy to clean. The racks also slide out so you can deep clean them, too. Another nifty feature is the auto shut-off to ensure your safety.
- Oster Toaster Oven: This toaster oven has an easy-to-clean interior and a removable crumb tray. The interior light lets you see where all the grease and grime are hiding. We also love how easy it is to use this toaster oven, thanks to the user-friendly control panel.
Extra Tip
Buy non-stick pans for your toaster oven. They will prevent grease and grime, and they’re very easy to clean with warm soapy water.
Easy Cleaning
When you know how to clean a toaster oven, inside and out, your appliance will last longer. And your food will taste better.
Brush out crumbs and debris after each use. Issue a deeper clean with baking soda or Bar Keeper’s Friend every week. It only takes around 30 minutes, and it’s nice and easy.
Invest in a non-stick toaster oven with a removable crumb tray for easier cleaning. This will save you time and elbow grease.