Are you looking for an effective way to clean your tiles? Maybe you’ve got a good cleaning regime, but you want to take things to another level.
You’ve come to the right place if you’re after sparkling, spotless tiles. We love tiles because they’re easy to maintain, especially if you know how to clean them effectively.
We’ll share an ultimate guide for cleaning your tiles. Keep reading for our five tried and true methods.
Key Takeaways
- Tile flooring is durable, water-resistant, easy to maintain, and offers various design options.
- Glazed and unglazed tiles have different characteristics, such as durability, aesthetics, and maintenance needs.
- Cleaning tools for tile floors include vacuums, brooms, dry mops, microfiber mops, spin mops, and steam mops.
- Keep grout clean by using commercial products, vinegar and baking soda, or oxygen bleach and warm water.
Advantages of Tile Flooring
If you’re redoing your home or building from scratch, you’ll face the decision of flooring at some point. Which type should you choose? Here are a few reasons why you should go for tiles.
1. They’re Durable
Tiles are made of natural earthen clays mixed with water and transformed using fire.
This flooring is difficult to crack and can last for centuries if well-maintained. But if one tile does break, it’s easy to replace it without having to take out sections of the floor.
Many tile manufacturers now use new technologies to increase traction on slippery surfaces.
2. Water-Resistant
If your ceramic tiles are glazed, they’ll be able to withstand anything. Water, dirt, and stains won’t be a worry since they can’t be absorbed. This is unlike other floors, such as hardwood which is very sensitive to moisture.
Tiles are an excellent option in humid regions since they can withstand moisture. They’re also a good option in areas with higher temperatures since tiles are naturally cooler than other floor types.
3. Easy to Maintain
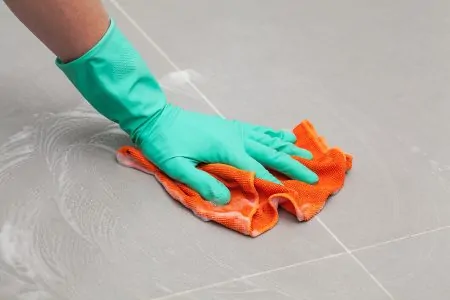
Keeping ceramic tiles clean is an easy task. Sweeping or vacuuming should be a part of your regular cleaning regime to keep the floors shining. Dust and dirt are visible on the surface, making them quick to wipe off.
It’s also safe to use most heavy-duty cleaning products on tiles. This makes it even easier to remove tough stains.
4. Design Variations
One of the main reasons homeowners choose ceramic tiles is the many design options available. Manufacturers use techniques that allow tiles to be printed in various ways.
Tiles come in all sorts of colors, patterns, and designs — you can even find manufacturers who do customization. If you like the durability of tiles but want the look of hardwood or natural stone, you can find that as well.
5. Allergen-Resistant
Flooring type is critical if a family member is dealing with allergies or asthma. Carpets can quickly become a thriving spot for dust mites, mold spores, and other triggers. These allergens can also flourish between hardwood floor planks.
On the other hand, tiles are hard and won’t store possible allergens. When dust, dirt, or pollen land on tile flooring, you can quickly spot and mop or sweep them away. This can improve the overall air quality in your home and keep everyone comfortable.
6. Timeless
Tiles can be timeless — and they can send a definitive message about your design preferences. You can mix and match different colors to show off your style, whether contemporary, chic, rustic, or casual.
7. Affordable
Ceramic tiles are one of the most affordable flooring types. Prices start from under $5 per square foot. DIY homeowners and families on a budget can easily find something suitable.
There is a wide price range when it comes to tiles. Lower-quality is the cheapest, and as the quality improves, prices can match that of hardwood. It all depends on the quality and how difficult it is to install.
Glazed vs. Unglazed Tiles
With tiles, you get to choose between glazed and unglazed floors. Each option has its own distinct advantages and disadvantages for various spaces.
As to how glazed and unglazed tiles are made, there’s not much difference other than the extra process glazed tiles undergo. Liquid glass is added as a thin layer during that process using very high temperatures.

Durability
Unglazed Tiles
Unglazed porcelain and ceramic tiles are generally thicker and denser compared to glazed. Due to its unfinished exterior, unglazed tiles have a rougher texture. This makes them an excellent option for areas such as the laundry room and kitchen where a slippery surface can be dangerous.
Unglazed tiles are also a good option for outdoor use in milder climates. They’re unlikely to scratch and excellent in high-traffic areas.
Glazed Tiles
There are different types of glaze — some are lighter while others are darker. This affects the tiles’ durability significantly.
Lighter glazes are fired at higher temperatures than dark glazes, and as a result, both the glazes and tiles are denser.
Because of the glass layer, glazed tiles are more prone to chipping or cracks. However, they’re also more resistant to staining, thanks to the added protective coating.

Aesthetics
Unglazed Tiles
Many prefer unglazed tiles because of the natural beauty they bring to a home. These aren’t colored or printed; they simply have the earthy color provided by the mineral deposit of the clay used.
Glazed Tiles
Because of the added layer of glass, glazed tiles can take on any color, pattern, or even print. These are excellent for decorative rooms, such as a colorful bathroom. Some glazed tiles are also made with textures to add an extra element.

Maintenance
Unglazed Tiles
Due to the rough texture of unglazed tiles, they tend to attract more dirt and hold onto it. They require more frequent cleaning than glazed tiles.
However, because unglazed tiles are less likely to scratch, you can use stiffer brushes to remove stains or dirt. You can also use natural cleaning solutions such as water and vinegar or use any commercial product safe for tiles.
Glazed Tiles
Glazed tiles have a glossy exterior. This makes dust, dirt, and allergens more visible. However, these tiles won’t hold onto dirt and stains as unglazed flooring.
So you can quickly remove dust and dirt using a broom, vacuum, or dry mop. Using a dry mop is also an excellent way to buff some shine into the tiles.
Best Cleaning Tools for Tile Floors
Cleaning tile floors is a breeze compared to other popular floorings such as hardwood and laminate. Tiles are less sensitive, and you can use various cleaning tools, as well as commercial and natural products.
Best Ways to Get Rid of Dust and Dirt
Regular sweeping or vacuuming keeps tiles clean and sparkling. Although tiles won’t hold onto dust and dirt the same way as carpets, dirt can still cause the floors to look dull.
1. Light Cleaning
- Vacuums for Tiles: The most efficient vacuums for tiles have strong suction and hard floor settings. It’s important to note that although tiles aren’t as sensitive as hardwood, scratches can happen. Therefore, you shouldn’t use attachments meant for carpets, such as beater rolls or stiff brushes.
- Flared brooms and dry mops: These are also excellent choices for light cleaning chores. These will get rid of dust and dirt efficiently but require a little more manual labor than a vacuum.
- Microfiber mops: A microfiber mop is a handy tool if you want to bring some shine to your floors after sweeping. It’s easy to use and won’t make a sound as you clean your house.
- Spray bottle: You can mix a cup of white vinegar in a spray bottle filled with water for effective light-cleaning. Spray as you go along using the microfiber mop with a damp cloth. Vinegar works brilliantly at adding long-lasting shine to tiles.
2. Deep Cleaning
When you feel it’s time for a deeper clean, you might want to get out the old mop and bucket. But there are a few other ways to do it.
- Spin mops: Using a spin mop can revive dull floors with minimal effort. Mix a cup of white vinegar in the bucket of water for extra shine. Or you can mix in some surface cleaner to thoroughly clean your floors. If you want something a bit more high-tech to help you clean your tiles, a floor scrubber does all the work for you.
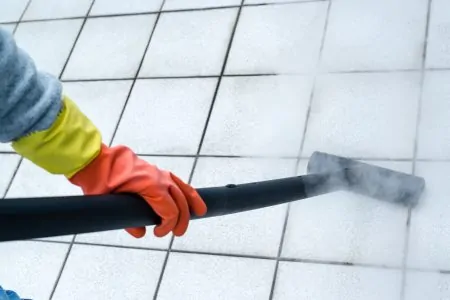
- Steam mops: These are another high-tech tool for removing tough stains and bacteria. It’s popular among families with young children since it keeps the floors clean for babies to crawl on. If you want a fresh scent to fill your home as you clean, you can add a commercial product to the mop. Some solutions are made with demineralized water and added scents such as mint and eucalyptus.
Take Note
How to Clean Tile Floors
There are many ways to clean tiles and various tools effective at cleaning and shining these floors. First things first, though, before starting, make sure your floors are clear. Sweep away dust and loose dirt and pick up toys or other items.
- Time: 10-20 minutes
- Difficulty: Easy

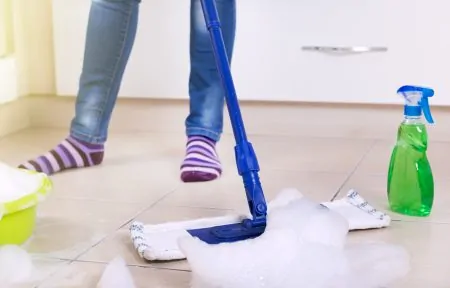
How to Clean Tiles Using a Manual Mop
1. Choose a Mop
A manual mop can be a spin mop, microfiber mop, or a regular wring mop. These all work on tiles.
However, water and soap can quickly leave marks on tiles. So it might look nice and clean while wet, but as soon as it dries, you may discover residue and streaks. The only way to fix this is by wiping the floors using a damp cloth (preferably microfiber).
2. Choose a Solution
Fill the bucket with water as you usually would. You can then choose which product you’d like to clean with. For a natural product, we prefer white vinegar as it adds shine and eliminates odors — excellent for pet families.
You can also choose a commercial multi-surface cleaner. Use as directed — some products require rinsing afterward to eliminate residue.
3. Start Mopping
Start at the furthest part of the room. Keep dipping the mop in the bucket every so often so you’re not spreading dirt. Remember to wring the mop well.
If you’re using a microfiber mop, you’ll have to remove the cloth to wet it. This can be difficult, but using a spray bottle to wet the floor as you go can make the job easier.

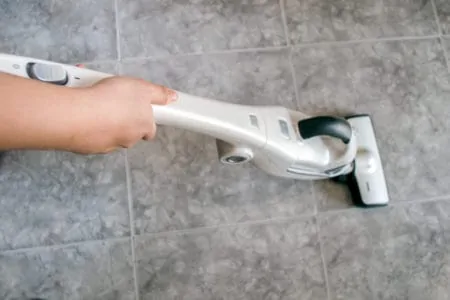
How to Clean Tiles Using a Steam Mop
1. Add Water
Start by filling the tank with water, preferably distilled. Skip the detergent or dish soap as this could ruin your machine. Use only distilled water or purchase a product specially made for steam mops.
2. Attach the Cloth
Attach the microfiber cloth to the steam head. Some use elastics to attach, while others use hooks and latches. If you’re unsure, follow the directions provided.
3. Allow to Heat
Plug the steamer into an outlet and allow it to heat. Some steamers will automatically turn on when plugged in, while others have a switch.
Allow it to heat for as long as directed. Some steam models are ready in under 30 seconds. Others can take up to a minute or two.
4. Release the Steam
Once the steamer is ready, place it on the floor and squeeze or pump the trigger. This will release steam through the microfiber floorhead as you go along. Then use back and forth motions, similar to mopping.
Caution
5. Allow the Floor to Dry
Once you’re done, allow the floor to dry. Steam cleaners don’t use as much water as a mop, so it shouldn’t take too long. If your steam mop is still plugged in, unplug it and allow it to cool before removing the cloth.
How to Clean Tiles Using a Spray Mop
1. Fill the Tank
A spray mop resembles a regular microfiber mop, but it has a small tank, trigger, and spray nozzle. Depending on the brand, you can buy individual bottles that you can put straight into the container. These contain a cleaning solution ready to go.
2. Attach the Cloth
Attach the microfiber cloth to the floorhead. This is usually attached using elastic pockets, but some use hooks and velcro.
3. Start Cleaning
Spray mops are super easy to use, and they eliminate the pain of carrying a heavy bucket around. Pull the trigger to release the cleaning solution as you go. Then mop back and forth as usual.
When you’re done, most microfiber cloths can be washed in the washer and reused clean the next time.
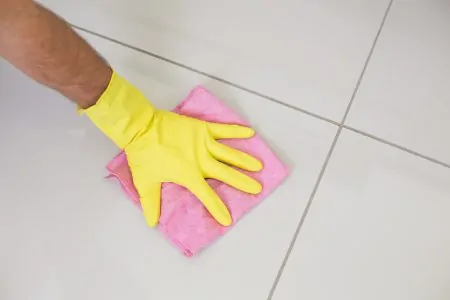
Tips for Keeping Your Grout Clean
Dirty grout lines can quickly make your sparkling tiles look grimy. If your grout is stained or discolored, you’ll need a few tools to restore it. Our tips below will help:
- Use a commercial product: There are multiple products available in stores and online clean grout well. Apply as directed by the manufacturer.
- Clean with vinegar and baking soda: Vinegar and baking soda effectively remove grime from grout lines. Make a paste and scrub with a small brush.
- Oxygen bleach and warm water: Add two tablespoons of bleach to two cups of water right before using. This should only be used for white grout as it can discolor colored grout. Apply the mix, scrub with a brush and rinse using a mop or cloth.
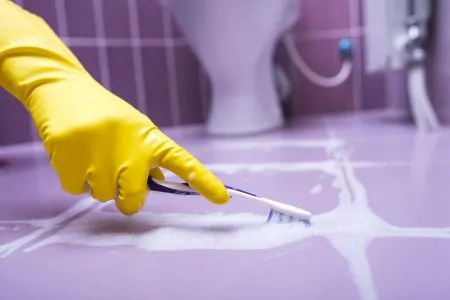
- Use a grout brush: Grout brushes are small and stiff. They fit perfectly into the tiny lines.
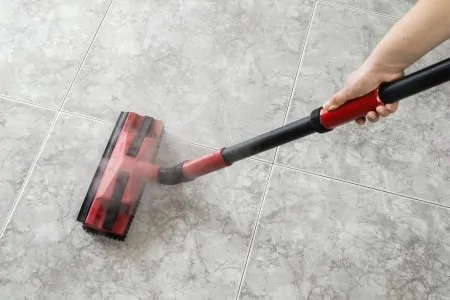
- Steam clean: If you have a steam mop or cleaner, these can be highly efficient at cleaning grout without chemicals. Use a small attachment to get into the grout lines quickly. Note that steam removes sealants, so you should only use it on unsealed grout or before resealing.
- Seal the grout: Unsealed grout is prone to staining and discoloration, but it’s also challenging to clean. You can easily seal the grout yourself.
Cleaning Tiles With Vinegar And Baking Soda
If you’re not into using harsh cleaning chemicals, there are natural ways to get a sparkling result.
Vinegar
Vinegar is a natural universal cleaning product. It effectively adds shine to tiles while deodorizing and disinfecting. All you have to do is add four ounces of vinegar to a gallon of water. Then mop as you normally would.
The vinegar scent might be strong at first, but don’t worry. It soon settles and becomes a neutral, clean smell throughout your home. You can also add lemon juice or essential oils to alter the scent if you don’t like the strong smell of vinegar.
Keep In Mind
Baking Soda
Baking soda is excellent at removing tough stains from tiles. You can clean by dissolving half a cup of baking soda in a gallon of water. Then mop as usual and rinse with clean water.
You can also combine four ounces of baking soda, four ounces of vinegar, and one tablespoon of dish soap in two gallons of water. If you like, add a few drops of essential oils, such as lavender, for a fresh scent.
Quick Tip
Removing Stains From Tile Floors
Unfortunately, stains can happen on tile floors, too, thanks to various spills and mishaps. Here are some common stains and how to remove them.
Grease and Oil
Tiles in kitchens and bathrooms are often victims of grease. The best way to clean this is by using a stiff brush and dish detergent.
You can also make a solution of four cups of hot water with one tablespoon of trisodium phosphate. Trisodium phosphate is alkaline and, therefore, very effective at removing grease and oil. It’s also highly disinfecting and is commonly used in the food industry to remove salmonella from poultry (3).
Be sure to wear gloves if handling trisodium phosphate.
Mildew
Mildew is a common problem in moist areas such as the bathroom. It’s often found in the grout, but it can also be present on the tiles. To successfully remove mildew, you’ll have to kill the source (4).
Using bleach is one of the best ways to get rid of mildew. Mix one cup of bleach with four cups of water. Apply the mixture using a sponge and rinse with clean water. You may need to scrub it a little if the mildew is persistent.
Stay Safe
If the mildew doesn’t budge, you may need to invest in a commercial product. These usually contain sodium hypochlorite and sodium carbonate. Be sure to keep the room well ventilated while using them.
Caution
Shoe Markings
Shoe markings can be frustrating to discover on your clean tiles. Luckily, these marks are easy to remove.
The best way to remove such marks is by using a neutral cleaner. Neutral cleaners have a pH level of seven, making them safe for all types of tiles. Dilute the detergent as instructed and use a cloth to scrub the markings.
Rust
Rust can be found underneath metal containers and objects placed in areas with more moisture. Luckily, the problem isn’t as challenging to remove as you might think.
Soak the rust stains with pure lemon juice and allow it to sit for five minutes. Check on it to make sure the fluid doesn’t dry.
Scrub the stain using an old toothbrush or a grout brush if you have one. If the rust is still present, repeat the process but apply a generous amount of salt or borax to cover the area (7).
Allow it to sit for up to four hours, depending on the stain. Then scrub the stain with a brush and rinse with water.
Additional Tips to Keep in Mind
By now, we should know how to clean tile floors and remove common stains. These extra tips will ensure you get the best results:
- Keep it light: Avoid leaving large amounts of water on your tile floors. Tiles can’t usually absorb water, but the water can leave annoying marks that require additional cleaning.
- Mind the grout: Cleaning the grout is often missed because we think it must get cleaned along with the tiles. This isn’t always the case. So, give the grout a good clean once a month and seal it if unsealed.
- Go natural: Natural products such as vinegar and baking soda are excellent on tiles. Both are good options for families with pets or young children who like to avoid chemicals.
- Remove spills: You can prevent stains by cleaning spills as they happen. Keep a spray bottle with equal parts water and vinegar ready to clean minor messes.
- Avoid hard tools: Tiles are tough, but that doesn’t mean you should throw caution to the wind. Avoid using hard tools such as steel wool, beater rolls, and scouring powders. Instead, use microfiber cloths and sponges to remove tough stains.
FAQs

How Often Should You Mop Tile Floors?
You should clean tile floors at least once a week with vinegar and water. You can add baking soda for stained floors and a few drops of suitable detergent.

Why Do My Tiles Always Look Dirty?
Your tiles always look dirty because you have left pooling water to dry on the surface, which leaves a residue. Also, the detergent you use could have reacted with the tiles and marked the surface.

How Do Professionals Clean Grout?
Professionals clean grout by vacuuming the floor first, then mopping with a solution of water and vinegar. Next, use a steam mop to deep clean the grout, and finally, wipe the floor dry to avoid mold growth.
Tip of the Tile
Tiles are versatile and easy to maintain — this is why so many homeowners prefer this flooring. You can also find a range of styles, colors, and shapes to suit your taste and home.
The right way to clean tile floors depends on what stains you’re facing. You can easily keep your floors clean by sweeping or vacuuming regularly. Use a mop or steam mop to get a deeper clean, and shining result.
Last but not least, don’t ignore the grout!