Did you know that your greasy stove drip pans are a fire hazard? That leftover grease, food drippings, and batter can cause a kitchen fire if the pans are not cleaned properly. Thankfully, it’s not difficult to clean stove drip pans.
Let us walk you through the steps for cleaning a stove drip pan. You’ll learn how to remove the pan and how to use various household products to clean them.
Key Takeaways
- Clean stove drip pans regularly to prevent fire hazards and maintain cleanliness.
- Common cleaning methods include vinegar and baking soda, hydrogen peroxide, ammonia, and dishwasher detergent.
- Replace rusty or grimy drip pans when they can no longer be cleaned effectively.
- Protect electric stove drip pans by soaking in vinegar and using baking soda for stubborn stains.
How to Remove Stove Drip Pans
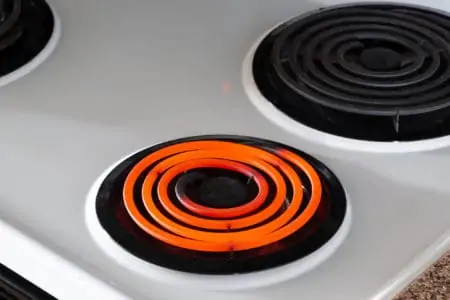
Before you begin cleaning your cooktop drip pans, make sure that your stove is off and cooled. First, you will lift the coil of your electric burner and gently pull it away from the socket. Pull and rock it until the burner releases.
Put the burner rings down. Now remove the drip pan off of the stove by gripping the edge of the pan and lifting.
What You’ll Need
To clean the stove drip pan, you will need:
- Trash can
- Cleaning Gloves
- Plastic Gallon Bag
- Bowl
- Scouring pad
- Brush
- Toothbrush
- Sponge
- Clean cloth
- Dish soap
- Baking soda
- Vinegar
- Ammonia
How to Clean Stove Drip Pans (Top Methods)
Before you use these methods for cleaning your stove drip pans, you will first need to clean the loose dirt and debris from the pans. Hold them over the trash can and shake the loose crumbs into the trash.
Vinegar and Baking Soda
To clean your drip pans with vinegar and baking soda, first, soak the pans in hot soapy water for 15 minutes. The easiest way to do this is to fill your sink with hot water and add a few drops of dish soap. Soak the drip pans in the sink.
After 15 minutes, drain your sink. Now cover the drip pans with vinegar and let them soak for 30 minutes.
After the 30 minutes is over, do not drain or rinse the drip pans. Leave them covered with vinegar.
Now you will sprinkle baking soda over the pans and the vinegar. Use a brush to scrub the pans with baking soda.
Yes, the pans will fizz as the baking soda reacts with the vinegar. This is fine. You want the reaction as it will help clean the pans.
Let the mixture sit for an additional 15 minutes. If needed, you can scrub tough areas with additional baking soda.
When you’re finished, rinse the pans with tap water and dry with a microfiber cloth. Replace the pans on the stove.
Hydrogen Peroxide
First, fill a bowl with hydrogen peroxide. Add one teaspoon of baking soda and one teaspoon of water to the bowl. Now soak an old toothbrush in the mixture for 30 minutes.
After 30 minutes, use the toothbrush to scrub the drip pans. Rinse the drip pans off and allow them to dry. Repeat the sequence as needed.
Ammonia
To clean your drip pans with ammonia, the first step is to place the drip pans into gallon plastic bags. Each pan will need its own bag.
Next put on cleaning gloves to pour ¼ cup of ammonia into each bag. Ammonia will cause irritation and possibly burns if it touches your skin, so wear gloves to protect your hands.
Seal the bag, and don’t worry if the pans aren’t completely covered. Ammonia is a strong cleaner and the fumes are powerful enough to clean the pans. Wait at least 12 hours or overnight to give the ammonia plenty of time to work.
After at least 12 hours have passed, open the bags in a well-ventilated place and away from your face. You do not want to get a whiff of the fumes. Be sure to get rid of the bags and ammonia safely.
Now that the drip pans have been removed from the ammonia, soak the pans in hot soapy water for a few minutes before scrubbing the pans with a sponge or brush to remove any tough stains.
Rinse the pans well and dry them with a clean cloth.
Dishwasher Detergent
To clean the drip pans with dishwasher detergent, place the pans in a large pot, and cover them with water and ½ cup of dishwasher detergent. Bring the water to a boil, reduce the temperature to low, and let the pans simmer for 30 minutes.
Let the pans cool before scrubbing them with dish soap and a brush. Rinse the pans and dry them with a clean cloth.
Oven Cleaner
Before cleaning your drip pans with oven cleaner, let them soak in a sink full of hot soapy water for an hour or longer. Don’t be stingy with the dish soap, you can add a good squirt or two to ensure that the water is truly soapy.
After an hour or so, drain the water and rinse the pans. Leave the pans in the sink. Now spray a good even coat of oven cleaner over the drip pans. Let them soak for another hour before you scrub the pans with a sponge or scouring pad.
If needed, repeat the process.
When the drip pans are clean, rinse and dry the pans. Return them to the stove.
Bleach
If you’d like to use bleach to clean your drip pans, first fill the sink with water before adding 2-3 caps of bleach. Soak the pans in bleach water for 30 minutes. Then put on cleaning gloves to drain the sink as the bleach water may irritate your skin.
Now scrub the drip pans with a scrub brush or scouring pad. The grime should be easy to remove.
Other Products
Another product people like to use to clean drip pans is called Bar Keepers Friend. To use this product, first, spray the drip pans lightly with water. Now sprinkle Bar Keepers Friend over the greasy pans. Let the pans sit for at least 5 minutes to let the chemical do its work. Now scour the pans with a scouring pad.
Some people have used WD-40 to clean their rusty drip pans. Put a pan in the sink and give it a good spray with WD-40. The pan should have a good coating.
Leave the kitchen for at least 20 minutes to both give the WD-40 time to work and to prevent yourself from becoming light-headed from the fumes.
Return and use a scouring pad to scrub the pan until it’s clean. Make sure you remove all the WD-40 from the drip pan before you return it to the stove.
A Brillo pad is another alternative to use to clean your drip pan. A Brillo pad is steel wool infused with a soapy mixture. It doesn’t require any soaking. All you do is scrub. Be careful. The steel wool of a Brillo pad may scratch your drip pans.
When Is It Time to Replace Drip Pans?
It’s time to replace rusty or grimy drip pans when you are no longer able to clean the pans. You should be able to find drip pans at any kitchen store.
FAQs

How Do You Cover Up Scratches on Drip Pans?
Cover up scratches on the drip pan by using mineral oil, vegetable oil, or olive oil. Put the oil on a cloth and rub the cloth around the drip pan in the direction of the grain until it’s polished.

How Do You Keep Stove Drip Pans From Rusting?
The best way to keep your stove drip pans from rusting is to keep the pans clean and dry. To do this, wipe the drip pans clean when you’re cleaning the kitchen after cooking. Use a paper towel or a dry cloth to dry the pans.

Can You Wash Stove Drip Pans In the Dishwasher?
You can wash stove drip pans in the dishwasher, provided you follow the manufacturer’s guidelines. It’s an excellent way of removing baked on food stains.

How Much Does it Cost to Replace a Drip Pan?
The cost of replacing a drip pan is typically $10 to $40, depending on the make and model you have.

How Do You Protect Electric Stove Drip Pans?
The best way to protect electric stove drip pans is to soak them in the sink with white vinegar for 30 minutes. Then sprinkle on baking soda for stubborn stains and let them sit for another 15 minutes before washing in hot water.

Can Easy Off Be Used On Drip Pans?
Easy Off can be used on drip pans. It is a popular oven cleaning product that cuts through stains, grease, and grime with ease.