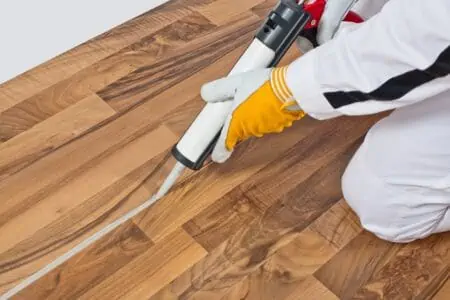
Silicone is everywhere. It’s a popular and durable material used for cookware, phone cases, sealant, and more. While it’s a great soft material, it also gets quite dirty and discolored.
We have many silicone items in our house, so we can give you some of our tried and tested cleaning tips. We’ll walk you through various methods for how to clean silicone, remove stains and fight discoloration.
Keep reading to learn all about silicone, why it turns yellow, whether it will melt, and more.
Key Takeaways
- Clean silicone items regularly with hot water and degreasing dish soap, using a non-abrasive sponge.
- Silicone can be safely washed in a dishwasher, but hand-washing allows for a more thorough clean.
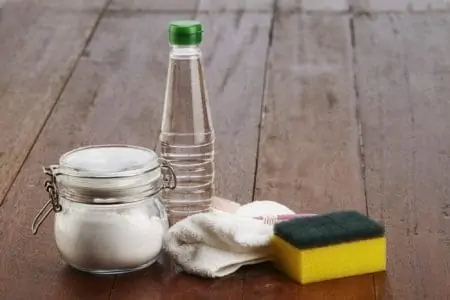
- Baking soda, vinegar, and hydrogen peroxide or bleach can be used to remove tough stains and discoloration from silicone.
- Avoid using abrasive cleaners or sharp objects on silicone to maintain its non-stick surface and durability.
Why Does Silicone Get Sticky?
When grease or oil contacts silicone, it can become absorbed. This leaves behind a sticky residue that lingers around even after washing. For cookware, this happens if you don’t clean the item thoroughly and immediately after each use.
This can happen over time for other items, such as phone cases or watch bands. When you notice the item is sticky, that’s when you should issue a deep clean. But maintenance is key — so we recommend routine weekly cleaning of the item to prevent stickiness.
Can You Wash Silicone in the Dishwasher?
Silicone is dishwasher safe — we recommend putting it on the top rack and avoiding the highest heat. If you’re loading your dishwasher, pop the silicone item right in. It’s an excellent method for removing grease and oil and, therefore, combatting stickiness.
However, it’s also super easy to clean silicone cookware and utensils by hand. And this often allows you to get a deeper clean into all the nooks and crannies.
How to Clean Silicone Kitchenware
While you should always check your user manual for specific instructions, washing silicone kitchenware can generally be done using universal methods. We’ll share four ways to clean silicone cooking utensils, baking mats, and more.
With Dishwashing Detergent
Washing silicone in hot soapy water is easy and effective. You can use this for silicone molds, bakeware, bowls, and more.
- Fill a sink: Fill your kitchen sink with hot water. Adding a splash of boiling water can help get it really hot, which is best for cutting through grease.
- Add soap: Add one teaspoon of dish soap, preferably one that contains a degreaser. For example, Ajax Super Degreaser is a great shout. Swish the water with a gloved hand to combine the soap and water.
- Add silicone items: Submerge the silicone items in the water and soak for between 30 and 60 minutes. This gives the degreasing soap time to do its job.
- Change water: After the time is up, if the water is cold, replace it with new hot soapy water.
- Scrub: Scrub the silicone items with a non-abrasive sponge, scrubbing brush, or cloth. Abrasive scouring pads or plastic scrubbers can ruin the non-stick surface of silicone.
- Rinse: Rinse the silicone item with hot water to remove the soap residue.
- Dry: Dry the silicone item with a microfiber cloth.
- Check: Use your fingers to feel the silicone surface. Repeat the above steps, or try a different method if you notice any sticky spots.
With Baking Soda
For tough stains, baking soda can make them disappear.
- Dampen: Dampen the silicone item with water.
- Sprinkle: Sprinkle a generous helping of baking soda over the item.
- Scrub: Use a toothbrush to scrub the baking soda into the water to form a paste. Make sure you apply the paste evenly to the whole item.
- Let it dry: Leave the baking soda on the piece until it’s dry. This can take a few hours, so we recommend doing it at night and leaving it on until morning.
- Rinse: A few hours later, rinse the baking soda off the silicone with hot water.
- Wash: Wash the silicone item using the above “with dishwashing detergent” method.
- Check: Check the silicone piece for stains or further sticky spots.
- Sprinkle: Sprinkle baking soda onto a sponge or cloth.
- Scrub: Scrub the sticky area with a sponge or cloth to remove the residue.
- Rinse: Rinse the silicone in hot water.
- Dry: If the sticky residue is gone, dry the silicone with a microfiber cloth.
With Vinegar
For those living in a hard-water area, you understand the pain of having white residue on all your cookware. To remove it from silicone, harness the power of distilled white vinegar.
- Fill a bowl or sink: Depending on the size of the silicone piece, fill a bowl or sink with distilled white vinegar.
- Soak: Submerge the piece into the vinegar and soak it for 30 minutes.
- Rinse: Rinse the piece well with hot water.
- Dry: Dry it well with a microfiber cloth.
Also, keep in mind that vinegar works as a natural sterilizer, which can help remove bacteria and mold.
In the Oven
The high heat from the oven and the absorbing quality of baking soda are great for removing stubborn stains. Try this method if the above methods haven’t quite kicked all stickiness and stains to the curb.
Just be sure that the silicone item is oven-safe. Check with the manufacturer. If it’s silicone bakeware you’re cleaning, it’s suitable for the oven.
- Turn on the oven: Heat the oven to 350 degrees Fahrenheit.
- Heat the silicone: Place the silicone item in the oven for ten minutes.
- Remove: Remove the silicone item from the oven and place it in your kitchen sink.
- Sprinkle water and baking soda: Dampen the silicone item with water before sprinkling a generous amount of baking soda over the stained area. Scrub with a toothbrush to create a paste.
- Let it dry: Leave the baking soda paste to dry on the item for a few hours or overnight.
- Rinse: Rinse the silicone with warm water.
- Dry: Dry the item with a microfiber cloth.
- Check: Check for sticky spots or stains. If any persist, repeat the above steps until the item is clean.
How to Remove Stains and Discoloration
Stains on your silicone are not pretty. Certain foods, especially turmeric or tomato, can cause extreme stains and discoloration. While it’s not always possible to completely remove these, we certainly can try.
- Time: 15 minutes (plus waiting time).
- Difficulty: Easy.
What You’ll Need
- Three percent hydrogen peroxide or bleach.
- Container to fit the silicone item.
- Dishwashing detergent.
- Water.
- Sink.
- Cloth, sponge, or scrubbing brush.
1. Create the Cleaning Solution
There’s no need to buy a specific product to clean silicone. You can make a homemade silicone cleaner from either hydrogen peroxide or bleach.
If using hydrogen peroxide, pour it into a container to fit the silicone item. For instance, if cleaning a spatula, pour it into a glass or a tray so you can fully submerge the spatula.
If you’re using bleach, you must dilute it first. Mix two cups of water per 2.5 tablespoons of bleach. Pour this into the appropriate container.
Warning
Don’t mix hydrogen peroxide and bleach. These create an oxygen gas which is so powerful it can explode (1). In general, we never recommend mixing bleach with anything else.
2. Submerge the Silicone
Place the silicone item in the cleaning solution, submerging it entirely. Leave it for 24 hours.
3. Wash as Normal
After 24 hours, wash the silicone item as usual, following our “with dishwashing detergent” steps.
How to Clean Other Silicone Items
What about cleaning silicone phone cases, bongs, and face brushes? We’ll walk you through the best methods for making these items spotless.
Phone Cases
We recommend cleaning your phone case at least monthly. You’re handling it every day, so it quickly harbors germs, bacteria, and oil.
- Create cleaning solution: In a sink or bowl, combine warm water and a few squirts of mild dish soap.
- Scrub: Dip an old toothbrush into the cleaning solution and scrub the case, moving in circular motions. Do this on both the inside and outside of the case.
- Rinse: Rinse the phone case under cold water.
- Dry: Dry the phone case well with a cloth or towel before returning it to your phone.
Bongs
Cleaning a silicone bong is super easy if you have a dishwasher. Just take the bong apart and pop it on the top rack. However, if you need to hand-wash it, follow this method:
- Create solution: In a sink or basin, combine warm water and a few squirts of non-toxic soap, such as Attitude Dishwashing Liquid.
- Submerge and soak: Take apart the bong and submerge the pieces in the solution overnight.
- Scrub: In the morning, use a gentle large straw brush to clean the chamber and other bong parts. Scrub away dirt, debris, and other loosened residue.
- Rinse: Rinse the bong well with warm water.
- Dry: Let the bong air dry before reassembling.
Face Brushes
If you use silicone makeup brushes and other beauty tools, it’s essential to clean them every couple of weeks.
- Dampen: Dampen the face brush in warm water.
- Apply soap: Apply a drop of mild soap to the item.
- Scrub: Using your fingers or a cloth, scrub the soap into the silicone, ensuring you tackle every inch of the item.
- Rinse: Rinse the face brush really well.
- Dry: Pat dry with a lint-free towel.
Hard Water
If you have hard water deposits on your silicone face brushes, soak them in distilled white vinegar. Leave them for 30 minutes before rinsing well.
How to Clean Silicone From Tiles or Glass
Silicone is often used as a sealant on tiles and glass. If you’re replacing or removing the silicone, it’s important to do it correctly to avoid a big mess. We’ll share the best method for removing it from glass and tiles, and how to clean any remaining residue.
- Time: 45 minutes.
- Difficulty: Intermediate.
What You’ll Need
- WD-40 or silicone solvent.
- Protective gloves.
- Silicone scraper.
- Heat gun or hair dryer.
- Putty knife.
- Acetone or rubbing alcohol.
- Scouring pad.
- Old towel.
1. Prepare the Area
Start by protecting yourself. Wear your gloves so that the cleaning solutions don’t cause irritation.
Next, ensure that there are no other objects or people nearby.
Last but not least, dry the area. Either leave it to air dry or grab a towel and dry it down.
2. Spray the Silicone
Apply WD-40 or another silicone solvent to the sealant you want to remove. Let it sit for a few minutes.
3. Scrape Up Silicone
Use your silicone scraping tool to gently push and scrape the silicone up. You might need to go back and forward in some areas to pull the silicone out. Continue to remove all silicone.
4. Heat and Scrape the Silicone
Point a heat gun or hair dryer at the remaining silicone residue for one minute per portion. Alternate by scraping the heated residue with a putty knife. Continue until you’ve removed as much as possible.
5. Clean Off Residue
Even after you’ve scraped up residue, you might be left with a sticky layer of silicone. To remove this, dampen a scouring pad with acetone or rubbing alcohol. Gently scrub the area in circular motions to dissolve and remove the silicone residue.
6. Dry the Area
Use an old towel to thoroughly dry the area before applying the new silicone.
Extra Tips for Cleaning Silicone
Silicone is easy to clean, but it’s also important to maintain it so that you can avoid stains, discoloration, and grease. Here are some top tips for caring for and cleaning silicone.
- Clean immediately: Don’t let silicone cookware sit around for hours after you’ve used it. The oils and grease will absorb into the material, leaving behind a sticky residue.
- Avoid extra oil: Silicone is already non-stick, so you don’t need excess oil. In fact, this will melt into the silicone, creating a stubborn barrier that’s hard to clean.
- No cooking sprays: Avoid cooking sprays, as this can create a stubborn layer of grease.
- Grease-cutting agents: Always use dish soap with a grease-cutting agent when cleaning.
- No abrasive cleaners: Avoid abrasive cleaners and tools. They will scratch the silicone, which can prevent it from being non-stick in the future.
- No sharp objects: Don’t use sharp knives when removing food from silicone. This can puncture the silicone.
- Dry it: Before putting silicone items away, ensure that it’s 100 percent dry. You can dry it by hand or leave it to air dry for a few hours.
- Watch the heat: Check the heat limit of your silicone piece. It’s not entirely heat resistant. Silicone usually has a threshold of around 428 degrees Fahrenheit.
- Utilize the dishwasher: While hand-washing is effective, the dishwasher is more powerful. Every once in a while, opt to put your silicone items through the dishwasher for a deeper clean.
FAQs

Why is My White Silicone Turning Yellow?
Silicone sealant can yellow due to oxidation. It can also yellow if it’s not exposed to daylight and UV rays. To avoid this problem, it’s recommended that you choose acetic cure silicone rather than a neutral cure.
For silicone cookware, this can happen due to the utensils coming in contact with certain ingredients. Turmeric, for example, can quickly yellow cookware.

Does Silicone Melt In Boiling Water?
No — boiling water is around 212 degrees Fahrenheit. Silicone has a heat threshold of around 400 to 450 degrees. So you can use boiling water to clean your silicone without worrying.

How Do You Get Black Mold Off Silicone?
Mold can quickly grow on silicone sealant, especially in the bathroom where the humidity levels are high. The best way to clean silicone affected by mold is by using bleach.
- Mix: Create a 1:4 ratio of bleach and water in a spray bottle. Shake well.
- Spray: Spray the solution over the moldy silicone and leave it for a few hours.
- Rinse: Dampen a sponge or cloth in plain water and wipe the silicone.
- Dry: Dry the area well with a towel.
- Repeat: Repeat if necessary.

How Do You Prevent Mold on Silicone?
The main ways to prevent mold in a bathroom, and therefore on silicone, include good ventilation, access to daylight, and low humidity levels.
Keep the windows open or run a dehumidifier. Use the exhaust fan while you’re showering, and leave it on for 30 minutes afterward.
Wipe down and dry the silicone every couple of days. Don’t overfill the bath and don’t leave damp clothes and towels in the bathroom.

How to Remove Silicone Lube From Carpet?
If you’ve spilled silicone lube on the carpet, blot it with a paper towel or microfiber cloth. Start from the outside and work your way in.
Spray rubbing alcohol onto the carpet and leave for one minute. Then blot up with your paper towel or absorbent cloth.
Continue blotting until the lube is gone. If a stain remains, apply a little dish soap to the area and leave for a couple of minutes. Then, steam clean the carpet.

Does Vinegar React With Silicone?
There is a possibility that the acid in vinegar can eat away at silicone. But it will be fine if you’re using five percent distilled white vinegar and aren’t leaving it on the silicone for long periods. Always check the manufacturer’s recommendations before using vinegar on silicone rubber.

Does Acetone Dissolve Silicone?
Yes, acetone is excellent at dissolving silicone. That’s why we recommend it for removing sealant residue. With that in mind, avoid acetone on your silicone cookware.