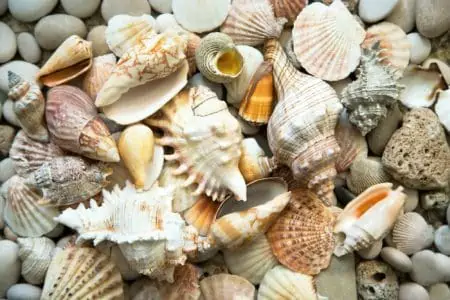
When you go shell-collecting, you’re sure to find some beautiful and rare pieces. But it’s important to know how to clean sea shells so that you can see their pure beauty and also preserve them.
No matter what state your shells are in, we’ll show you how to remove dirt, stains, build-up, and even animal tissue.
Soon enough, your shells will be pristine enough to display and show off to any house guests who stop by.
Key Takeaways
- Soak sea shells overnight in room temperature water, then boil them to remove dirt and debris.
- Use tweezers and a microfiber cloth to clean shells, avoiding bleach to preserve color.
- Polish sea shells with mineral oil for a natural shine and to preserve them.
- Use alternative cleaning methods like toothpaste, hydrogen peroxide, or muriatic acid for stubborn dirt or sanitizing purposes.
Tips For Collecting Sea Shells
It’s not as simple as going to the beach and picking up any old shell. You must remember that many shells you find are actually homes to various animals such as clams, mussels, oysters, and more. Many beaches will prohibit you from taking living creatures, and often, this means their shells, too.
You can test if there’s anything inside by touching the shell very gently. If it moves, then leave it alone. That’s somebody’s home.
A few other handy sea shell collection tips include:
- Time it right: Go before or after low tide when there are tons of beautiful shells ashore.
- Check the water: Don’t limit yourself to the beach only. Look in the shallow water too.
- Search tidal pools: There will be some beautiful shells in tidal pools and marshes. Just remember to leave inhabited shells alone.
- Come equipped: It’s a good idea to take some items to make the collection easier. This includes a shell bag, sifter, shovel, a net, sand flea rake, and of course, sunglasses and a hat for yourself.
How to Clean Shells Without Losing Color
The main thing people want to remove when cleaning sea shells is the periostracum coating and the sea smell. We’ll show you how to do so, without damaging the shell’s color.
- Time: 30 minutes (plus waiting time)
- Difficulty: Easy
What You’ll Need
- Water
- Large pot
- Tongs
- Towel
- Tweezers
- Microfiber cloth
- Mild soap (optional)
1. Soak Shells
Place the shells in a large pot and fill with room temperature water. Soak them overnight.
2. Boil Water
Change the water out and fill it with fresh room temperature water. Make sure the shells are fully submerged, with around two inches of extra water above the highest shell. Put the pot on the stove and slowly bring it to a boil. Leave the water to boil for around five minutes.
3. Remove Shells
Use your tongs to carefully remove the shells and place them on a soft towel.
4. Clean Shells
Use your tweezers to remove loosened gunk from the shells. Wipe the shells with a microfiber cloth to remove loosened dirt and gunk.
5. Repeat if Necessary
Repeat the above steps if your shells are still dirty. This time, add about two tablespoons of soap to the water for steps one and two. This can help remove stubborn grime and dirt.
6. Air Dry
Leave the shells on the towel overnight to fully air dry.
Cleaning Seashells Without Bleach
Many people automatically turn to bleach to clean their sea shells. While this will issue a deep clean, it can discolor the shells. Plus, it’s a hazardous chemical. If you want to deep clean your shells without bleach, here are three alternative methods.
With Muriatic Acid
Muriatic acid is a strong chemical. You should only clean with acid for shells that are extremely difficult to clean. You can find it in the paint department at your local hardware store.
- Mix solution: Pour a ¾ cup of water into a large glass container. Add ¼ cup of muriatic acid.
- Prepare a glass: Fill a second glass container with water.
- Clean shells: Using tongs, dip each shell, one at a time, into the muriatic acid solution for three seconds. You’ll notice the shells fizz as the acid attacks the dirt and build-up on the shells. Do not hold the shells in the acid for longer than three seconds. Otherwise, this can damage the shell and color. Repeat for each shell.
- Rinse: Using the tongs, dip the shell straight into the water.
- Dry: Place the shell on a towel to dry.
- Brush: If necessary, scrub the shell with a wire brush to remove loosened dirt.
- Rinse and dry: If you followed step six, give the shell one more final rinse and let it air dry on a towel.
Top Tip
Change out the second glass of plain water often. It will eventually have quite a bit of acid residue in it, which you don’t want to affect future shells.
With Toothpaste
Toothpaste is a mild alternative to bleach.
- Apply toothpaste: Spread a thin coating of toothpaste on all sides of the shell. Leave it overnight.
- Scrub: Use an unused toothbrush to scrub the shells well. Dip it in water to make this task easier. Continue scrubbing to remove toothpaste residue and loosened dirt. Make sure you get in all the nooks and crannies.
- Rinse: Run the shells under cool water to remove all of the residues.
- Dry: Leave the shells to air dry thoroughly on a towel.
With Hydrogen Peroxide
Hydrogen peroxide is a strong cleaner that can deep clean sea shells. It can also remove bacteria from the shells.
- Fill bowl: Fill a glass bowl or container with hydrogen peroxide, preferably deep enough to submerge the shell.
- Soak: Leave the shell to soak for up to eight hours.
- Rinse: Rinse the shells under cool water.
- Dry: Leave the shells to air dry on a towel.
How to Polish Sea Shells
Once you’ve cleaned the shells, it’s time to make them shine.
- Time: 5 minutes per shell (plus drying time)
- Difficulty: Easy
What You’ll Need
- Mineral oil
- Paintbrush
- Thin towel
1. Oil the Shells
Once the shells are cleaned and dried (give them at least 24 hours to fully air dry), you can oil them.
You can apply mineral oil to a paintbrush and brush it all over the shell. Or you can use your finger to rub the mineral oil onto the shell gently.
Mineral oil will shine up the shell but also preserve it.
2. Let Shells Dry
Leave the shells on a thin towel (not a thick absorbent one that could remove some of the oil) for about 24 hours to let the oil set.
How to Clean Animal Tissue From Sea Shells
If you found some lovely shells currently coated with animal tissue, we can help you get rid of that. The best method is cleaning with boiling water. We’ve already walked you through that, but you can skip some of the other steps to tackle animal tissue alone. So let’s get into it.
- Time: 40 minutes
- Difficulty: Intermediate
What You’ll Need
- Large pot
- Water
- Toothbrush or wire brush
- Tweezers
- Tongs
- Cloth
- Towel
1. Boil Shells
Place your shells in a large pot and cover with room temperature water, leaving around two inches of extra water above the tallest shell.
Place the pot on the stove and slowly bring it to a boil. Leave it boiling for five minutes before turning off the heat.
Try This
If you’re boiling more than one shell, boil for longer. For instance, if you have five shells, you might want to boil for about 15 minutes instead.
2. Remove Shells
Using your tongs, remove your shells carefully from the pot and place them on a towel.
3. Remove Animal Tissue
Now for the gross part. Use your tweezers to remove loosened bits of animal tissue and deposits from the shell. Once you’ve removed large bits, use a toothbrush or wire brush to scrub the shell clean.
Finally, you can wipe the shell with a damp cloth to give it a final cleanse.
4. Rinse and Dry
Rinse the shells under lukewarm water to remove all residue. Lay them on a towel to air dry for around 24 hours. You can give them one more clean later, if you’d like. Otherwise, you can skip straight to polishing them.
What to Do With Sea Shells
Now your shells are sparkling clean and shiny, what can you use them for? We have a few ideas you might love:
- For crafts: You can do many different crafts with shells. One idea is to glue them to the back of the cardboard, in the shape of a heart or star, and hang up on the wall.
- Fill a jar: You don’t have to spend ages displaying your shells. Simply place them in a nice glass jar and put it in your bathroom, hallway, or kitchen.
- Decorate a jar: Another option is to cover a jar in clay and press the shells into it before it hardens. Use this as pen storage. A great mother’s day idea!
- Hang them: Glue the shells onto a few bits of string and secure them to a stick. Hang the stick on the wall, and now you have a pretty shell wall hanging!
- Picture frame: Glue the shells around a picture frame to display a nice family photo.
- Display in glass cloches: This is a great idea for large shells. Put one or two in glass cloches and place them on a mantelpiece or window frame. They make a great statement piece.
- Jewelry: Shells make great jewelry pieces. You can design earrings, necklaces, pendants, and brooches!
- Containing seasonings: At dinner time, you can place salt, pepper, and other seasonings in your (very) clean sea shells.
- Trinket trays: Why not use scallop shells to hold your trinkets? You can use them as they are, paint them, or even cover them with scrapbook paper.
- Sea in a bottle: This is a great sensory activity for babies. Place the shells in a bottle with some water and glitter. Secure tightly and let your baby explore!
- Crown: If you’re very crafty, you could glue shells to a crown which would be a great addition to a mermaid Halloween costume.
- Candles: Pour some melted wax into the shells with a wick and use them as a DIY candle.
- Soap dish: If you have a large clam shell, it’s perfect for storing your bar soap in the bathroom.
FAQs

How Do You Keep Seashells Shiny?
Rub mineral oil or baby oil onto the seashells whenever they look dull.

How Do You Clean Seashells With Baking Soda?
Fill a bowl with two cups of lukewarm water, two tablespoons of baking soda, and a sprinkling of salt. Mix it together. Submerge the shells in the liquid for 10-15 minutes. Scrub off the loosened dirt with a toothbrush. Rinse the shells under warm water and air dry.

Can You Use Vinegar to Clean Seashells?
Technically, yes. But you must never soak the shells in vinegar as this can corrode the shell. If you must clean with vinegar, pour a little vinegar into a bowl and scrub it onto the shell using a toothbrush. Rinse well with soap and water.

Can You Use Clear Nail Polish On Seashells?
Yes — if you want a more permanent gleam on your seashells, paint them with clear nail polish. Do one side of the shell at a time before leaving to dry completely. Then do the other side. Remember that this method will be less natural-looking than mineral or baby oil.
Spotless Shiny Shells
After you go shell collecting, we think cleaning the shells properly is crucial. Our methods will help you clean your shells without losing any color. Plus, all these methods are without bleach.
Whether you collected your shells from the beach or from the deep ocean, our methods will help clean and polish them. If you want to sanitize them, then the hydrogen peroxide method is going to be fantastic.
All of these methods will help to restore the color, too. You might find that your sandy-colored shell is a bright color beneath the dirt and build-up.