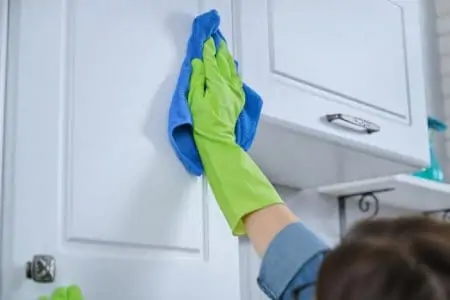
Nothing is worse than greasy and grimy kitchen cabinets. They’re streaked, stained, and ugly. Thankfully cleaning greasy and grimy kitchen cabinets doesn’t require expensive cleaning products.
Instead, you can use ingredients in your kitchen to create a simple kitchen cleanser to cut the grime and restore your cabinets. Read here to learn how to clean kitchen cabinets.
Key Takeaways
- Clean kitchen cabinets weekly and deep clean them seasonally, using a microfiber cloth and mild cleaner.
- To remove common stains like fingerprints, grease, and food splatters, use a 50-50 vinegar and water solution or baking soda paste.
- White vinegar and hot water, dish soap, citrus multipurpose cleaner, and baking soda with lemon or water are effective methods to clean greasy cabinets.
- Different cabinet materials, such as painted, wood, and laminate cabinets, require specific cleaning techniques to prevent damage.
When to Clean Your Kitchen Cabinets
Weekly
Give your cabinets a spot clean every week. To do this, spray a multi-purpose cleaner on a microfiber cloth before wiping down the cabinets. Remember to also disinfect the hardware on your cabinets such as knobs and handles.
Seasonally
You’ll want to give your kitchen cabinets a deep clean every season or 3-4 times a year. First, empty out the cabinets.
Now dab a mild cleaner on your microfiber cloth or spray the cloth with the cleaner. Wipe the cabinets inside and out with your cloth. Wipe down the shelves, as well as the inside and the outside of the door.
Use an old toothbrush to give the corners and small crevices a clean.
When you’re finished, wipe down the cabinets with a damp, but not-soaked microfiber cloth. A soaked sponge will put too much water on your cabinets which may damage them. Also, ensure that you rinse the cabinets well as you need to remove all the cleaner residue from your cabinets, or the residue will quickly attract dirt.
Most Common Kitchen Cabinet Stains
Fingerprints
Fingerprints leave an oily residue which causes stains. To remove fingerprints from your cabinets, use a 50-50 vinegar to water solution. Wipe the fingerprints with this solution before using a damp cloth to remove the vinegar.
Then use a dry microfiber cloth to buff and polish your cabinets.
Grease
To remove grease, you will again use the 50-50 vinegar mixture to wipe the cabinets. You may need to wipe the cabinets several times before the greasy stain is removed. Again, you will need to rinse the cabinets with a damp microfiber cloth before buffing your cabinets dry with a microfiber cloth.
Food Splatters
Food splatters can be caused by kids dropping eggs or splattering ketchup around the kitchen. To remove the food splatters, wipe up the mess with a damp cloth as quickly as possible. Then make a baking soda paste.
To make the paste, put some baking soda on a small plate. Add water and mix until a paste is formed. Add this paste to the cabinets and allow it to sit for 2-3 minutes.
Next, wipe the paste away with a damp cloth and end off by drying the cabinets.
Water Stains
To remove the stains, mix equal parts of olive oil and vinegar. Use a cloth to dab the mixture on the stain and wipe in the direction of the wood grain. What happens is that the vinegar removes the stain while the olive oil polishes the wood.
Scuffs
The best way to deal with scuffs is with a soft eraser. Rub along the mark. Then use a clean cloth to wipe the residue away.
This is an especially good trick when you have white cabinets.
5 Ways to Clean Greasy Kitchen Cabinets
White Vinegar and Hot Water
Use white vinegar and hot water to clean your cabinets. The combination doesn’t require any special cleaners and you likely already keep vinegar in your kitchen cabinet.
- Time: 30-45 minutes
- Difficulty: Beginner
Materials:
- White vinegar
- Warm water
- Clean spray bottle
- Microfiber cloth
1. Make Vinegar Solution
The first step is to make your vinegar water mixture which is a 50-50 ratio of vinegar to water. Once you’ve made your solution, fill your spray bottle with it.
2. Spray on Cabinets
Spray the mixture on your cabinets. Allow the mixture to sit on your cabinets for 3-4 minutes before moving on to the next step. You need to give the vinegar time to work.
3. Wipe Cabinets
Wipe the cabinets with a damp microfiber cloth to remove the stain. If you’re working with wood cabinets, be sure to wipe in the direction of the grain.
4. Dry the Cabinets
Use a dry cloth to buff and dry your cabinets. Ensure that all the vinegar residue is removed so more dirt isn’t attracted to your cabinets.
Expert Tip
If you have a stubborn stain, make a paste of vinegar and salt. Use this paste on a toothbrush to scrub the stain gently. When you’re finished, wipe the cabinet clean with a damp cloth before drying it with a dry cloth.
Dishwashing Liquid
Dish soap is one of the best degreasers to use on your cabinets as it’s designed to cut through grease. Make sure that you’re using dish soap and not dishwasher detergent. Dish soap is much gentler and will not damage your kitchen cabinets.
- Time: 30-45 minutes
- Difficulty: Beginner
Materials
- Dish soap
- Water
- Bowl
- Sponge
- Microfiber cloths
1. Mix Soapy Water
Fill the bowl with water before adding a few drops of dish soap to the water.
2. Wipe Off Grease
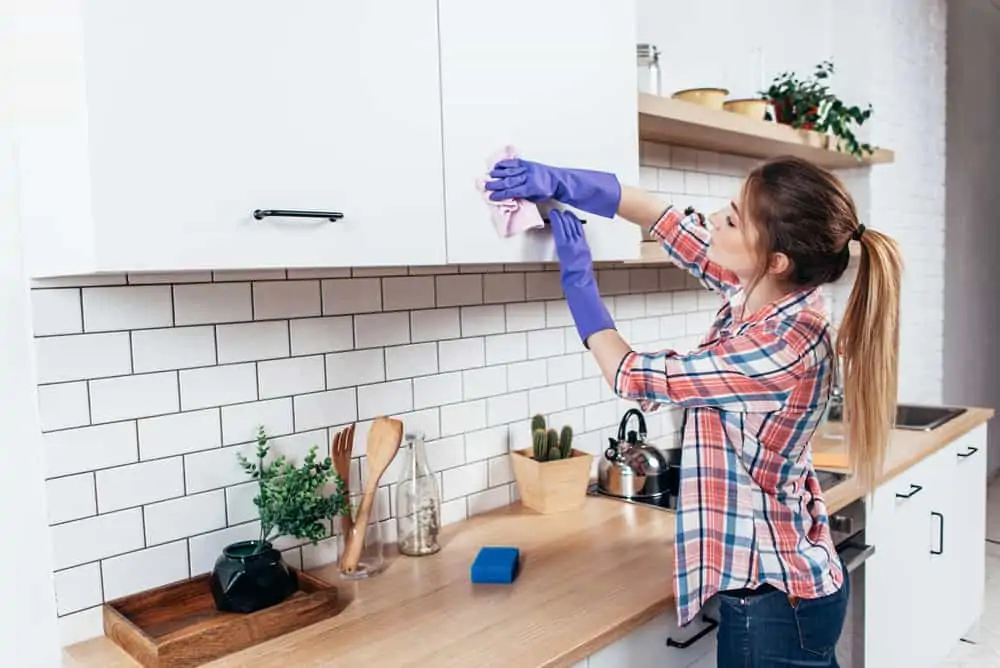
Dip your sponge in the soapy water. You want your sponge damp but not dripping wet as too much water will damage your cabinets. Rub at the greasy stains on your cabinet until the grease is removed.
3. Rinse Cabinets
Rinse the cabinets with clean water to remove all the soapy residue to prevent dirt build-up later.
4. Dry the Cabinets
Dry your cabinets with a microfiber cloth.
Expert Tip
Try combining 1 tablespoon of dish soap, ¼ cup of vinegar, and 2 gallons of water. Mix these in a large bucket and use as you would soapy water in the instructions above.
Citrus Multipurpose Cleaner
A citrus multipurpose cleaner is an excellent grease remover to use on your kitchen cabinets. You can use a purchased cleaner or you can make your own.
- Time: 30-45 minutes
- Difficulty: Beginner
Materials:
- Multipurpose cleaner with citrus oil
- Sponge
- 2 Microfiber cloths
- Water
1. Spray the Cabinets
Spray all your cabinets with the citrus multipurpose cleaner. Let the cleaner sit on the cabinets for 3-4 minutes before moving on to the next step.
Expert Tip
You can make your own citrus multipurpose cleaner using the directions below.
Materials
- Canning Jar
- Citrus Peels such as orange, lemon, or lime
- White vinegar
- Spray bottle
Fill the canning jar with citrus peels. Then pour white vinegar over the peels until the canning jar is full.
Let the jar sit for 2 or 3 weeks.
Strain the peels while saving the liquid. After you’ve strained the peels, pour the liquid into a spray bottle to use instead of a store-bought cleaner.
2. Remove the Grease
Use a damp sponge to gently wipe the grease away from your cabinets. This may take some gentle scrubbing. If you have wood cabinets, remember to wipe in the direction of the wood grain.
3. Wipe Away Residue
Wipe away the residue that was left by the cleaner using a damp cloth. Again, you’ll want to ensure all the residue is removed as it will attract dirt if left behind.
4. Dry Your Cabinets
Use your second microfiber cloth to buff and dry your cabinets.
Baking Soda And Lemon
Baking soda and lemon are natural degreasers and perfect to use on your kitchen cabinets.
- Time: 30-45 minutes
- Difficulty: Beginner
Materials
- Sponge
- Clean microfiber cloth
- Spray bottle
- Baking soda
- Warm water
- Juice of 1 lemon
1. Make the Mixture
You will use 1 part baking soda and 2 parts water. Add the juice from 1 lemon and mix the solution in a bowl.
2. Add Solution to the Spray Bottle
After you’ve made your solution, you will add the solution to the spray bottle.
3. Spray the Cabinets
Spray your cabinets with the mixture. Leave the mixture on the cabinets for 2-3 minutes to give the solution time to work.
4. Scrub the Cabinets
Using your sponge, gently scrub the grease off of your cabinets. Add more mixture as needed.
5. Rinse the sponge
Now rinse the sponge in warm water. You will need to remove the solution from your cabinets so your cabinets do not attract more dirt.
6. Dry the Cabinets
Use a clean microfiber cloth to dry your cabinets. Make sure that you’ve removed all the liquid as any moisture can damage your cabinets.
Baking Soda And Water
If you have a tougher job, then you’ll need to use a gentle abrasive cleaner such as baking soda. Baking soda is also a mild alkali which means that it will also dissolve grease.
- Time: 30-45 minutes
- Difficulty: Beginner
Materials:
- Baking Soda
- Water
- Plate
- Several Microfiber cloths
1. Make Baking Soda Paste
Make a baking soda paste by adding equal parts of baking soda and water. Mix the two ingredients together until you have a paste.
2. Apply Paste
Apply the paste to your cabinets using small circular motions. As the microfiber cloths become dirty, exchange them for a clean one. Continue until all your cabinets are covered in this powdery paste.
3. Remove Paste
Use a fresh damp microfiber cloth to remove the paste from your cabinets. Again you’ll want to ensure that the cloth stays clean by rinsing it and wringing it out as you go along.
4. Dry the Cabinets
The final step is to dry your cabinets thoroughly as any moisture left on the cabinets may damage them.
Expert Tip
You can make a spray of 1 part baking soda, 2 parts water, and a small amount of lemon juice. It’s easy to spray on the cabinets. Then wipe the mixture off with a damp, warm cloth.
How to Clean Grease Off Different Types Of Kitchen Cabinets
Painted Kitchen Cabinets
Your painted cabinet can be easily cleaned with water and baking soda. Although if it’s been several years since your cabinets were painted or the paint is chipping, you may want to consider repainting them.
- Time: 30-45 minutes
- Difficulty: Beginner
Materials:
- Baking soda
- Water
- Plate
- Clean microfiber cloths
1. Make a Paste
The first step is to make a paste of 1 part water and 2 parts baking soda. Mix the ingredients on a plate until you have a paste.
2. Dab Paste on Stain
Use a clean cloth to dab the paste on the stain. Make sure that you’ve covered the stain entirely and leave it for 3-4 minutes.
3. Wipe Clean
Now wipe the stain clean using another clean, damp cloth.
4. Dry Cabinet
Buff off any remaining residue with a clean, dry cloth. Ensure that all the residue and all the moisture are removed.
Expert Tip
Use a cloth dampened with diluted ammonia. Wipe the cabinet until the stain is removed or at least less noticeable.
Wood Kitchen Cabinets
Wood kitchen cabinets come with different seals and finishes. Some will withstand tougher treatment than others. However, to be safe, use a gentle cleanser like Murphy’s Oil Soap to clean and shine your cabinets.
- Time: 30-45 minutes
- Difficulty: Beginner
Materials:
- Oil-based Cleanser such as Murphy’s Oil Soap
- Water
- Clean microfiber cloths
1. Use a Cleanser on Your Cabinet
Dampen a cloth with your cleanser of choice. Murphy’s Oil Soap is a good one that will not damage your cabinets. Use the cleaner to wipe your cabinets and make sure to rub with the grain.
2. Remove Soapy Residue
Now use a damp but not soaked cloth to wipe down your cabinets and remove the soapy residue. Be careful of how damp the cloth is. Too much water will damage the wood
3. Dry the Cabinets
Dry the cabinets with a microfiber cloth. Rub the wood with the grain to buff and polish it.
Quick Tip
Keep an eye on the high moisture areas of your kitchen such as above the stove and near the sink. These areas are exposed to steam and condensation which can damage the wood, so they need extra care and attention. Adding an additional coat of sealant is a good idea to protect these cabinets.
Laminate Kitchen Cabinets
Laminate cabinets are durable and forgiving cabinets to have in your kitchen. Usually, a weekly wipe down is enough to keep your cabinets looking good.
- Time: 30-45 minutes
- Difficulty: Beginner
Materials:
- White Vinegar
- Baking Soda
- Water
- Plate
- Clean microfiber cloths
1. Wipe the Cabinets
First, wipe your cabinets with an all-purpose cleaning wipe or diluted vinegar on a clean cloth.
2. Dry the Cabinets
When you’re done, thoroughly dry the cabinets with a clean cloth. Make sure that you’ve removed any residue from your cabinets.
3. Remove Stains
Remove any stains by making a paste of baking soda and water. Apply the paste to the stain and let it sit for a few minutes. Then take a damp cloth and wipe away the powdery paste.
Use a dry cloth to dry the area.
Expert Tip
Avoid using abrasive cleaning pads on your laminate kitchen cabinets, these pads will scratch and damage the surface.
You can use an eraser to remove any scuffs on your cabinets. Use the eraser to wipe at the scuffs. Then use a clean cloth to wipe away any residue that is left.
Glass Kitchen Cabinets
Glass cabinets are made of mixed material. They may be wood and glass or laminate and glass. You will need to be careful that you do not damage the glass or the wood/laminate on your cabinet doors when cleaning.
- Time: 30-45 minutes
- Difficulty: Beginner
Materials:
- Glass cleaner
- Dish soap
- Water
- Small bowl
- Clean microfiber cloths
1. Clean the Glass
Use a glass cleaner to clean the glass on your cabinets. Spray your microfiber cloth rather than the glass on your cabinets to prevent spraying the wood or laminate next to the glass.
Open the cabinet door to clean the glass on the inside of the cabinet as well.
2. Clean the Wood or Laminate
Carefully clean the wood or laminate around the glass with vinegar. Do not use an oil-based cleanser to clean the wood. The oil-based cleanser will leave residue and streaks on the glass which is hard to remove.
Instead, put some water with a few drops of dish soap in a small bowl. You’ll use this soapy water to clean the wood or laminate.
FAQs About Cleaning Greasy Kitchen Cabinets
How to Prevent Kitchen Grease From Building Up
There are several ways to prevent kitchen grease from building up on your cabinets. The first way is to wipe your cabinets weekly using a soft sponge and degreaser. This will keep the grease under control.
The second method is to turn on the exhaust fan or range hood the moment you begin cooking. You’ll remove any grease in the air before it has a chance to land on your cabinets.
Wash your hands before cooking. Not only is this good for hygienic purposes, but it will also prevent you from leaving any oily fingerprints on your cabinets.
Wipe down your cabinets with a paper towel after you’ve finished cooking. Yes, I know you’re tired and just want to sit down and rest, but this is one of the best ways to prevent kitchen grease from building up.
How Do You Clean Kitchen Cabinets Without Removing the Finish?
To clean your kitchen cupboard without removing the finish use a gentle oil-based soap such as Murphy’s Oil Soap. Also if you’re using vinegar, do not spray the vinegar directly on the cabinets. Put it on a damp rag first. Wipe the cabinet and let it sit.
Then remove the vinegar with a clean damp rag.

What Is The Best Degreaser For Kitchen Cabinets?
Many people recommend Krud Kutter as the best cleaner for kitchen cabinets.

How Do You Get Greasy Fingerprints Off Kitchen Cabinets?
Remove greasy fingerprints from your kitchen cabinets by using a 50-50 vinegar and water solution. Dampen a cloth in the mixture and wipe the fingerprints until they’re removed. Then use a damp cloth to remove any vinegar before using a clean dry cloth to dry your cabinets.

Why Are My Kitchen Cabinets Sticky After Cleaning?
Kitchen cabinets are often sticky after cleaning because the cleanser sometimes leaves a sticky residue. Remove this sticky residue by using soapy water. You can do this by adding a couple of drops of dish soap to 2 cups of water.
Wash the cabinets with this solution. Then dip your sponge into vinegar to wipe down the cabinets. Use a clean damp cloth to remove all the soapy water and vinegar from your cabinets before drying the cabinets with a clean dry cloth.
If you have a tough stain, use a baking soda paste. Put baking soda on a plate and add the same amount of water. Stir it together until you have a paste.
Then, dab the paste onto the stain and rub the stain gently. Let it sit for a few minutes after rubbing the stain before using a clean damp cloth to remove the powdery paste. Dry it with a clean dry cloth.

How Do You Clean Laminate Cabinets Without Streaking?
The best way to clean laminate cabinets without streaking is to mix equal amounts of water and vinegar in a spray bottle and apply it to the surface. Finally, wipe the cabinets with a clean microfiber cloth to ensure there are no streaks.
In Summary
Mix a 50-50 mixture of vinegar and warm water in a bowl. Pour the mixture into a spray bottle. Now spray the solution onto your kitchen cabinets and let it sit for 3-4 minutes. This gives the vinegar time to cut through the grease. Scrub the grease away with a damp sponge. Then wipe the vinegar mixture off your cabinets with a clean damp sponge.