Driving with foggy headlights is dangerous. Your visibility is reduced making it harder to see potential hazards down the road. This happens when your plastic lenses become dull, scratched, and yellowed over time.
Today we’re discussing how to clean foggy headlights so you can confidently drive safely at night.
Key Takeaways
- Headlights become foggy due to road debris and UV rays, which damage the protective coating.
- Cleaning methods include using toothpaste, baking soda and vinegar, Coca-Cola, or WD-40 to remove the haze.
- For a more thorough restoration, sandpaper or headlight restoration kits can be used to restore the headlight completely.
- Protect headlight lenses by applying wax specifically for plastic headlights, using a vinyl film cover, or washing them frequently with a mild detergent.
What Causes Car Headlights to Get Foggy?
Headlights become foggy over time due to the combination of road debris and UV rays from the sun. The two factors wear away at the protective coating on the headlights. To fix your headlights, you will need to remove the damaged coating and add a new coat.
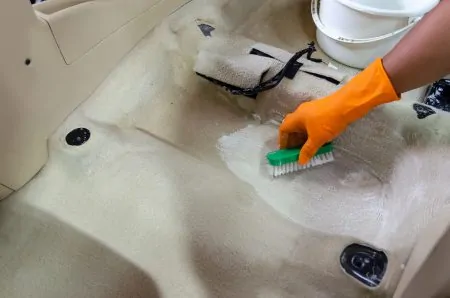
Best Ways to Clean Headlights
Here’s how to defog headlights at home with toothpaste, vinegar, or a lemon.
Toothpaste
Regular white toothpaste can be used to restore your headlights. Gel toothpaste isn’t recommended as it doesn’t work as well.
First, clean your headlights with soapy water and then give them a rinse. Add a fingertip of toothpaste onto the headlight and use a soft cloth to scrub the light. A light coat of baking soda can be added to the toothpaste to help the toothpaste work better.
As you scrub, keep the headlight wet and add more toothpaste as needed. Once the protective coating is removed, you can apply a sealant to your headlights.
Baking Soda and Vinegar
As we’re discussing how to clean headlights at home, we can’t skip cleaning headlights with baking soda and vinegar.
First, remove the dust with a microfiber cloth. Then wash the headlights with soapy water to clean the lens before rinsing the lens with fresh water.
Mix 1-2 tablespoons of baking soda with vinegar to make a thick paste. Use a microfiber cloth to polish the headlight with the paste. Rinse the paste off the lens. Repeat until the lens of your headlight is clean and clear.
Coca-Cola
Cleaning headlights with Coca-cola works because it has enough acidity to dissolve the oxidation and eat away the buildup on a variety of surfaces including your headlights. However, it will work more slowly than toothpaste or vinegar.
To begin, wash your headlights with soapy water before opening the can of Coca-Cola. You can put the Coca-Cola into a spray bottle to spray on the headlights or soak a sponge in the Coke. Apply the Coca-cola to your headlights.
Allow it to sit for 10 minutes before wiping it away. Wash your headlight. If it’s still foggy, you can repeat the treatment as needed.
WD-40
WD-40 is another cleanser you can use to clean your headlamps. To begin, wipe your headlamps clean with a damp cloth before spraying your headlights with WD-40. Make sure to spray a generous layer on them.
Allow the WD-40 to sit on the headlights for 5-10 minutes which will allow the solution to get under the buildup and muck.
Then use a soft, clean sponge to gently scrub your headlights. Wipe them clean with a clean cloth. The WD-40 will also add a protective coating to your headlights to help the shine last longer.
Headlight Restoration Kits
One of your best options is to use a restoration kit to remove the haze from your headlights. We recommend using 3M Ultra Headlight Restoration Kit.
Make sure you follow the instructions on the headlight restoration kit and don’t rush the process. You will likely be spending 15-20 minutes per headlight to clean them. When you have finished, make sure to allow plenty of time for the sealant to dry so you don’t end up with bugs and dirt stuck to your headlights.
Bug Spray
Bug spray can be used as the chemicals in the spray will help to remove dirt and the UV-damaged plastic.
First, clean the excess dirt off your headlights before spraying a cloth with the bug spray. Rub the bug spray on the old cloudy lights. Make sure you don’t get bug spray on the car.
Leave it there for a few minutes before carefully wiping it all off of your headlights.
Caution
This is not the best method to use to clean your headlights as the bug spray may melt your plastic headlamp.
Windex
If you’d like to use Windex to clean your headlights, you will need to prepare the area around the headlight covers to prevent the Windex from damaging your paint. Spray the surface of your headlight generously with the glass cleaner and let it soak for 10 minutes.
Remove the Windex with a clean cloth.
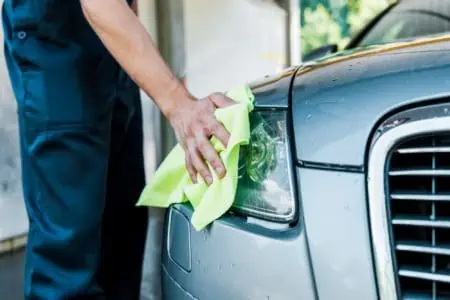
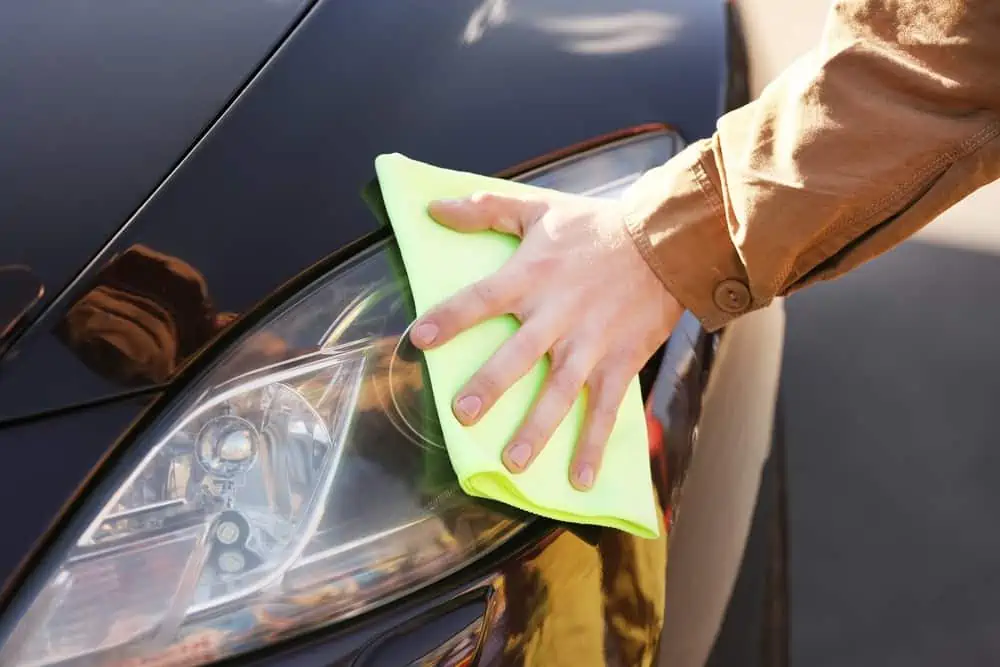
How To Clean Headlights
Cleaning headlights will help you restore some of their original shine and brightness so you have better visibility at night.
- Time: 10-20 minutes
- Difficulty: Beginner
What You’ll Need
- Small bucket
- Dish soap
- Hose
- Cleanser of choice
- Microfiber cloths
- Sponge
1. Wash Headlights
Fill your small bucket with warm water and add 1-2 tablespoons of dish soap to the water. Mix the water so you end up with a solution of soapy water.
Wash the headlights with soapy water before spraying the headlights with a hose to rinse them.
2. Tape
Carefully tape the area around your headlight to prevent the cleanser of your choice from damaging your car’s paint.
Caution
3. Apply Cleanser
Apply the cleanser of your choice to the headlights and if needed allow it to soak for a few minutes.
4. Rinse Headlights
Wipe away the cleanser of your choice using a microfiber cloth. Most cleansers use a sopping wet cloth to remove the cleanser, but WD-40 uses a dry cloth.
How to Restore Headlights
To restore your headlights completely, it’s best to use sandpaper or a headlight restoration kit. Here are the instructions for how to use sandpaper to restore your headlights.
- Time: 1 hour
- Difficulty: Intermediate
What You’ll Need
- Bucket
- Dish soap
- Flannel polishing cloth
- Latex gloves
- Masking tape
- Wet/dry sandpaper from 1000 to 2500 grit
- Plastic polish
1. Wash and Rinse Headlights
Fill a small bucket with warm water and 1-2 tablespoons of dish soap. Mix it until the dish soap is evenly distributed. Use a clean microfiber cloth to wash your headlights before rinsing your lights with a hose.
When you’ve finished washing the headlights, empty and rinse the bucket and fill it with fresh water. Place the sandpaper in the bucket to allow it to soak for at least 15 minutes before you start working with it.
2. Tape Area
Tape up the area around your lenses with masking tape so that you won’t scratch the paint when you sand the lenses.
Take Note
Tape may peel the paint of older cars.
3. Sand Headlight
Look at your headlight before you begin. If the headlight has no scratches but is dulled or yellowed, start with the 1500 grit paper and work up to the 2500 grit paper. However, light scratches will require you to start with the 1000 grit paper.
Choose the appropriate sandpaper. Push the sandpaper back and forth horizontally over the headlight. When you’ve finished, rinse your headlight.
Move up to the next higher grit of paper. Now sand your headlight vertically. Rinse the headlight when you’ve finished.
Every time you move up to a higher level of grit, change the direction you’re sanding making sure you rinse the headlight between papers. Keep working until you’ve reached the 2500 grit sandpaper and sanded your headlight with it.
4. Buff Headlight
Wash your headlight with cool and clear water, and give your headlight plenty of time to dry.
Then stick one corner of your flannel cloth into the polishing compound to put some polish on the cloth. Use firm pressure and polish your headlight in a circular pattern until the lens is smooth and clear. Allow the polish to dry.
Now use the clean end of the cloth to buff off the residue from the polish.
Repeat the process of polishing your headlight one more time.
If there are some small areas of the headlight that still appear to be foggy or yellowed, try repolishing these areas one more time with the polishing compound. Buff the area and inspect your headlights.
It should be clean and clear.
How Do I Protect My Headlight Lenses?
There are a few ways you can protect your headlight lenses.
- Apply wax to your headlights to help protect them from road debris and UV rays. Make sure the wax has been specifically formulated for plastic headlights.
- Cover your headlights with a vinyl film.
- Wash your headlights often with a mild detergent to keep them clean.
FAQs

What Removes Oxidation From Headlights?
The best way to remove oxidation from headlights is to use an abrasive that will grind away the damaged plastic and restore it to its original condition.

Will Magic Eraser Clean Headlights?
Yes, you can clean headlights with a Magic eraser.

Does Rubbing Alcohol Clean Headlights?
Rubbing alcohol will clean the headlights. After washing and rinsing the headlight, wipe the rubbing alcohol all over the headlight for several minutes. Then wait for 10-20 minutes until the alcohol has evaporated.
Your headlights should be clear.
Does Wax Help Clean Headlights?
Yes, a wax that’s formulated for plastic headlights can help to clean them.

Can Lemon Juice Clean Headlights?
Headlights can be cleaned with lemon juice. Cut a lemon in half and add a layer of baking soda to the fleshy surface. Scrub your headlights with the fleshy surface.
Wait 5 minutes and then rinse with water. Repeat if needed until your headlights are clean.

Can Steel Wool Clean Headlights?
You can use 0000 superfine steel wool to clean your headlights. Make sure you’re careful not to scratch the paint of your car with the steel wool.