Many don’t realize how sensitive hardwood floors truly are. They undoubtedly add a sense of luxury to a house, but they also require the correct maintenance.
The way you clean hardwood floors depends on a few factors. These factors include things such as finish, whether they’re sealed or unsealed, and age.
If you’re feeling unsure, don’t worry, we’ve created the ultimate guide for how to clean hardwood floors in various ways, depending on your situation and preferences.
Key Takeaways
- Hardwood floors need proper maintenance to prevent damage and maintain their appearance.
- Sealed floors have a protective layer, while unsealed floors require gentle care and specific cleaning methods.
- Different hardwood floor finishes include water-based polyurethane, hard-wax oil, acid-cured, oil sealer, and aluminum oxide.
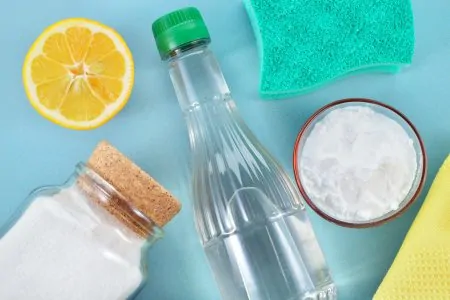
- Natural cleaning methods for hardwood floors include using vinegar and water, tea bags, or olive oil, lemon, and hot water.
Why Maintain Your Hardwood Floors?

Hardwood floors are a luxury. As you step into a house, you’re greeted with a warm atmosphere and a subtle wooden scent that can be so addictive. They add considerable value to a home and can last more than a lifetime.
But owning wooden floors also comes with its responsibilities. Failing to maintain your hardwood floors can alter how they look and even cause damage.
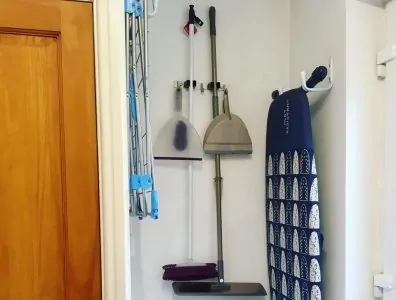
Thankfully, although these floors are sensitive, cleaning them isn’t a complex task. They require minimum water, and you only need to sweep them with a broom or vacuum. Dull floors are also quick to fix, and you can use natural ingredients or specialized cleaners.
Sealed vs. Unsealed Hardwood Floors
You might have recently moved into a new home with hardwood floors, but are they sealed? How would you know?
First, find a secluded area of flooring that’s not too visible. Pour a tiny amount of water onto the area. If it gets absorbed by the wood, the floor is unsealed. If the droplets sit on the wood, your floors are sealed.
Unsealed Floors
Unsealed floors are delicate and challenging to keep clean. Without proper maintenance, they can end up looking dull in no time. So, when cleaning unsealed hardwood floors, there are a few things you should and shouldn’t do:
- Do sweep and vacuum regularly: Removing dust and dirt is essential for maintaining unsealed floors. You should do it when necessary. Choose your tools carefully. For instance, only use a soft-bristled broom or a specialized vacuum for bare floors.
- Do treat with oil: Treating your unsealed floors with oil once a month can help to keep them shining. You don’t need to purchase an expensive product — jojoba or linseed will do fine. After sweeping, apply the oil with a clean rag and buff the floors with a dry mop.
- Do use wax: If you want to add some extra shine, wax your floors between cleanings. Choose petroleum-based and waterless waxes to avoid scratches or warping. Apply a thin coat using a rag, and allow it to dry for at least half an hour. Buff it in using a dry mop.
- Don’t use water: Water is an unsealed floor’s worst enemy. Without a protective coating, the wood will absorb any liquid and swell. You will end up with warping and cracks that are impossible to get rid of (1).
Although unsealed hardwood floors are ultra-sensitive, you can get a good result as long as you’re gentle.
Keep In Mind
Sealed Floors
A finish protects sealed hardwood floors. The protective layer prevents moisture from penetrating and being absorbed. So, cleaning your sealed floors is easier since you won’t have to be as careful.
However, finished floors also need to be resealed once in a while. When to do this depends on the type of finish and wear. Generally, though, a good time to do it is when the floor begins to look dull, even after a deep clean.
Some cleaning products reseal floors at the same time. These need to dry for at least 30 minutes. However, resealing or refinishing your hardwood floors is generally best done by professionals.
Types of Hardwood Floor Finishes

There are many types of finishes available for hardwood flooring — each with specific benefits.
1. Water-Based Polyurethane
Polyurethane is one of the more traditional finishes. It gives the floor a smooth, wet look by using several coats. However, newer formulas are water-based and provide a clear finish.
Water-based polyurethane is available in semi-gloss and satin. Many high-gloss hardwood floors are prefinished in the factory, making installation much faster.
Thanks to the gloss, this type of hardwood flooring is easy to clean. But it does require more cleaning because dust, dirt, and pet hair tend to be quite visible. (2)
2. Hard-Wax Oil
Hard-wax oil finish is easy to apply for DIY’ers. It’s an older style that’s making a comeback. This finish gives the floors a lustrous finish that’s easy to maintain.
You can clean the floors using a damp mop and occasionally a specialized cleaner that adds shine.
However, a drawback to hard-wax oil finishes is their low durability and vulnerability to staining. It also requires frequent reapplication; experts recommend you refinish it every two or three years (3).
3. Acid-Cured
Acid-cured finishes are incredibly durable and, therefore, often used on exotic woods and those with a smooth texture. These floors require extra protection, so we don’t recommend more than damp mopping.
Applying this finish isn’t an easy job — certainly not one to do yourself. For one, the formula is highly toxic during the curing process. Additionally, the curing process can last between three days to a month, depending on humidity.
4. Oil Sealer
Oil sealers are another popular choice for do-it-yourself homeowners. They’re easy to apply and non-toxic (4). The finish won’t dry as hard as polyurethane, but it brings out grain patterns and improves the color.
It also gives the wood a natural low-gloss, perfect for traditional-style homes. Tung oil is the primary ingredient in oil sealers. It’s naturally derived and, therefore, not permanent.
Oil sealers require reapplication every three to five years (5). But, don’t plan on going back inside right after a refinish; it needs to dry for at least 24 to 48 hours and requires multiple coats.
Also, avoid applying oils or waxes in an attempt to restore shine. These floors are best re-glossed using a buffer or dry mop.
5. Aluminum Oxide
This is the most durable finish available as it lasts up to 25 years (6). You’ll find this type mostly on engineered floors due to a thinner veneer that you can’t sand or refinish as often.
These floors can be cleaned similarly to polyurethane finishes — regular sweeping or vacuuming and damp-mopping sparingly.
If you want aluminum oxide floors, prefinished wood planks are your only option. This is because of the application and drying tools and equipment used. However, because they’re prefinished, the application will be much faster.
How to Clean Hardwood Floors

Getting a thorough clean on your hardwood floors isn’t tricky. Frankly, regular sweeping or vacuuming will remove most dirt. Damp-mopping is also a life-saver when you need to restore shine.
If you want to know exactly how to clean hardwood floors using different methods, look no further. You can choose from one of the methods below.
1. Naturally
Avoiding chemicals is one of the best ways to preserve your floors. Fortunately, most of the items in our list of ingredients you probably already have in your pantry. Using all-natural products is also great for the environment and safer around children and pets.
Here are some of our favorite methods:
- Vinegar and water.
- Vinegar, water, and plant-based liquid soap.
- Teabags.
- Vinegar and vegetable oil.
- Olive oil, lemon, and hot water.
- Vinegar and vegetable oil.
- Warm water and borax.
- Baking soda.
Warning
Vinegar and Water
Vinegar is one of the most versatile products you can find. Its high acidic levels make it effective at cleaning most stains and surfaces. Vinegar can easily make tough stains surrender and is an excellent way to tackle bad odors.
To effectively clean your hardwood floors, mix vinegar and water in a spray bottle. Whip out your dry mop and spritz as you go along. Because vinegar is so acidic, you mustn’t overdo it — half a cup in a gallon of water is enough.
You can also fill a bucket if you wish to damp mop, but remember to wring out all extra water.
Vinegar, Water, and Plant-Based Liquid Soap
Vinegar and water might not cut when you need an extra-deep clean. Adding a bit of plant-based liquid soap can significantly enhance the mixture. Plant-based liquid soap is very mild and gentle on wooden floors.
Use one-eighth of a cup of vinegar and one-eighth of a cup of liquid soap in a gallon of water. You can either damp mop the floors or use a spray bottle for easy application.
If you want to add some scent, use a few drops of your favorite essential oil. Our favorite for cleaning is lavender; it adds a lovely, long-lasting floral fragrance.
Tea Bags
Black tea is high in tannic acids, making it another excellent choice for cleaning hardwood floors (7). It’s an easy method to apply, and no, you don’t need to find giant tea bags.
Let two teabags soak in a pot of boiling water for a couple of minutes. Pour the tea into a bucket and use a damp mop to wipe your floors gently.
The tea will bring subtle shine to the floors, making them look refreshed. It’ll also add a calming scent.
If you like the spray bottle method, it’ll work just fine with tea as well.
Warning
Vinegar and Vegetable Oil
If you’re extra careful with your floors, you might want to stay away from water. Luckily, you can still use vinegar and vegetable oil to make an effective cleaning solution. Simply mix equal parts of vinegar and vegetable oil.
This mixture will remove dirt and grime effectively while restoring some shine to your floors. It is best applied using a spray bottle and dry mop to buff it in.
However, you might have to buff an area multiple times to get the oil in. If you leave the oil on the surface, it can attract dust and dirt.
Olive Oil, Lemon, and Hot Water
This mix of olive oil, lemon juice, and hot water works as a cleaner and a polish. It restores shine and won’t streak. Olive oil is also excellent for hardwood floors due to its moisturizing abilities.
Fill a bucket with one gallon of hot water. It shouldn’t be boiling water. Simply turn your faucet to the hottest setting. Add three-quarters of a cup of olive oil and half a cup of lemon juice.
Then, stir the mixture using a wooden spoon until everything is combined properly. Dampen a mop and start at the furthest part of the room and work your way towards the exit. The process takes a bit of work since you might have to go over sections twice.
One bright spot, though: because it’s soap-free, you won’t have to rinse it. Simply leave it to dry and enjoy your revived floors.
Warm Water and Borax
Borax is an excellent solution if you want more protection on your wooden floors. It’s a natural desiccant that dries water-damaged wood.
Another great thing about borax is that it’s a natural pesticide (8). Termites can quickly do damage to a wooden floor. However, borax kills termites and other wood enemies such as fungus.
Dissolve half a cup of borax in a bucket with warm water. Then use a mop or sponge to clean the floor. The borax will leave your floors with a refreshed sheen.
Baking Soda
Baking soda is another universal, natural cleaning product like vinegar. It’s alkaline but can change the pH level of acid when in contact (9).
This is why baking soda is so effective at removing odors. However, if your wooden floors are unsealed, the baking soda could cause a stain, so please be careful.
All you have to do is locate the troubled area and sprinkle some baking soda to cover it. Scrub the spot briefly and then remove the powder with a damp cloth. You may have to repeat if the stain is consistent, but the baking soda should get it off in no time.
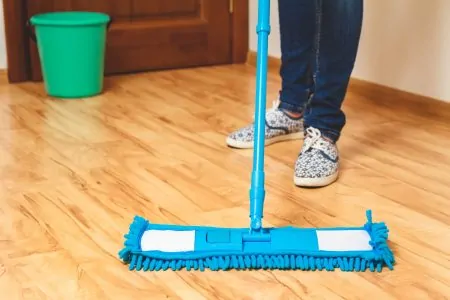
2. With a Mop
Mopping is a crucial part of cleaning any floor. But, to effectively clean hardwood floors, you need to have the right mop.
Microfiber
Microfiber is one of the best materials to use on hardwood floors. It’s soft and designed to pick up a lot of dust and dirt without leaving streaks (10).
A microfiber mop with a swivel handle is convenient. It allows you to move around corners and furniture with ease.
Wet the microfiber pad in your cleaning solution. Wring it until damp, and place it on the floor. Most attach easily to the base of the pole, so you won’t have to fiddle around.
Spin Mop
Spin mops are very useful on hardwood floors because you can get a lot of moisture out without using force. The mop head is also made of a very soft material that’s gentle on wooden floors.
Fill the bucket with your desired cleaning solution. Wet the mop, and use the spin to wring it thoroughly.
Spray Mop
A spray mop has a small container fitted that you can fill with a cleaner. It has a spray function, so you can spritz wherever needed as you go along.
The mop features a trigger at the top of the handle. Point and spray where needed, and then glide the mop over the area.
You just have to be careful not to overspray and always dry the area thoroughly when done.
Steam Mop
Using a steam mop on hardwood floors is quite controversial. Some say it’s okay, while others think it’s the biggest no-no.
However, steam mops marked as safe for hardwood floors will mop up excess water, leaving the floors nearly dry. Still, we advise you only use steam mops on properly sealed floors.
When using a steam mop, fill the small container with water and plug the mop into an outlet. Allow it to heat for as long as stated in the instructions. Once heated, mop your floors as usual. The mop will begin to create steam as it glides over the floor.
Steam Mops At Your Own Risk
3. Cloth and Spray Bottle
Cleaning hardwood floors with a cloth and spray bottle is quick and easy. You can use a microfiber cloth to clean without leaving streaks effectively.
This method is also useful for spot cleaning. Simply spray the small area and wipe with a cloth.
4. With a Vacuum
Using a vacuum is an effective way to quickly get rid of dust, dirt, and grime. However, because hardwood floors are so delicate, you must choose the right vac.
Due to the hard surface, you won’t need any special attachments; all you need is good suction.
You should also avoid any vacuum tools designed for carpets, such as beater bars, rolls, and stiff brushes. These will create deep scratches on your floors.
Opt for no attachments, or choose specialized dust brushes instead. These are soft and gentle on the wooden surface. You’ll also find vacuums specifically designed for hardwood floors. They usually come with suitable attachments and power settings.
5. Without Water
Water is wooden floors’ biggest enemy. But luckily, you don’t actually need water to keep them clean.
Dry Mopping
Dry mopping is very effective at tackling dust and dirt. These mops are usually made of microfiber and have a swivel handle for easy maneuvering. Tackle your floors straight on or zig-zag your way down the hall.
Wax Paper
Like a dry mop, wax paper effectively eliminates dirt and dust. Attach a piece of wax paper to a flat dry mop; you might need a piece of tape. Run it over your floors, paying attention to edges and corners.
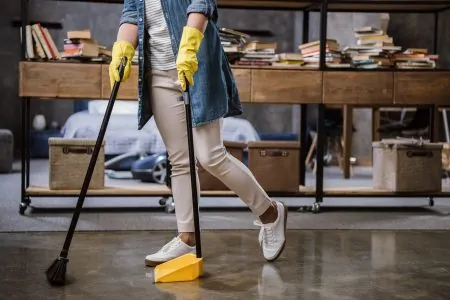
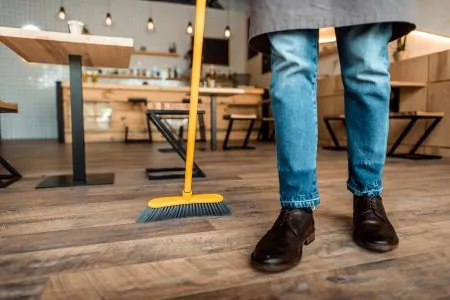
Soft Broom
A soft broom might become your new best friend. It’s quick to whip out and efficient at getting rid of dust bunnies.
Make sure you choose a broom with flagged bristles. These are flared at the end — like split ends — and are softer and more effective with fine dust.
How to Clean Old Hardwood Floors
Taking care of old hardwood floors isn’t as straightforward as new ones. Here are a few tips to keep them clean without damage:
- Daily sweep: Sweeping daily will keep dust and dirt at bay, minimizing stains.
- Vacuum weekly: Mark a day in your calendar as a reminder to vacuum weekly. Delicate floors can’t handle the strong suction every day.
- Mop monthly: Keep water to a minimum when dealing with old wood. Only use a damp mop once a month to restore shine.
- Remove spills: Wipe it off with a cloth as soon as you notice a spill or stain.
Additional Tips and Tricks

Follow these tips to keep your hardwood floors clean and scratch-free:
- Schedule cleaning: Having set times to clean is better for your floors, but it can also be easier for you. Mark your calendar for daily sweeps or vacuuming, and find a good day every week for mopping. Hardwood floors don’t require deep cleaning often, so you can also minimize your workload.
- Remove wet spills: Another great way to keep your floors healthy is by cleaning up spills immediately. This might become a tough job for parents since wet spills are just part of the job. But leaving wet messes can create watermarks, damage, spots, and stains. So have a few microfiber cloths at hand to quickly wipe away any mess.
- Use rugs: Placing a few throw rugs around the house can limit wear on your floors. Try to place them in spots where scratches are more likely to occur, like under tables and chairs. Avoid rugs with a rubber underside — this can create a humid environment between them and the floor, leading to damage.
- Leave shoes at the door: Take your shoes off as soon as you enter your home. Cleats and heels are deadly to hardwood floors since they can leave dents and deep scratches. Maybe put up a friendly reminder by the door so that anyone who enters will know to remove their shoes.
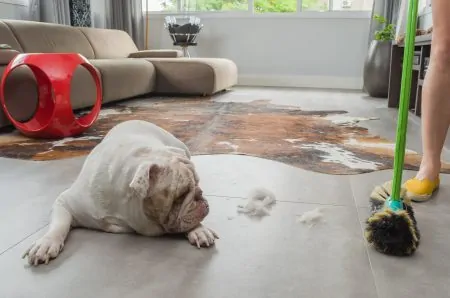
- Trim pet nails: If you have a loveable dog at home, keep those paws trimmed. As they run around, they can easily scratch the sensitive surface. Trimming their nails is also an essential part of their care.
- Doormats: To keep cleaning to a minimum, you also need to keep dirt to a minimum. Having a doormat is a convenient way to leave dirt and small stones outside. Rain and snow can also come inside via boots and shoes during winter and rainy days. These can cause water damage if not removed.
FAQs

How Often Should You Mop Hardwood Floors?
You should mop hardwood floors at least once weekly to keep them clean and remove bacteria. You may need to mop more frequently if you have pets and children.

How Do You Keep Hardwood Floors Clean and Shiny?
The best way to keep hardwood floors clean and shiny is to vacuum or sweep them regularly and use natural ingredients like white vinegar and lemon juice. Finally, buff the floor dry with a soft cloth to restore the shine and remove streaks.

Can You Use Dawn Dish Soap on Hardwood Floors?
You shouldn’t use Dawn Dish Soap on hardwood floors. However, it is effective on tile, marble, and granite floors. Use natural ingredients for the best results on hardwood floors.

Can You Use Pine-Sol on Wood Floors?
You can use Pine-Sol on wood floors. It is perfectly safe, as long as your floor is sealed and finished. If in doubt, consult the manufacturer’s guidelines before using it.

Is Murphy’s Oil Soap Good for Wood Floors?
Murphy’s Oil Soap is good to use on wood floors if they are sealed and finished. It is an excellent wood floor protection product, and great for cleaning spot stains or entire floors.
Cleaning the Right Way
Hardwood floors are delicate but not impossible to maintain. They add significant value to a house, and they can be a lifetime investment. How you clean your floors depends on whether they’re sealed or unsealed (without a protective layer).
Hopefully, our guide has helped you know exactly how to clean hardwood floors. Remember to be gentle when sweeping or vacuuming and keep water to a minimum. Clean up spills as they happen, and your floors should be more than fine.