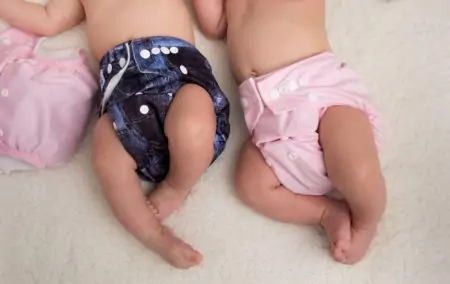
Are you considering using cloth diapers on your baby? After all, cloth diapers are environmentally friendly and more economical than disposable diapers. However, the thought of cleaning cloth diapers can be intimidating.
Don’t worry. Reusable diapers aren’t that difficult once you know how to wash cloth diapers.
Key Takeaways
- Rinse cloth diapers in cold water, then wash in hot water with detergent. Use extra rinse if available.
- Avoid bleach and fabric softeners, and use detergent without optical brighteners or extra enzymes.
- Hang diapers to dry on a clothesline or tumble dry on a low heat setting.
- Wash cloth diapers every 2-3 days, and rinse daily to prevent stains and odor.
What To Consider Before Washing Cloth Diapers
Before you begin to wash your child’s reusable diapers, there are a couple of things you need to consider first.
The first is your water. Do you have hard water? Hard water has a high amount of minerals in it, so it will leave mineral deposits on the reusable diapers as you wash them.
If you do have hard water it’s not a big problem as there are a few tricks to counteract the mineral deposits that buildup such as using laundry detergent that is made for hard water.
The second thing to consider is your detergent. You will need to use a basic detergent without optical brighteners or extra enzymes. Baby’s have sensitive skin that may react to these additives.
How To Machine Wash Cloth Diapers
To ensure that your diapers are cleaned properly and that you do not develop stink issues you will need a proper wash routine. Ideally, diapers should be washed every 2-3 days, and can be rinsed daily.
- Time: 3 hours
- Difficulty: Beginner
What You’ll Need
- Laundry detergent
- Washing machine
- Dryer or clothesline
- Clothespins (if using a clothesline)
1. Remove Any Solid Waste
Remove any solid waste in the diaper by flushing it down the toilet. Then rinse the diaper in cold water.
One option is to hold the diaper in the toilet and swish it around until the solid particles are removed and the diaper is wet.
The second option is to install a diaper sprayer to your toilet inflow pipe. It will act as a mini-showerhead when you rinse the diapers. Spray the diaper until the solid particles are removed and the diaper is wet.
If there is no solid waste in the diaper it can go directly into the diaper pail.
2. Drop Into Diaper Pail
Your diaper pail should be aerated. This helps to prevent stinks. A washing basket works well for this.
Drop the dirty diaper into the diaper pail until wash day.
3. Rinse Diapers
Cloth diapers need to be rinsed before washing them. This is to get rid of the urine in the diapers so that they can be washed in clean water.
To rinse them use your machine’s rinse and spin cycle or use a cold speed wash cycle.
Do not use detergent at this time. This prewash will help to loosen any remaining solid particles on the diapers and will reduce staining, it will also get rid of the urine in the diapers.
4. Wash Diapers In Washing Machine
Once the speed cycle is finished, wash the diapers in hot water on a normal wash cycle. It is best to have the drum filled to about ¾ of its capacity. This way there will be enough agitation within the machine.
Add detergent to the wash cycle, but do not use bleach or fabric softeners when washing the diapers. You should use the maximum amount of detergent as per the manufacturer’s guide for heavily soiled washing.
The rinse cycle can be set to warm or cold water. If you have the option, an extra rinse is helpful as it helps prevent detergent from building up on the fabric of the diapers.
Do not use a gentle cycle to wash. This does not provide enough agitation to clean the diapers properly and could then cause stink issues or urine build-up.
5. Dry the Diapers
Dry the diaper on a low tumble in the dryer or hang the diapers on a drying line in the shade.
The best option is to line dry your diapers. Natural fibers can be hung in the sun but waterproof covers and pockets that are made of pul should be dried in the shade, as direct sunlight can damage the pul fabric.
Diapers can be dried in the dryer on a low heat setting but this is not ideal as it causes more wear and tears on cloth diapers than the other methods of drying. Also, make sure to check the label of your diapers as some manufacturers advise against tumble drying.
How To Hand Wash Cloth Diapers
Sometimes a washing machine and a dryer are not available. Hand washing can be done effectively and just as well as a machine if you know how.
- Time: 2 hours
- Difficulty: Intermediate
What You’ll Need
- Detergent
- Hot/warm water
- Scrub brush
- Clothesline or drying rack
- Clothespins
- Bathtub or bucket
- Rubber gloves (optional)
- Stain soap (optional)
- Plunger (optional – needs to be used with a bucket)
1. Pre-Rinse Diapers
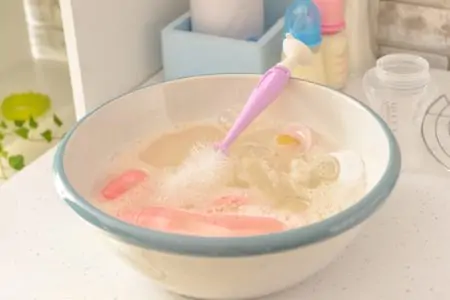
First, pre-rinse the diapers. This can be done in cold or hot water. Let them sit for about 10 minutes to make certain they’re good and wet.
2. Prewash the Diapers
Fill the tub or bucket with warm or hot water. You’ll want the container about ⅓-½ full of water so the diapers will be completely covered by the water when you add them. Use ¼ of the normal amount of detergent for a bathtub and less for a bucket.
3. Add Diapers and Agitate
Add the diapers to the tub or bucket. Use your hands in the bathtub or bucket to agitate the water and swish the diapers around.
If you’re using a bucket and have a plunger, you can use the plunger in the bucket to agitate the water instead of your hands. This is an easy and effective way to do it. For the prewash, you can do around 50 plunges.
4. Drain Water & Remove Excess Water from Diapers
Drain the water from the bucket or bathtub. Also, squeeze any excess water from the diapers by pushing down on the diapers. The diapers should no longer smell.
Do not wring the diapers. This may stretch the fabric and cause the diapers to lose their shape, ruining the diapers.
5. Check for Staining
If you see any staining on the diapers, use the stain soap and a brush by adding some soap to the brush and then using the brush to scrub at the stain.
6. Add Water and Detergent
Add hot water and detergent to the bucket or bathtub. For every 3 gallons of water, you’ll need to use ¼ of your normal recommended amount of detergent. So if you fill your bathtub with 12 gallons of water, you’ll use the full recommended amount of detergent.
7. Add Diapers
Add the diapers to the bucket or bathtub. Again you will knead and agitate the diapers in the water.
If you’re using a plunger and bucket, then use the plunger to agitate the diapers. You can use around 200 plunges as the wash cycle.
Leave the diapers in the water for about 30 minutes.
8. Drain the Diapers & Remove Excess Water
Again you will drain the diapers and remove any excess water by squeezing the diapers against the bottom and sides of the container. Do not wring the diapers.
9. Rinse Diapers
Rinse the diapers by filling the tub or bucket with warm water. You’ll agitate the diapers again for the third time. Then drain the tub or bucket and squeeze the diapers to remove any excess water from them.
If there are suds in the water or the water is slimy, then rinse, agitate, and drain the diapers until the suds or slimy water no longer appears when you agitate the diapers.
10. Dry the Diapers
Hang the diapers on a clothesline or drying rack to dry. Be sure to wash all equipment you used to wash the diapers such as the tub, bucket, or plunger.
How to Strip Diapers
Stripping diapers is a method of removing any buildup from your diapers. This includes minerals from hard water as well as buildup from detergents. If you are using preloved diapers you will need to strip them before using them on your baby. Stripping is also necessary if your baby has thrush.
Stripping should not be part of your regular wash routine as it can damage your diapers if done often.
- Time: 2 hours
- Difficulty: Beginner
What You’ll Need
- Washing machine
- Original Dawn dish detergent, bleach, or laundry treatment designed for stripping
1. Put Diapers into Washing Machine
Ensure that your diapers are clean before you strip them. Place your clean diapers into the washing machine.
2. Add Stripping Agent
Let your machine fill with water before adding your stripping agent. When it is done filling up you can pause your cycle if needed to aff the stripping agent.
Add the stripping agent you’ve chosen to use to the washing machine. Use the recommended amount of the laundry treatment designed for stripping or a few drops of Dawn. If you are using bleach, mix ½ cup of bleach with 34 ounces of water before adding it to your machine.
Do not add any other detergents or extra additives to the wash.
Run a normal wash cycle.
3. Wash Diapers
Next, run another wash cycle but this time, use hot water on a regular wash cycle.
4. Dry Diapers
Dry the diapers in the dryer or on a clothesline.
5. If the Smell Persists
If the smell is still there, you can repeat the treatment process up to three times. If you think it’s simply a detergent buildup rather than hard water, you can wash the diapers in plain hot water with no additives, strippers, or detergents.
Pro Tips When Cleaning Cloth Diapers
Diaper pails
Diaper pails should not be sealed containers. Airing the diapers will help prevent stinks. You can also add baking soda to your diaper bags and diaper pails or use a few drops of tea tree oil on a piece of cotton wool. This will help to deodorize the containers and keep them from stinking.
Rinse daily
Rinse your diapers daily. You can do it by hand, in the baby’s bathwater after a bath. This will help prevent urine build-up and stink issues.
Rinse night diapers
Rinse your night diapers directly off of the bum in hot water. These nappies tend to have a stronger smell as they hold much more urine than day nappies. The hot water breaks down the urine and so prevents stinks.
Avoid Bleach
Avoid using bleach to clean your diapers. It’s a harsh chemical that may damage the fabric of your diapers.
Use Vinegar
You can use vinegar to help clean your diapers and remove buildup. However, be careful how much vinegar you use as it’s a cleaning acid and may damage the fibers of your cloth diapers.
Cloth Diaper Care Tips
There are a few tricks that make life easier for babies and for toddlers using cloth diapers.
Diaper Liners
Use diaper liners to provide extra skin protection for your child. They also help prevent stains on your diapers. Most diaper liners are biodegradable and can be flushed down the toilet. If you prefer reusable ones, polar fleece liners work well too.
Waterproof Bags
Carry waterproof bags that can be sealed shut when you travel. This way you have a place to store your wet diapers until you return home. Plus, you won’t need to worry about the water from the diaper escaping.
It’s handy to keep a waterproof bag in your diaper bag so you’re never caught unprepared.
No Softeners
Do not use softeners when washing cloth diapers. The softeners leave a residue on the diapers that may irritate your baby’s sensitive skin and can also mess with the diaper’s ability to absorb liquids.
Polyester Diaper Covers
Wash polyester diaper covers in warm water and dry on a drying rack. Do not hang them up as the diaper covers can stretch out and lose their shape.
Stiff Diapers
If your diapers are stiff coming off the clothesline, you can rub them to soften them. A quick tumble on a low heat setting can also help.
How Often Should You Wash Cloth Diapers?
It is best to rinse your diapers daily and then wash them every 2-3 days. The reason is that the longer the soiled diapers stay in the pail, the more likely they are to stain and cause the diapers to stink. Urine is also acidic and can cause damage to the natural fibers used in modern cloth diapers. Eventually, this will ruin your diapers.
FAQs About Cloth Diapers

Do You Really Save Money Using Cloth Diapers?
Yes, most people save $1.50 to $2.00 per day using cloth diapers. However, the first year requires a sizable investment in cloth diapers, diaper pails, and covers. This means you may not save much the first year, but you will save quite a bit every year after that. Even more so if you have more than one kid.

Is Washing Cloth Diapers Sanitary?
Yes, washing cloth diapers is sanitary as you flush all solid waste down the toilet before washing the diapers.

How Do You Clean Poopy Cloth Diapers Without Sprayer?
If you don’t have a sprayer, flush the poop down the toilet. Then hold the diaper covered with poop firmly by one corner as you swish the diaper in the toilet to rinse it.
Can I Wash Cloth Diapers And Inserts Together?
Yes, most inserts can be washed with cloth diapers. Be sure to check the washing instructions of your inserts as the washing instructions differ between different manufacturers.

What Do You Soak Cloth Diapers In?
Modern cloth diapers should ideally not be soaked as it damages the natural fibers. You can rinse them to loosen any soil on the diapers. You can also wash them on the speed cycle in cold water before washing the diapers.
Do You Wash Cloth Diapers In Hot Or Cold Water?
It is better to wash the diapers in hot water if permitted by the manufacturer. If you have to wash in cold water you will need to add some extra detergent.

How Long Does it Take For Cloth Diapers to Dry?
The time it takes for cloth diapers to dry varies depending on the size and thickness of the diaper and the way you choose to dry it. The fastest method is to place it in the dryer for thirty minutes
In Summary
Prewash your baby’s cloth diapers by rinsing the diapers in cold water with no detergent. Next, wash the diapers again using hot water and laundry detergent. Use the extra rinse cycle if you have it. Finally hang the diapers on a clothesline to dry or put them into your dryer on a low tumble.