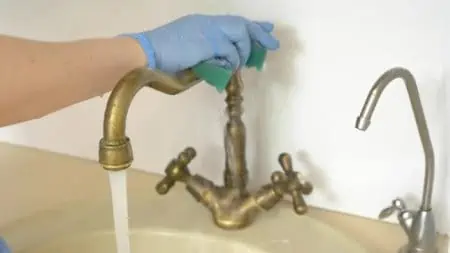
Brass pieces are a statement in any home, but not when they’re dull and filthy. If you can’t seem to get your brass clean, don’t fret. We can help.
First of all, you need to determine whether it’s real brass or fake. We’ll walk you through how to do that.
Once you’ve determined it’s real brass, we’ll show you eight methods for how to clean brass hardware, jewelry, and more so that it’s shiny, beautiful, and spotless.
Ready to restore your brass? Let’s get cleaning.
Key Takeaways
- Determine if your item is real brass by testing it with a magnet and checking for a shiny yellow scratch. Real brass is not magnetic.
- Clean brass using simple methods like soap and water, toothpaste, lemon and baking soda, or even ketchup.
- For stubborn stains or heavily corroded pieces, consider using specialized products like Brasso or Bar Keepers Friend.
- Be cautious when cleaning lacquered brass, valuable antiques, or brass jewelry; consider consulting a professional to avoid damage.
How To Tell If It’s Brass
First, you need to determine whether you’re copper-colored home decor is actually real brass. There’s no point in following our cleaning methods if the brass is fake.
The easiest way to determine this is to test the brass with a magnet. If the magnet sticks, then it’s not real brass. Real brass isn’t magnetic, so your item was probably made of steel or cast iron before the manufacturer coated it with a brass plating.
If the magnet doesn’t stick, then it’s probably real brass. But you can go a step further by scratching an inconspicuous area with a sharp tool. If you see a shiny yellow scratch, then it’s likely real brass. If the scratch is silver, then your item is most likely zinc.
The other type of brass is lacquered. Lacquered brass is real brass that has a thin protective layer over it. You can tell if the brass has been lacquered when you can see the thin shiny layer. There should be no tarnishes on the brass, but if there are, you will also notice a crack or the lacquer peeling off in places.
Sometimes it can be difficult to tell if the brass has been lacquered so it’s best to check with the manufacturer.
How To Clean Brass
Once you’ve determined that your item is authentic brass, you’re probably wondering what the best way to clean it is. You can use a few DIY methods that involve items you already have at home. If you’d rather buy a specialized product, we have that option too.
Below are eight methods for cleaning your brass pieces, even antiques!
- Time: 10 minutes
- Difficulty: Easy
Soap and Water
Starting with the most straightforward method, soap and water will do the trick. This will clean stained and tarnished brass pieces. In fact, it even works for fake brass. Whether you’ve got brass candlesticks, doorknobs, or another gorgeous piece, put this method to the test.
- Make a bath: Pour warm water into a basin or sink and add a few tablespoons of soap.
- Soak and scrub: Soak the brass item in the soapy water for a few minutes before scrubbing with a cloth or toothbrush. Continue to remove stains and dirt. You might need to use some elbow grease!
- Rinse: Rinse the brass piece.
- Dry: Wipe dry with a cloth.
Toothpaste
Toothpaste is a bit of a versatile item to keep in your home. It cleans your teeth, but it can also clean brass. What’s more — it can also polish your brass items. So if you have an old item that’s on the dull side, try cleaning it with toothpaste.
- Apply: Use plain white toothpaste (no gels or flavors). Apply a thin layer to the brass piece.
- Leave: Leave it to sit for a few minutes.
- Polish: Use a dry microfiber cloth to buff the brass, spreading the toothpaste into the piece. You might need to use some elbow grease on stubborn stains. Add more toothpaste if necessary.
- Rinse: Once the brass is clean and polished, rinse it with cool water.
- Dry: Wipe dry with a microfiber cloth.
Lemon and Baking Soda
We love cleaning with baking soda and lemon.
These natural cleaners are great at removing build-up and dirt on your brass items. We recommend this for items you can’t dunk in water, such as doorknobs or handles.
You can simply follow this method without removing them from their spot in the house.
- Create mixture: Squeeze ½ a lemon into a bowl. Add one teaspoon of baking soda. Mix together.
- Apply: Dip a clean cloth into the mixture and apply it to the brass item.
- Buff: Buff the brass to remove grime. Continue until it’s clean. Apply more of the mixture and repeat this step to polish the brass item.
- Wipe: Use a damp cloth to wipe away any residue.
- Dry: Use a separate dry cloth to dry the item.
Lemon and Salt
Have lemons you need to use up and brass that needs restoring? Try this method. The abrasive texture of the salt is excellent for removing hardened and stubborn stains. Try this combination if you have a really old brass piece that needs to be revived.
- Prepare mixture: Slice a lemon in half and sprinkle a teaspoon of salt over the exposed part.
- Rub: Rub the salty lemon onto the brass item, squeezing out more lemon juice as you go. Continue until the piece is clean. Add more salt if necessary.
- Rinse: Rinse under warm water, or dampen a cloth and wipe the item.
- Dry: Use a microfiber cloth to dry the piece.
Save The Day
For brass pieces that have turned black, green, or another color, this method will work wonders. The salt especially works on heavily corroded pieces since it can scrub off layers of oxidation.
Vinegar
Cleaning with vinegar is a great hack.
We’ll be mixing vinegar, salt, and all-purpose flour for this method. This is for tough stains, the kind that makes you want to throw the whole brass piece away. Well, we’re going to revive it, so it looks as good as new.
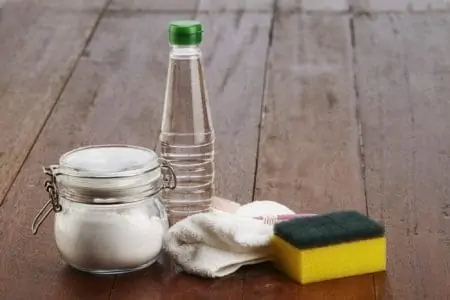
The salt will work off any stubborn build-up. The acid from the vinegar will remove stains. The flour will thicken up the mixture, so it’s more effective. Let’s go.
- Mix: In a bowl, mix one teaspoon of salt with ½ cup of distilled white vinegar. Stir well. Add about two tablespoons of flour to make a paste.
- Apply: Use a cloth or toothbrush to apply the mixture to the brass object. Once it’s coating the item, let it sit for 10 minutes. It will work its magic during this process.
- Rinse: Run the item under cool water or rinse with a dampened cloth to remove all residue. Wipe it clean afterward.
- Dry: Use a dry microfiber cloth to dry the brass object.
Ketchup
You might have heard this tale that ketchup can restore brass. Is it true? Yes! This is a cheap way to bring back life to old brass or antique pieces. Due to the acidic quality of ketchup, it’s great at breaking down grease and grime, and removing stains.
- Test: In an inconspicuous spot, squirt a little ketchup. After a couple of minutes, wipe with a damp cloth. If it worked and didn’t damage the brass, carry on with the following steps.
- Apply: Either squeezed ketchup directly onto the item or onto a cloth first. Spread it evenly across the piece.
- Leave: Leave the ketchup to sit for a few minutes while the acid works its magic.
- Rinse: Rinse under water or with a separate damp cloth until all of the ketchup has been removed.
- Dry: Dry with a cloth.
Brasso
While you can clean and polish brass without Brasso — you might be a big fan. And why not? It certainly works. After all, it’s made for cleaning brass.
- Shake: Shake the bottle well before using.
- Soak a cloth: Saturate a clean cloth or sponge with Brasso.
- Rub: Rub Brasso thoroughly onto your brass piece until stains have been removed and the item is visibly polished.
- Buff: With a separate cloth, buff the item. No need for rinsing or drying!
Did You Know
Brasso works on other metals too. This includes copper, stainless steel, pewter, bronze, and aluminum. So if you have lots of metal items to clean — or own an antique store — this is a great investment!
Bar Keepers Friend
Another trusted specialized product for cleaning brass is Bar Keepers Friend. You can use it on brass, ceramic, copper, chrome, bronze, and more. It’s a great all-purpose cleaner — and it isn’t too expensive either.
- Dampen the brass: Dampen the brass piece first. Dip it in water or spritz it with a spray bottle.
- Sprinkle Bar Keepers Friend: Sprinkle the product onto the dampened brass.
- Rub: Rub the brass using a wet cloth, scrubbing the Bar Keepers Friend into the object to remove stains and dirt.
- Rinse: Rinse it within one minute of application; otherwise, the Bar Keepers Friend can discolor the brass.
- Wipe dry: Use a soft cloth to wipe the item dry.
When To Hire a Professional
While you can use these DIY methods at home, sometimes the best way to clean brass is to take it a professional.
One instance in which you should take the brass to a pro is if the piece is lacquered. A lacquer finish is a thin shiny layer that prevents tarnish. But most of our homemade brass cleaners can ruin a lacquered finish, so a professional cleaner is key.
Another situation in which you should consider a professional is if the piece is of high value. The last thing you want to do is ruin your antique brass heirloom. So while you know how to clean and polish brass — a professional might be your best option in this situation.
Last but not least, if you have tried any of the above methods in an inconspicuous spot and notice damage, don’t clean the brass yourself. Take it to a professional brass and metal cleaner.
What To Avoid When Cleaning Brass
You now know the best ways to clean brass, but there are some warnings we need to tell you about. Knowing these red flags can help you take fantastic care of your brass and avoid damage.
- Avoid coarse steel wool: While some experts will polish brass with very fine steel wool, never use a ball of steel wool thicker than a grade 00. Otherwise, you will scratch the brass’ surface.
- Wash then polish: If you want to polish the brass piece, never do so without washing it. First of all, it won’t work super well. Secondly, if you polish it without washing it, you can end up scratching dirt and debris into the brass.
- Avoid rough abrasive cleaners: Don’t clean your brass items with rough cloths, metal-bristled brushes, or harsh steel wool. You can easily damage and scratch the brass.
How To Clean Brass Jewelry
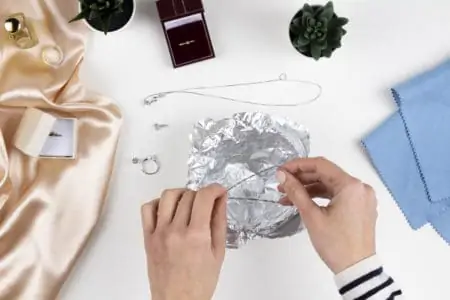
You might be nervous about cleaning your brass jewelry, but we have a fantastic method that avoids harsh chemicals or scrubbing.
- Prepare: Put the brass jewelry in a bowl or tub. Squirt a layer of ketchup over the jewelry to submerge the jewelry. Add a splash of water and gently shake the bowl to ensure that the jewelry is completely covered.
- Leave: Let the jewelry sit in the ketchup solution for 10-20 minutes. If it’s extra dirty, leave it for 30 minutes.
- Rinse: Remove the jewelry from the ketchup and rinse the jewelry under cool water. Make sure your sink is plugged so you don’t lose your jewelry down the drain!
- Scrub: If there is still some discoloration, then use very fine steel wool (00-0000) or a soft cloth to scrub it completely clean.
- Dry: Dry the jewelry thoroughly with a thin paper towel and a q-tip. Make sure you get in all the nooks and crannies.
Tips For Maintaining Brass
To keep your brass looking beautiful, keep these handy tips in mind.
- Don’t touch it: Okay, well, you can touch it when you need to. But avoid touching it too often. This counts for both decor pieces and jewelry. The oils from your skin can tarnish the brass pretty quickly. For things like doorknobs that you need to touch often, wipe with a soft cloth every day to prevent tarnishing.
- Always use a soft cloth: Opt for a soft cloth when cleaning unless you’re trying to remove stubborn stains. This will prevent scratching and further damage.
- Be careful with lacquered brass: As mentioned, always take lacquered brass to a professional for proper cleaning. In between cleans, you can wipe it with a soft, damp cloth to maintain it.
- Oil it to prevent tarnishing: If you apply a thin layer of mineral or linseed oil, it can effectively prevent tarnishing. Apply the oil to a freshly cleaned piece of brass using a soft terry towel.
- Seal the brass: The thing about brass is that it will tarnish. That’s because oxygen is the cause of tarnished brass. So you can’t exactly avoid it. You can prevent this process by sealing the brass. Apply a small amount of paint thinner to a cloth before rubbing it over the brass. Wipe it with a separate damp cloth to remove the residue. Leave it to dry overnight before polishing the brass with our lemon juice and salt method. Then clean with soap and water. Finally, paint the brass with polyurethane. Let this dry for two hours, then repeat four times. It should protect the brass for a couple of years.
FAQs

Why Does Brass Turn Green?
Brass contains copper. When copper reacts with oxygen, an oxidation process occurs. The brass will then turn green as a natural layer to protect the metal from becoming even more tarnished. In a way, it’s a good thing. But we know it’s definitely not pleasant to look at.
You can clean green oxidation off with an abrasive cleaner, like lemon and salt.

Can You Use WD-40 to Clean Brass?
WD-40 has many uses, and even the manufacturer suggests using it for cleaning brass. It’s quick, and it works! Simply coat the brass item with a layer of WD-40 and let it sit for up to 30 minutes. Rub the item with a clean cloth in circular motions to dry and buff it simultaneously. If you are on the hunt for the answer on how to polish brass until it’s shiny, then WD-40 is it.

Can You Use Steel Wool On Brass?
As long as you’re careful and use nothing coarser than the grade 00 steel wool. Anything tougher than this, and you can scratch your brass.

How Do You Clean Brass Without Removing Patina?
Patina is a greenish color that naturally occurs through oxidation. While some people hate it, others love it. It gives the brass a timeless and antique look. If you want to clean your brass, you have to be careful.
First of all, you can try polishing the brass piece with a polish-soaked cloth. For instance, the Cape Cod Polishing Cloths are popular.
Brasso, as mentioned earlier, is also a good choice.
You can also use soap and water if you aren’t using anything abrasive.
Avoid This
To maintain the patina, never use anything abrasive. That’s precisely how to get rid of the patina you have grown to love. Another tip is to test the above methods in a small spot to ensure that it doesn’t erase the patina.

What is the Difference Between Brass and Bronze?
The main difference between brass and bronze is the color. Brass has a dull yellow color, while bronze tends to be a darker reddish-brown color.

Can Coke Clean Brass?
Coke can clean brass. Leave it in to soak for a few hours and it will remove dirt and bacteria.

Will Vinegar Harm Brass?
Vinegar will not harm brass. It is a natural ingredient that cleans and deodorizes, and it has multiple applications around your home.
Good As New
While some folk like the aged look of tarnished brass, others want their brass pieces to shine and sparkle.
No matter how you want your brass to look in the end, we’ve offered you multiple cleaning methods.
Remember to always test your chosen cleaner in an inconspicuous spot to ensure it doesn’t damage the brass. When in doubt, take the brass piece to a professional to avoid damage.