When you invest in an electric razor, you expect it to last. A quality razor will, but you have to clean it regularly in order to keep it sharp and functioning properly.
We’ve put together a fantastic and easy-to-follow guide for how to clean an electric razor. We’ll show you how to clean it daily, deep clean it, maintain it, and more.
If you’re looking to get the best out of your razor and achieve a smooth, clean shave — keep reading.
Key Takeaways
- Clean your electric razor daily by shaking out loose hair and rinsing the shaver head. Deep clean weekly or every five uses for optimal performance.
- Disassemble your electric razor before deep cleaning, following the manufacturer’s instructions for your specific model.
- For deep cleaning, use a microbrush or small paintbrush to remove debris, then rinse and apply soap or cleaning spray as appropriate for your razor model.
- To disinfect your razor, use an alcohol-based cleaning solution and follow the proper dismantling and deep cleaning steps before applying the solution.
- How Often Should You Clean Electric Razor?
- How to Disassemble Electric Razors
- How to Clean an Electric Razor
- How to Disinfect an Electric Razor With Alcohol
- Maintaining an Electric Razor
- How Long Do Electric Shaver Blades Last?
- Should I Buy a Self-Cleaning Electric Razor?
- FAQs
- What’s Better: an Electric Shaver or Razor?
- A Close Shave
How Often Should You Clean Electric Razor?
We recommend giving your electric razor a quick clean after each use. Emptying it and rinsing the shaver head will prevent build-up, and it only takes a few seconds.
As for deep-cleaning, you should aim for once a week, depending on how often you use it. If you don’t use it frequently, aim for every five uses.
Why? A clean razor keeps it sharp and allows you to get a closer and cleaner shave. There’s nothing worse than shaving with a dull blade.
How to Disassemble Electric Razors
For a deep clean, you’ll need to take your electric razor apart. We’ll show you how to do it safely, so you don’t damage your razor.
These methods work for both men’s and women’s razors across various brands, including Remington and Philips.
Rotary Head
Flip the top open if it’s on a hinge or pop it off completely if connected by a friction fitting. Remove the retainer that’s securing the blades. Now remove the blades. Refer to the manufacturer’s guide for the proper steps for your specific model.
Foil
You can remove the protective foils if you have a foil razor, such as a Braun model. They should just pop off. This will expose the blades.
Keep in mind that you can’t remove the foils on all foil razors. Check with your manufacturer first.
Clipper
Pop off the razor head using your thumbs to push it back from the main body. This will expose the blades. You’ll need a screwdriver to remove the blades if you also want to deep clean those.
How to Clean an Electric Razor
These methods will help you clean your razor, so it’s sharp and fresh. We’ll tackle daily cleaning and deep cleaning. These tips are essential whether you’re using men’s or women’s razors.
After Use
Follow these steps after every shave.
- Time: 3 minutes
- Difficulty: Easy
What You’ll Need
- Water
- Cleaning station (optional)
1. Shake Out Razor
After each use, turn off and unplug the razor. Hold it upside down over the sink and tap it gently with your finger. This will shake the hair loose from the device. Continue until hair is no longer falling out.
Be Careful
Don’t tap the razor against the sink as the impact could damage your razor.
2. Rinse the Razor
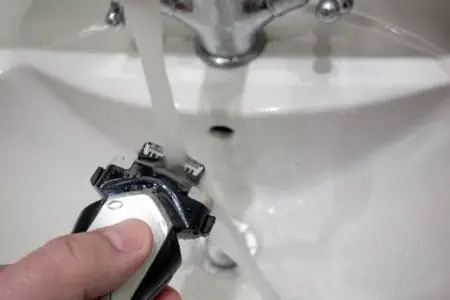
Check the manufacturer’s instructions to make sure that you can get the razor wet. Remember that electronics and water don’t mix, so you need to make sure that the razor is designed to handle moisture.
If so, rinse the shaver head under running water. This removes excess dirt, hair, and oil. This is all you need to do for a daily clean!
3. Air Dry
Let the razor air dry either in its station or by laying it down on a dry cloth.
Optional: Use Your Cleaning Station
Some razors come with a cleaning station. Insert your razor into the cleaning station and set it to clean. This is suitable for both daily use and deep cleaning.
Deep Cleaning
Deep cleaning your electric razor should occur once a week. This removes excess dirt, oil, and hair to ensure your razor works to the best of its ability.
- Time: 15 minutes
- Difficulty: Easy
What You’ll Need
- Water
- Microbrush or small paintbrush
- Soap
- Cleaning spray (for razors that can’t be cleaned with water)
- Clean towel or cloth
1. Dismantle the Razor
After you’ve turned your razor off and unplugged it, dismantle it following your manufacturer’s advice. Don’t forget that the dismantling method varies depending on what type of razor you have. Remove the blades if you can, since they need to be deep cleaned, too.
2. Empty Out the Razor
Your razor is probably full of debris: hair, oil, and general dirt. Turn the razor upside down and gently tap it with your finger to shake out the debris.
3. Dry Brush the Parts
Use your microbrush or small paintbrush to dry brush the razor. Make sure to get into all the nooks and crannies, all around the blades, along with the trimmer, and inside the razor. Remove as much debris, dead skin, and hair as possible.
3. Rinse the Parts
If you can’t clean your razor with water, skip to step five. If water is allowed, keep reading.
Rinse the various parts with water, focusing especially on the blades. Use your finger to gently rub off any lingering debris and dirt.
4. Apply Soap
Put a little soap on your microbrush or paintbrush. Apply it to the damp razor blades and other rinsed parts. Scrub well. This removes all kinds of dirt but is excellent for removing oil and dead skin. It can also remove bacteria. Once you’ve cleaned all the parts, rinse them with water again.
5. Apply Cleaning Spray
If you can’t wash your razor with water, then you will need to use a specialized cleaning spray for razors.
Depending on what brand you get, follow the manufacturer’s advice. But in general, you should lay down the parts separately on a dry towel. Apply the spray to the various razor parts. Scrub with your microbrush until the razor is clean.
Top Tip
Some cleaning sprays also come with an included lubricant. This double-power spray means that your razor is clean but also lubricated so that it will work much better in the long run. Even if your razor allows you to clean with soap and water, getting a quality cleaning spray is always a good idea.
6. Dry the Razor
Dry the parts with a cloth or towel. You can leave them to air dry for a little longer to ensure everything is 100 percent dry.
7. Reassemble Your Razor
Now that the parts are clean and dry, reassemble the razor. Next time you shave, you should notice a difference!
How to Disinfect an Electric Razor With Alcohol
Every now and then, it’s wise to disinfect your electric razor. This removes bacteria and germs. We’ll share how to sanitize a razor using alcohol-based solutions.
- Time: 5 minutes
- Difficulty: Easy
What You’ll Need
- Two cleaning cloths.
- Alcohol-based cleaning solution, such as rubbing alcohol.
1. Dismantle and Deep Clean the Razor
Before sanitizing, make sure you follow the above steps for dismantling and deep cleaning your electric razor. There is no point in sanitizing if you’ve not thoroughly cleaned out all the gunk.
2. Apply Cleaning Solution to a Cloth
Apply your rubbing alcohol or other alcohol-based cleaning solution, such as Cool Care, to a cleaning cloth. Be careful not to oversaturate the cloth.
3. Sanitize the Razor
Use the dampened cloth to gently rub the razor and its parts. You can sanitize the blades, the protective head, and even the handle of your razor. This is your chance to kill all the germs and bacteria.
4. Dry the Parts
Use your second cleaning cloth to dry the various razor parts. Leave them to air dry to completion before reassembling the razor.
Maintaining an Electric Razor
Taking good care of your razor can prolong its life. This is important, so you’re not spending money on a new razor every few months. Plus, these tips are easy and totally achievable.
- Clean the body of the razor: Clean the body of the razor whenever you’re deep cleaning. Use an alcohol wipe or soapy water. Make sure to dry it thoroughly afterward.
- Shake and rinse: Give your razor a shake and rinse after every use. Deep clean every 5-7 uses.
- Charging: Only charge your razor when necessary. Overcharging can diminish the battery life over time.
- Lubrication helps: Keep your razor lubricated. This keeps the blades and rollers running seamlessly, and it prolongs your razor’s life. It also provides you with a closer shave since the razor will be running more smoothly. Check with your manufacturer, but you should be able to use a multi-purpose hair clipper oil. Put a couple of drops onto the blade and foils before running the razor for a few seconds.
- Use a razor case: Purchase a razor case. This protects the razor if you accidentally drop it. It also prevents excess debris from entering the machine and coating the blades.
- Replace parts: Replace the razors when they become dull. This is usually an annual expense but may be more often if you shave daily. You might need to replace the foils, also. Your manufacturer should provide replacements.
- No oils: Avoid using oil-based products before shaving. Shaving cream and foam are fine, but moisturizers and face oils can build up inside your razor. Apply these skincare steps after shaving.
How Long Do Electric Shaver Blades Last?
We recommend replacing your shaver blades every 12 to 18 months, depending on how often you shave. If you shave often and your blades seem dull, you may need to replace them sooner.
The blades dull down over time. If the razor isn’t sharp, you will not get a clean shave. Plus, it can irritate your skin.
Should I Buy a Self-Cleaning Electric Razor?
If these cleaning tips seem like a chore, you may want to consider a self-cleaning electric razor. These come with cleaning stations, so you don’t have to do the dirty work yourself.
There are some fantastic options on the market. They clean your razor quickly and efficiently, as well as dry it so you can get to shaving as soon as possible. Some options take longer to clean than others. Some take as little as two minutes, while others take a few hours when you consider the drying time.
One of the main drawbacks is that these razors are more expensive. They average around $250, whereas you can get a quality electric razor — without a self-cleaning feature — for between $50 and $100. Plus, these are kind of noisy.
If you have the extra funds to buy one, though, and you don’t have time to deep clean your razor regularly, it’s going to be a great purchase!
FAQs

Can You Get an Electric Razor Wet?
Many electric razors are waterproof but always check the manufacturer guidelines before washing with water.

How Do You Clean an Electric Razor Without Getting it Wet?
You can clean the outside of the razor with an alcohol-based wipe.
For the blades and foil, use a cleaning spray designed for electric razors.

How Do You Get the Smell Out of an Electric Razor?
If your razor smells, deep cleaning the electric razor should solve the issue. But if the musty smell persists, there are some other things you can do.
First of all, make sure to keep your razor dry. It might always remain slightly moist if you store it in a damp, humid bathroom. This can result in a continuously bad smell. You can also remove the shaver head after each use to dry it out thoroughly.
The next thing you can try is soaking the blade and foil in a blade wash for about 20 minutes. This will deodorize it and disinfect it.
Lastly, you can soak the blade and foil in witch hazel or vinegar for another 20 minutes. This can also remove foul odors.
Dry thoroughly before putting the razor back together.

How Long Do Electric Shaver Blades Last?
Electric shaver blades last between 12 and 18 months, depending on the frequency of use, hair type, and make and model.

Can Electric Razors be Used In the Shower?
Electric razors can be used in the shower, provided you choose a model that is waterproof. Always check the manufacturer’s guidelines before getting the razor wet.
What’s Better: an Electric Shaver or Razor?
It’s down to personal preference, but we prefer an electric shaver when it comes to facial hair.
Electric shavers are safer to use, so they are a good choice if you have curious kids around. They’re also quick and easy to use, wet or dry. You can pack them easily when you’re traveling. Last but not least, they are kinder on sensitive skin.
You may want to opt for a manual razor if you’re after a super close shave. Razors are cheaper upfront, and it’s easy to get replacement blades. They are also easy to use and don’t require regular maintenance.
But if you can sacrifice the extremely close shave for efficiency and safety, electric shavers are the way forward.
A Close Shave
To ensure a close shave and sharp blades, you should aim to deep clean your electric razor once per week. Dirt, hair, oil, and dead skin all build up inside your razor with each use.
Between deep cleans, make sure to empty and rinse your razor after each use.
Always turn off and unplug your electric razor before cleaning. Check with your manufacturer to know if you should clean your razor with water or a cleaning spray.
Now you know how to clean an electric shaver. Enjoy the cleaning process knowing that once it’s done, your razor will be as good as new!