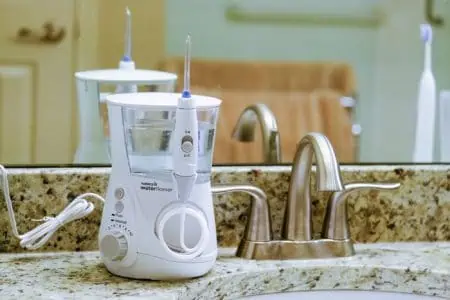
Waterpik Flossers have been designed to improve your oral health and dental care. They include a special flosser tip and water reservoir to help you clean areas of your gum that normal flossing and brushing can’t reach. However, your Waterpik must stay clean so you don’t introduce bacteria, mold, or mildew into your mouth.
So today, we’re discussing how to clean a Waterpik Water Flosser so you can keep your mouth healthy no matter which type you have, corded, cordless, or a Sonic-Fusion machine.
Key Takeaways
- Clean your Waterpik Water Flosser regularly: daily purging, weekly wiping, and monthly deep cleaning.
- Use distilled white vinegar or hydrogen peroxide as a cleaning solution to remove mineral deposits, mold, and bacteria.
- Soak the flosser handle and tip separately in a vinegar solution to ensure thorough cleaning.
- Replace the flosser tip every 3-6 months and maintain proper care to prolong the lifespan of your Waterpik.
How Often to Clean a Waterpik
Daily: Purge the water and air from your flosser both before and after each use.
Weekly: Wipe your Waterpik down every week using a damp microfiber cloth.
Monthly: Deep clean your Waterpik every 1-3 months. This includes cleaning the reservoir but this is easy at it can be in the dishwasher. Then, use diluted vinegar or mouthwash to disinfect the reservoir, as well as the handle, flosser, and flosser tip.
How to Clean a Waterpik With Vinegar
Distilled white vinegar is an excellent product to use when cleaning a Waterpik. Not only does it clean the Waterpik, but the vinegar will also remove mineral deposits, mold, mildew, and bacteria.
- Time: 30-45 minutes + drying time
- Difficulty: Beginner
What You’ll Need
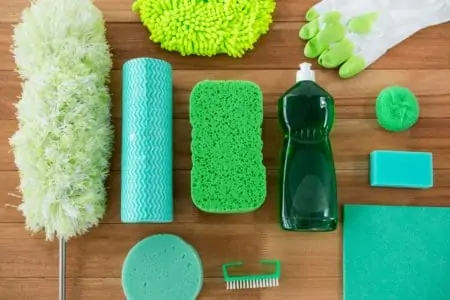
- Soft cloth
- Dish soap
- Dishwasher (optional)
- White vinegar
- 2 containers like jars or bowls
1. Clean Outside of the Waterpik (Weekly)
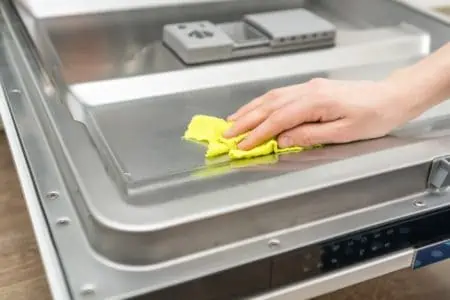
Unplug your Waterpik. Mix warm water with a small squirt of mild dish soap to make soapy water. Dampen your soft cloth in this mixture and wipe down the outside of your unit.
Rinse the cloth under running water to remove the soap from your cloth and wipe your unit a second time to remove the soapy residue.
Finish by filling the reservoir with warm water. Flush the Waterpik by running the entire reservoir through it.
2. Clean Reservoir (Deep Clean)
Remove the reservoir from the Waterpik. If you have a reservoir valve, remove it and set it aside. Place the reservoir with the open side facing down on the top dishwasher rack.
Run a washing cycle to clean your reservoir and allow it to dry.
If you don’t have a dishwasher, you can clean your reservoir with hot soapy water in the sink. Make sure you rinse it well and allow it to air dry.
The valve isn’t machine washable, so don’t pop it in the dishwasher. Instead, wash the valve by holding it under warm running water while rubbing it all over with your fingers. Do this for 30-45 seconds to make sure that the valve is clean.
Set the valve aside to air dry. When both the valve and the reservoir are clean and completely dry, you can reattach the valve. Press the valve into place, ensuring all 4 prongs are visible under the reservoir.
3. Clean Flosser
Daily: Make sure you purge the flosser before and after use. Do this by removing the reservoir and running the flosser for at least 10 seconds with the reservoir removed. Then turn off the unit.
You will see a cavity where the reservoir normally sits. Wipe this area with a paper towel. Make sure this area is leaning at an angle to allow the inner cavity and tubes to air dry. This will prevent bacteria, mold, and mildew from growing in your Waterpik.
Deep Clean: Mix 2 cups of warm water with 2-4 tablespoons of white vinegar and pour this solution into the reservoir. Run the Waterpik until half of the solution is gone.
Turn off the Waterpik and put the Waterpik’s handle into the sink. Allow the solution to drain from the reservoir into the sink for the next 20 minutes. This gives the vinegar time to remove the mineral buildup, as well as any bacteria growing there.
The vinegar will also break down any grease in your machine.
After 20 minutes, empty the reservoir of any leftover vinegar solution and fill it with warm water. Run this tank through the flosser and into the sink to remove the taste of vinegar from your Waterpik.
When finished, remove the reservoir from your Waterpik and allow it to air dry until the next time you use the Waterpik.
4. Clean the Handle (Deep Clean)
Press a button to eject the flosser tip. Fill your container with 2 parts water and 1 part white vinegar. Put your flosser handle into the container and let it soak for 5-7 minutes. After soaking, rinse the handle thoroughly with warm water.
Don’t worry about the tip. It is soaked separately from the handle.
5. Flosser Tip (Monthly)
In a second container, again add 2 parts water to 1 part vinegar and soak the flosser tip for 5-7 minutes. This will help to remove any mineral deposits that may interfere with its ability to work.
Make sure you replace the tip every 3-6 months as it will become clogged over time and won’t work as effectively.
How to Clean a Waterpik Without Vinegar
If you’d prefer to avoid the use of vinegar, you can substitute it with hydrogen peroxide. Use 2 parts water to 1 part hydrogen peroxide for the solution.
Another option is to use 1 part mouthwash to 1 part water instead of vinegar or hydrogen peroxide to clean your Waterpik.
How to Clean Waterpik Mold
Waterpiks are susceptible to the growth of microorganisms as they often have standing water in the machines encouraging the growth of mold and mildew.
- Time: 30-45 minutes
- Difficulty: Beginner
What You’ll Need
- Vinegar
- Dish soap
- 2 containers
1. Wash Outside and Reservoir
Wash the outside of your Waterpik using a soft cloth and soapy water. Put the reservoir on the top shelf of your dishwasher to clean it.
Make sure you wash these parts at regular intervals to prevent and kill any bacterial growth happening in your machine.
2. Run Vinegar Solution Through Flosser
Fill the reservoir with 1 part water and 1 part vinegar and run it through the flosser. The vinegar will help clean out mold and bacteria in the hose.
3. Wash Handle and Tip
Fill two containers with 1 part water and 1 part vinegar. This higher concentration of vinegar will help to dissolve mineral deposits while killing any mold and bacteria lurking in your machine. Allow the tip and handle to soak for a full 20 minutes instead of 5-7 minutes.
4. Rinse Flosser
After running the vinegar solution through the flosser and soaking the handle and tip, make sure you run a full reservoir of warm water through the flosser to remove any leftover particles in the machine. This will also remove the taste of the vinegar as well.
What to Avoid When Cleaning a Waterpik
Make sure that you don’t clean your Waterpik with bleach, iodine, or concentrated essential oils. You will also need to avoid baking soda and salt. These products may damage your Waterpik and reduce its lifespan.
How to Prevent Mold In Waterpik
You can prevent mold from growing in your Waterpik by using these simple maintenance tips:
- Make sure to empty the reservoir after each use.
- Clean the water handle and flosser tip regularly.
- Make sure you use the flosser regularly.
When to Replace a Waterpik
While the tip of a Waterpik needs to be changed every 3-6 months, a well-maintained Waterpik can last for many years. Consider replacing your machine when you have signs of leakage, a lack of water pressure, or the machine is no longer running.
FAQs

How Do I Fix a Stuck Button On a Waterpik?
If you have a stuck button on your Waterpik such as the pause button, first turn off the machine. Then try wiggling and prying at the button until the button springs back.

Can I Put Listerine In My Waterpik?
Yes, you can put a mouthwash such as Listerine into your Waterpik. Listerine has been clinically tested as safe for use in the machine.
You can use the mouthwash to floss or to clean your machine. Make sure you rinse the machine well after putting Listerine in it.

How Long Does a Waterpik Last?
A well-maintained Waterpik can last for many years.