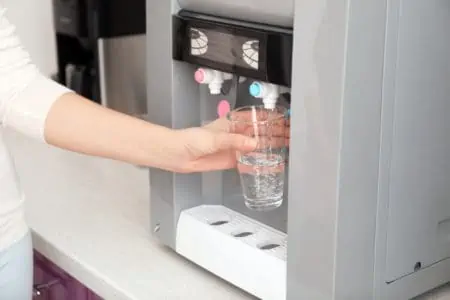
If you’ve noticed that your water cooler looks dirty and possibly even moldy, it might be time to give it a good clean. When you don’t clean your water cooler often, microfibers and germs can get into your water which is unsafe for drinking (1).
This task doesn’t need to take long. Our seven-step method only takes 15 minutes. Keep reading if you want the easiest and most effective method for how to clean a water cooler. These instructions are suitable for countertop, bottom loading, and top-loading dispensers.
If you stay on top of this cleaning routine, your water will be safer to drink and much fresher.
Key Takeaways
- Clean water coolers regularly by unplugging, draining, and removing plastic parts for washing.
- Use a 1:3 ratio of distilled white vinegar and water as a cleaning solution, then rinse the reservoir with plain water.
- Sanitize water coolers 2-3 times a year with bleach, but ensure thorough rinsing to remove any residue.
- Maintain water cooler cleanliness by vacuuming wires, changing purification filters, and cleaning exterior surfaces.
Water Cooler Cleaning Checklist
Let’s review a quick summary upfront. Here’s how you can clean and sanitize your water cooler today:
- Prep: Before cleaning water dispensers, unplug them. Remove the empty bottle and drain excess water into a basin.
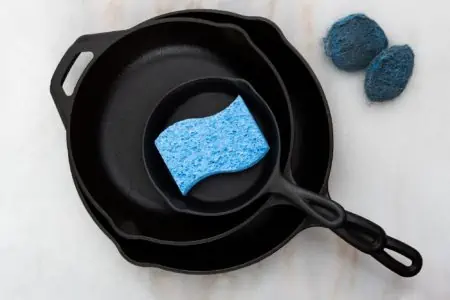
- Remove and wash plastic parts: Remove the drip tray, baffle, and water guard. Wash in the dishwasher or soak in hot soapy water before scrubbing clean.
- Make a cleaning solution: Mix a 1:3 ratio of distilled white vinegar and water.
- Fill the reservoir: Pour the cleaning solution into the reservoir. Scrub to remove dirt and grime. Let the solution sit for two minutes before draining through the water cooler.
- Rinse: Pour plain water through the reservoir and drain it out. Repeat three times.
- Sanitize: Mix one tablespoon of bleach per gallon of water. Pour the solution into the reservoir and let it sit for two minutes before draining through.
- Rinse: Pour plain water through the reservoir and drain out. Repeat five times to ensure no bleach residue is left behind.
- Reassemble and clean outside: Put all the plastic pieces back onto the cooler. Add a new bottle. Plug the appliance back in. Wipe the exterior with antibacterial wipes.
Expert Advice
Never clean stainless steel elements with bleach. Bleach can corrode stainless steel and damage your appliance (2).
How Often Should Water Coolers Be Cleaned?
We recommend cleaning the water cooler every time you change the bottle or every six weeks — whichever comes first (3).
Frequent cleaning ensures that you tackle contamination. You want your water cooler to be very hygienic since people drink from it.
Aim to sanitize the water cooler 2-3 times a year.
How to Clean a Water Cooler
Let’s get into the best method for cleaning a top-loading water cooler. We’ll cover both the inside and outside, as well as plastic components.
This method doesn’t use any harsh chemicals. Instead, we’ll use distilled white vinegar, a non-toxic, eco-friendly cleaner.
- Time: 15 minutes
- Difficulty: Easy
What You’ll Need:
- Dishwasher (optional)
- A bucket or basin
- Large pouring jug
- Hot water
- Dish soap
- Distilled white vinegar
- Scrubbing brush
- Microfiber cloth
- Multi-purpose spray
1. Prep the Water Cooler
Before you get started, unplug the water cooler. Remove the empty bottle and discard according to the manufacturer’s instructions. Drain excess water from the cooler into a basin then flush down the toilet.
2. Remove and Wash Plastic Parts
Remove all the removable plastic parts, such as the drip tray, the baffle, and the water guard. If the manufacturer allows, you can wash these in the dishwasher.
If not, mix hot soapy water in a sink or basin. Soak the parts in there for 20 minutes before scrubbing dirt and grime off with a cloth or brush. Lay it flat on a towel to air dry.
3. Make Cleaning Solution With Vinegar
In a large pouring jug, combine a 1:3 ratio of distilled white vinegar and water. This will be your cleaning solution.
4. Fill Reservoir With Cleaner
Fill the reservoir with your cleaning solution. Scrub well to remove dirt and grime build-up. Let the solution sit for two minutes before draining through the water cooler.
Empty the water out and into a bucket and then flush it down the toilet.
5. Rinse the Cooler Interior
Repeat the above step with plain water to rinse out all vinegar residue. Do this three times to ensure it’s ready for drinking water.
6. Reassemble Cooler
Put all the plastic pieces back onto the cooler. Add on the new water bottle. Run the water to ensure everything is working well.
7. Clean the Exterior
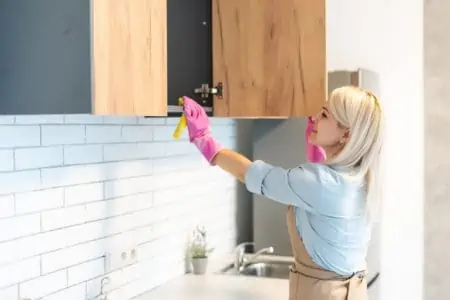
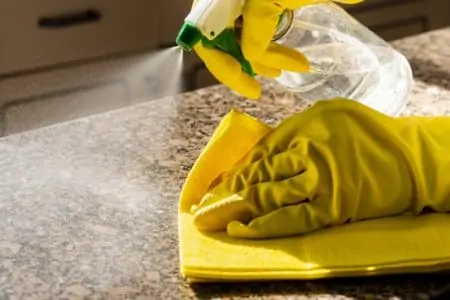
Spray a microfiber cloth with multi-purpose spray. Scrub the outside for deep cleaning of the water cooler, including the new bottle, the body, and the taps. This will remove dirt and germs.
How to Clean a Bottom-Loading Water Dispenser
If you’re wondering how to clean a bottom-loading water cooler, then the instructions vary slightly. But it’s still straightforward and pretty quick. Plus, you don’t need as many items in your cleaning kit.
- Time: 25 minutes
- Difficulty: Easy
What You’ll Need:
- Distilled white vinegar
- Water
- Funnel (optional)
- Two microfiber cloths
- Multi-purpose spray
- Basin or jug
1. Prep the Water Machine
First, unplug the water bottle. Next, remove the water bottle before draining any water from the reservoir into a basin or water jug. Flush it down the toilet.
2. Mix Cleaning Solution
This time, you’ll be mixing your cleaning solution directly into the water cooler. Pour a 1:3 solution of distilled white vinegar and water into the water bottle. It doesn’t need to fill all the way up. Even one cup of vinegar and three cups of water will be fine. A funnel makes it easier to pour in the liquids.
Shake the bottle to combine the water with vinegar.
Insert the bottle back into the cooler.
Alternative Step
If you don’t have vinegar on hand, you can clean it with baking soda instead. Use the same ratio and method as above.
3. Drain the Reservoir
Turn on the taps to drain the cleaning solution through the system until all the cleaning solution is gone.
4. Rinse the Water Cooler
To finish cleaning the water cooler interior, fill up the bottle with about three liters of water. Turn the spigots on to rinse the water bottle and taps thoroughly.
5. Clean the Exterior
Spray a microfiber cloth with multi-purpose spray. Wipe down the machine’s exterior. Remove the drip tray and give that a good scrub too. Lots of gunk can build up on the drip tray.
6. Dry the Cooler
Use a dry microfiber cloth to wipe down the water cooler, ensuring that it’s nice and dry. Fill up the water bottle with freshwater or add in a replacement. Plug it back in, and you’re ready to go!
How to Sanitize a Water Cooler
The above steps give your water cooler a deep clean, but you may want to go the extra mile and sanitize the water cooler with bleach. If your water cooler has a self-clean mechanism, you can use that instead.
Remember that bleach is a corrosive substance, so you must wear protective equipment. You must also flush out the system very well to ensure there are no traces of bleach in the taps.
- Time: 15 minutes
- Difficulty: Easy
Did You Know
This is a fantastic option if your water cooler hasn’t been cleaned for a while. You may notice mold and mildew, and therefore, bleach will be the most effective cleaning solution.
What You’ll Need:
- Dishwasher (optional)
- A bucket or basin
- Large pouring jug
- Hot water
- Dish soap
- Bleach
- Scrubbing brush
- Microfiber cloth
- Multi-purpose spray
- Gloves, mask, and goggles
- Antibacterial wipes
1. Prep the Water Cooler
Before we get into how to clean a water dispenser, it’s essential to prep the area.
Unplug the water cooler, remove the empty bottle and drain the excess water into a basin then flush it down the toilet.
2. Remove and Wash Plastic Parts
Remove the plastic parts and wash them in the dishwasher if the manufacturer allows. If not, soak them in hot soapy water for 20 minutes before scrubbing with a cloth or brush. Once they’re clean, air dry them flat on a towel.
3. Make Bleach Cleaning Solution
We don’t recommend using undiluted bleach. Instead, make a solution. But first, put on your protective equipment!
In a large pouring jug or bucket, mix one tablespoon of bleach per gallon of water.
4. Fill Reservoir With Bleach
Pour the bleach solution into the cooler reservoir and scrub well with a brush. Let the solution sit for two minutes before draining through. Empty the water into a bucket and flush it down the toilet.
5. Rinse Well
This is the most critical step when cleaning water coolers to ensure there is no bleach residue. Pour plain water through the reservoir five times. It may seem excessive, but it’s vital.
6. Reassemble Cooler
Take the clean plastic pieces and put them back on. Add a new water bottle and plug the water machine back in.
7. Clean the Exterior
To properly sanitize the exterior, use anti-bacterial wipes. Scrub the outside of the water cooler, including the new bottle, the body, and the tapes to remove all dirt and germs.
Maintaining a Water Cooler
When you buy a water cooler, it’s essential to keep up with maintenance so that it lasts a long time and is hygienic for people to use. Here are our top tips:
- Hire a cleaning service: If it’s been a while since the cooler has been cleaned and you aren’t sure how to approach it, consider hiring a water dispenser cleaning service. This is a good idea, especially if you have mold or mildew in the system.
- Vacuum the wires: Water coolers can be subject to dust. Dust build-up can ruin appliances. Dust the water cooler often, but also use your soft-bristled vacuum attachment to vacuum the inner wiring system to remove excess dust.
- Clean regularly: You can perform this 15-minute cleaning routine every time you change the bottle. This will keep your water cooler in mint condition.
- Skip lubrication: Don’t lubricate the compressor as the air-tight seal is necessary.
- Unplug when empty: When you finish a bottle, but you’re going to wait a couple of hours before replacing it, unplug the water cooler. It’s a waste of energy.
- Change purification filters: Every six months, change the purification filters. Otherwise, the water quality can decrease, which makes for unsafe drinking.
FAQs

How Long Does a Water Cooler Last?
With the proper maintenance, you can expect your water cooler to last around five years, especially if you bought a commercial-grade option.
But if you slack on the cleaning and maintenance, your water cooler might only last for one year.

Does Mold Grow In Water Coolers?
Yes. Mold loves to grow in damp, warm places with limited air circulation. So if you see mold in your water cooler, don’t be surprised. Deep cleaning regularly can combat mold before it’s even had a chance to settle.

Can a Water Cooler Make You Sick?
Having said all this, you may want to skip using water coolers altogether. If you have one in your home and you clean it regularly, you’ll be totally fine. But if you share a water cooler with colleagues, you may be able to get sick.
Even if a shared water cooler is cleaned daily and sanitized weekly, your colleagues may not always have clean hands before they touch the taps (4). Germs and bacteria can quickly build up on the outside of the water cooler and contaminate the water or your drinking glass.
Common bacteria found in workplace water coolers include germs that can cause Legionnaires’ disease or Pontiac fever (5).
So even if you know exactly how to clean a water dispenser, germs can still fester. If your company has invested money in a commercial-grade water dispenser, it’s a shame, but better safe than sorry.

Will Cleaning the Water Dispenser Help the Water Taste Better?
Definitely. Contaminated water coming out of a dirty dispenser will never taste good. If you want to freshen up the taste of your water, give the cooler a deep clean.

What Do I Do If My Water Cooler Is Leaking?
First, check the user manual for your specific model to find the appropriate troubleshooting tips. If none work, contact the manufacturer to see if they can send out a repair person or a replacement. A warranty may even cover your water machine.
In general, though, here are some things you can try:
- Leaks from the cooler: If the leak is coming from the cooler, it’s probably the bottle. There may be a crack in the plastic which then leaks. Remove the bottle and try a different one. If the leak stops, then you know it was the bottle.
- Leaks from the drip tray: Empty the drip tray regularly to prevent it from overflowing. This alone is enough to cease drip tray leaks.
- Leaks from the taps: It might be time to tighten the taps. Twist them slightly, and this should stop the leaking. If that doesn’t work, you may need to replace the spring or washer inside the taps. Remove the water bottle, drain the cooler tank, and contact an engineer to carry out this task.
If leaks persist, do not use the water cooler. Call the manufacturer and wait until the problem is fixed before resuming use.

What is a Self-Cleaning Water Dispenser?
A self-cleaning water dispenser is a machine that automatically disinfects the water reservoir to provide you with clean water.
Clean and Cool
Now that you know how to clean a water cooler, your system will be free of bacteria, germs, and contaminated water. It will also be much more pleasing to look at, especially if you were suffering a mold and mildew build-up beforehand.
Keep in mind that you can use distilled white vinegar for a deep clean, but bleach is best for sanitizing the water dispenser.
Make sure to clean the cooler every time you change the bottle and sanitize the system 2-3 times a year.
Last but not least, never clean a stainless steel system with bleach. This can cause corrosion and damage.