Is your Shark vacuum losing suction? Is it emitting a foul odor? One of the main reasons for such issues is that we sometimes ignore cleaning our vacuums.
There’s no need for that anymore! You don’t have to spend cash on repairs or replacements. All you need is proper maintenance.
With our step-by-step guide on how to clean a Shark vacuum, your vacuum will be back to its usual efficient self.
Key Takeaways
- Clean your Shark vacuum every three months to maintain its efficiency.
- Make sure to empty the dust canister, clean filters, and remove debris from the brush head.
- Don’t forget to clean the hose and motorized floor nozzle to prevent clogs and odors.
- Reassemble the vacuum once all parts are completely dry to avoid mold growth.
How Often Should You Clean a Shark Vacuum?
According to the owner’s manual, you should clean the filters every three months.
The HEPA (high-efficiency particulate air) filter can run for two years without trouble. But if you find its efficiency dwindling, you may want to clean or replace it sooner (1).
In essence, you’ll need to remember to clean your Shark vacuum four times a year for it to do its job well. Then again, even with a Google calendar reminder, you might miss a date or two.
Thankfully, there are some signs from your Shark that say it’s time to clean the vacuum. These include:
- Reduced suction power.
- Unpleasant odor from the vacuum.
- The vacuum produces gasp-like sounds.
- The vacuum leaves dirt behind during cleaning.
The manufacturers boast that the Shark vacuums never lose suction, so if yours is, you may want to check how dirty it is.
How to Clean a Shark Vacuum
There are several Shark models on the market, and the removable components are likely located in different places. So, you’ll need to consult your model-specific manual to know where to find these parts and how to remove them.
That said, the cleaning process is the same and will work for most models. Let’s get started.
- Time: 1-1.5 hours
- Difficulty: Intermediate
What You’ll Need:
- Soap
- Water and access to a sink or basin
- A pair of scissors
- Microfiber cloth
- Soft brush
- Two cups of vinegar and three tablespoons of baking soda
- Gloves to protect your hands
1. Unplug and Disassemble
Start by unplugging your vacuum cleaner. Ideally, you should clean the vacuum outdoors as there is dirt involved. Where possible, place a sheet or any other covering underneath the vacuum to avoid creating a messy heap.
Don’t Forget
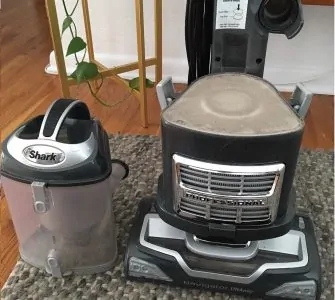
2. Empty the Dust Canister
Next, remove the canister from the unit and dispose of the dirt into a disposal bag. Soak the canister in soapy water and wash it using your microfiber cloth. Rinse it in cold water and allow it to air-dry.
Be sure the canister is completely dry before reassembly. This may take around 24 hours.
Take Note
3. Clean the Filters
Having removed the dirt canister from the larger vacuuming component, you’ll find the filters. Depending on your Shark vacuum model, the filters may be made of foam rubber. Additional filters may be made of felt.
Dunk the foam filters in soapy water and wash them thoroughly. The filters will likely look stained even after a good scrub. The important thing to remember is that they are clean.
Shark doesn’t recommend washing felt filters as they can get damaged easily. So, tap them gently to loosen the dirt and wipe them clean.
If you choose to wash yours, soak them in soapy water just like their foam counterparts. However, wash them lightly and carefully. Remember, you’ll be doing this at your own risk.
Rinse the soap off the filters, lay them flat, and allow them to air-dry for at least 24 hours. If the filters are worn out, it’s probably a sign that this would be a good time to replace them. Be sure to buy a filter that is specific to your model.
Cleaning HEPA Filters?
4. Clean the Brush Head
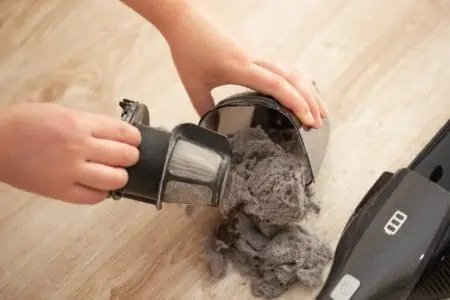
The rotating brush bears the brunt of the cleaning, and you’ll find debris stuck on it, such as hair, strings, and other dirt.
To clean your rotating brush, start by separating the floor attachment from its handle. The floor attachment on most models will have a button at each end. Press these buttons to release the brush head for better cleaning.
Use your scissors to snip debris that’s tangled in the brush. Then, use your hands to gently pull out all the debris, careful not to damage the bristles in the process.
Use a soft brush to remove stubborn dirt or soak the brush in water and scrub it thoroughly. Allow the brush to air-dry for at least 24 hours before re-attaching it.
5. Clean the Hose
Check the hose for any clogs that may be obstructing movement. Dislodge the hose from both ends. Carefully inspect the ends and the entire length of the hose.
If the vacuum hose is clogged, put it on the hot water tap and run it. Close one end of the hose with your hand, remove the hose from the tap, close the other end. Give the hose a good shake.
Next, mix the baking soda and vinegar in a pot and pour it into the hose. As with the hot water, you’ll need to cover one end with your hand and the other as well. Shake well for a couple of minutes.
Let the mixture go and run warm water through the hose, followed by cold water. The baking soda and vinegar mixture helps unclog the hose and removes bad odors. Plus, the hot water helps loosen and remove the dirt.
Lay the hose flat and allow it to dry. Once it completely dries, reattach it to the unit.
6. Clean the Motorized Floor Nozzle
Once you detach the hose from the connector, check the opening for any blockages. Turn the floor nozzle upside down. Tap it gently to loosen any dirt, then use an old toothbrush to remove it.
The lower duct hose attached to the motorized floor nozzle is a small hose that often gets forgotten during cleaning. Detach it and check it for blockages. Inspect the openings for clogs as well.
Clean it in the same way as the main hose and brush down the openings as shown above for each.
7. Reassemble the Vacuum
The cleaning process is almost done. Reassemble all the parts, taking great care to ensure every component is completely dry. We can’t overemphasize this point.
With everything intact, give the entire vacuum a good wipe down to ensure the exterior is as clean as the inside.
8. Spread a Fresh Scent
Is the dog smell on your floor or other odors getting on your nerves? You can place mildly scented tabs in the vacuum right before vacuuming and spread a fresh scent. Ground cinnamon or ground coffee beans will achieve the same effect.
If you find other scents a little overpowering, you can try the Fresh Wave Vacuum Deodorizer Beads that will leave your home and Shark vacuum smelling fresh.
FAQs

How Do You Remove a Shark Vacuum Filter?
To remove a Shark vacuum filter, lay the cleaner on its back and locate the two filters below the dust canister. Press the filter release button to remove the filter housing. You should see two filters: one foam and the other felt.
Remove the filters from their frame and clean or replace them with new filters.

How Do I Stop My Shark Vacuum From Smelling Like Dog?
To stop your Shark vacuum from smelling like dog, empty the dust bin regularly and keep it clean. Wash the filters or change them according to the manufacturer’s instructions. Another way to remove the dog smell is to drop in some freshener capsules, like this Scent Capsule.

Why Does My Shark Vacuum Keep Getting Clogged?
Your Shark vacuum keeps getting clogged because you are probably not cleaning it regularly. The filters become soiled and restrict the airflow. When that happens, the suction drops, affecting the performance.

Why is My Shark Vacuum Blowing Dirt Out?
Your Shark vacuum is blowing dirt out because of a blockage in the system. Also, allowing the dust canister to fill to the maximum will force the dust back out of the vacuum because it has nowhere else to go.