A dirty PS4 can soon become a dysfunctional PS4. With dust and debris getting into the fan, your PlayStation will run loud and become laggy.
We’re here to teach you how to clean your PlayStation. This method is for the original PS4, but we have some tips for the PS4 Pro and Slim, too.
We’ll show you how to clean the PS4 fans and the exterior, as well as the controllers. Soon your PS4 will be looking brand new and hopefully running a lot smoother.
Key Takeaways
- Clean your PS4 monthly to avoid dust buildup, which can cause noisy fans, overheating, and hardware failure.
- Open your PS4 carefully and use compressed air and cotton swabs to clean the fan, then reassemble the console.
- Wipe down the PS4 exterior with cleaning wipes, remove dust using compressed air or a vacuum, and finish with a dry microfiber cloth.
- Clean PS4 controllers with a damp cloth, cotton swabs, toothpicks, and a final wipe down with a dry microfiber cloth.
When to Clean a PS4
You should clean your PS4 externally every month to prevent dirt and dust from building up on and inside your PlayStation. If you don’t protect your PS4 from dust, it will become a problem.
Symptoms of a dust issue include a noisy fan, overheating, and hardware failure. If you’ve noticed this happening with your console, it might be time for a deeper internal clean so it works better.
However, the bad news is that cleaning the original PlayStation Four internally can void the warranty. So only do this if your warranty is up and you’re okay with the potential consequences, like a broken PlayStation. To repeat our main advice, keep on top of dust control so that you don’t end up in this predicament.
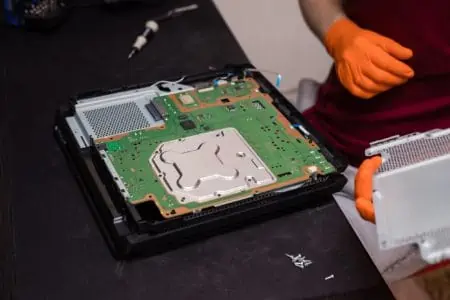
How to Open PS4 to Clean Fan
Before you learn how to clean PS4 fans, you need to open up your PlayStation to access the fans. We’ll show you how.
But remember that following these steps will void the warranty since you’ve disassembled your device. So only do this if you’re okay with that knowledge.
- Time: 15 minutes
- Difficulty: Intermediate
What You’ll Need
- T9 Torx security bit screwdriver or 2mm flathead screwdriver
- Philips screwdriver
- Knife or flathead screwdriver
1. Unplug the PlayStation
To prevent any electrical accidents, unplug the PlayStation, remove the cables and store them elsewhere, so they don’t get in your way.
2. Unscrew the Back Cover
You will need to remove the three screws at the top back of the PS4. They might be covered by stickers which you can remove with a knife or a flathead screwdriver.
The best way to remove the screws without damage is with a T9 Torx security bit screwdriver. If you can’t get your hands on one of those screwdrivers, you can use a 2mm flathead screwdriver instead. But just note that this will strip the screws.
Keep the screws in a safe place and gently remove the back cover by gently lifting it from the back, near the power unit, first.
3. Remove the Power Supply(Optional)
You don’t have to do this, but it’ll help you access the fan better so that you can issue a more thorough clean. But it’s an extra step that isn’t 100 percent necessary.
Use your Philips screwdriver to remove the first two screws — the ones that are nearest the back of the PS4 on the far left and right edge. Note that the metal triangles point inwards as you’ll need to return them to the same position later.
Use your T9 Torx screwdriver to remove the three T9 screws from the back left, front middle, and the back right.
Gently lift the power supply unit to remove it. It can be tricky, so be careful. Also, note that there’s a connection cable that you don’t want to remove. Always lift the unit from right to left so you don’t disconnect the cable which is connected on the far left. Once you’ve lifted the power supply unit, gently fold it over to the left and let it sit there while still being connected.
How to Clean a PlayStation
Now that you know how to open your PS4, here’s how to give the fan a deep interior clean. We’ll also show you how to clean the outside to minimize dust build-up and make your console look spotless.
- Time: 40 minutes
- Difficulty: Intermediate
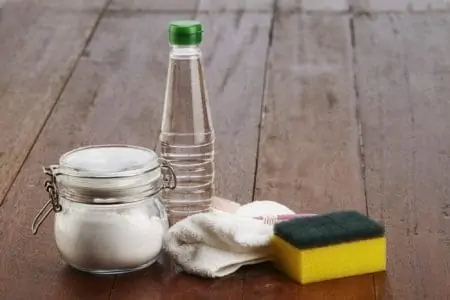
What You’ll Need
- Can of compressed air
- Cotton swabs
- T9 Torx security bit screwdriver or 2mm flathead screwdriver
- Philips screwdriver
- Cleaning wipes
- Microfiber cloth
- Vacuum with nozzle attachment (optional)
1. Clean the Fan
Since the fan is already exposed from the above steps, let’s start with that.
You can skip to this step if you want to clean your PlayStation without taking it apart.
If you removed the power supply, you’ll be able to spray condensed air into the vent in front of the fan for a more thorough clean. When spraying into this vent, hold the fan down, so that it doesn’t rotate. This will protect the fan’s motor.
To clean the fan itself, use a cotton swab to collect and remove the dust. There will be satisfying clumps that come out! Repeat for each blade.
If your power supply is off, repeat the compressed air and cotton swab tip a few times until you notice the dust is minimal. This can take a good 5-10 minutes for the best results.
Caution
Don’t spray compressed air into the fan blades. You don’t want to spin the fan too fast. Otherwise, you could damage the circuitry. Only clean the fan blades with cotton swabs.
2. Reassemble the PS4
Working backward from the earlier tips, put the console back together. Make sure to put the screws and metal covers exactly as they were.
If you used a 2mm screwdriver instead of a T9 screwdriver, don’t put the screws back in all the way. Otherwise, they could get stuck since your 2mm screwdriver will have stripped the screws. That’s why we definitely recommend a T9 Torx security bit screwdriver!
If you noticed residual spray from the condensed air, give the PlayStation a few hours to air dry before using the console again.
3. Wipe the Exterior
Time to clean the outside.
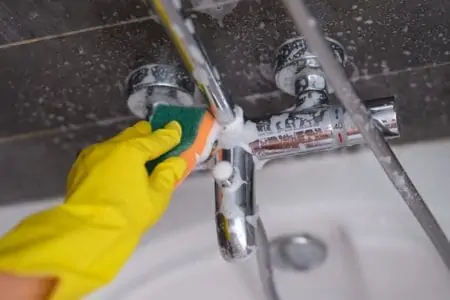
First, wipe down the exterior with a cleaning wipe. This will remove dust, debris, dirt, and stains. If you use disinfecting wipes, you can also sanitize your PS4 at the same time.
4. Remove Dust
Using your can of compressed air, blow away any dust from your PS4. Read the instructions on your can of compressed air to know how far to hold it from the PS4. We recommend holding the can upright to minimize moisture releasing from the can.
You can also spray the air into the ports at the front and back. This can remove dust, but it can also work dust further into the console. So we think that a better option for this step would be to use your nozzle attachment on your vacuum to suck dust out of the PlayStation. Use the lowest vacuum setting to prevent damage.
5. Wipe With a Cloth
Finally, wipe down the PS4 with a dry microfiber cloth to remove any excess dust. Voila! Your PS4 is looking sleek and clean.
How to Clean a PS4 Slim and Pro
When cleaning a PS4 Slim or Pro, the good news is that you can remove the cover without voiding the warranty. So get inside of the console for a deeper clean!
When removing the cover for the PS4 Slim and Pro, it’s much easier. Simply pull on the left and right corners at the front of the console. Then pull at the bottom, slide the cover back, and it will be easy to remove.
With the PS4 Slim, the fan inside has a cover over it. You can clean it the same way as you would with the original, by blowing condensed air into the vents (while holding the fan in place) and wiping the blades with a cotton swab.
On the PS4 Pro, there isn’t a cover over the fan. You will see the fan right away after you’ve removed the main PS4 cover.
How to Clean PS4 Controllers
Since you handle your controllers most days, keeping them clean is important. They can get covered in germs, bacteria, food residue, dust, and grime. This cleaning hack will save you some embarrassment the next time you invite a friend over to the game.
- Time: 20 minutes
- Difficulty: Easy
What You’ll Need
- Microfiber cloths
- Water
- Isopropyl alcohol
- Cotton swabs
- Gloves
- Toothpicks
1. Wipe With a Damp Cloth
Start by dampening a microfiber cloth in water. Better yet, dampening it with isopropyl alcohol can remove grime, grease, and stains and even sanitize your controllers. Make sure the cloth isn’t too wet, so wring it out well.
Wipe down the entire controller with this cloth, getting around the handles, buttons, and sides.
2. Clean With Cotton Swabs
Wearing gloves, soak a cotton swab with isopropyl alcohol. Flatten the cotton bud, so the end is flat. Now you can get it into the small crevices, like the gaps around the buttons, all around the thumbsticks (top and base), and trigger buttons (top and base).
Top Tip
When cleaning the thumbsticks, move them around to expose the entire base. Wipe down all areas of the base to ensure that it’s all 100% clean.
3. Clean the Touchpad
Use a toothpick to scrape around the touchpad. This will loosen dirt and debris. Wipe it away with a clean microfiber cloth.
Repeat step two to prepare your cotton swab and wipe around the touchpad, options, share, and PlayStation button.
4. Clean Extra Gaps
You might notice a couple of gaps you missed, such as where the two pieces of the controller meet, the ports, and the speakers. Use your toothpick to gently scrape dirt out of these gaps before wiping it away with a cloth.
To clean the speakers, stick the toothpick in each hole, twist, and remove it. Wipe with a cloth.
Cleaning The Ports
Some tips advise you to clean your ports with an isopropyl alcohol-soaked cotton swab, but we recommend cleaning the ports with a dry cotton swab. This will prevent moisture from getting inside of your controller.
5. Final Wipe Down
Use a dry microfiber cloth to wipe down the controller once more. This will remove loosened dirt and debris while leaving behind a lint-free finish.
How to Clean PS4 Games
Ports, controllers, and interior fans aren’t the only issues with PS4s. The games can also get dirty to the point where they are faulty. We’ll show you how to clean fingerprints and dust off the discs so that they can hopefully work properly again.
- Time: 5-10 minutes
- Difficulty: Easy
What You’ll Need
- Microfiber cloths (or lens cloths)
- Water
- Isopropyl alcohol
1. Wipe With a Cloth
Most of the time, wiping your PS4 games with a microfiber or lens cloth is enough to remove fingerprints and dust. Make sure to use a lint-free cloth.
Wipe the disc from the center into the edges moving in straight lines. Make sure to hold the edges of the disc, so you don’t add any more dust or fingerprints.
2. Wipe With Water or Alcohol
If the disc is still dirty after the above step, issue a deeper clean with water or alcohol. Dampen a cloth in water or diluted isopropyl alcohol (1:1 solution with water) and wipe the disc from the center to the edges, moving in straight lines. Dry the disc afterward with a separate dry, microfiber cloth.
Be Safe
Don’t soak the disc. When you dampen the cloth in a liquid, wring it out extremely well. Soaking the disc could cause permanent damage.
FAQs

Why is My PS4 So Loud?
Usually, a PS4 will make loud noises if the fan is dirty and dusty.
Another reason it could be loud is because it’s overheating, so make sure you keep it in a well-ventilated area.
A few more reasons could be:
- You’re playing graphic-intensive games which overrun the PS4.
- Your hard drive is failing.
- The cooling fans are running.
- There are loose screws within the console.
- The heatsink is damaged.

Why is My PS4 So Laggy?
Poor ventilation could be one issue. So again, make sure that the PS4 is in a well-ventilated spot.
Software or firmware issues can cause the PS4 to lag, as well as a cluttered database, a clogged cache, a full hard drive, or slow internet.

Can You Use Wet Wipes to Clean a PlayStation?
You can use wet cleaning wipes, such as Lysol wipes to clean the exterior of your console. Do not use wet wipes on the interior or in the ports of your PlayStation, as this can cause moisture damage.

Can You Get Your PS4 Professionally Cleaned?
We get it. Cleaning your PS4 is an intimidating and time-consuming task. If you don’t have experience cleaning gadgets, you might be worried about breaking your console.
You can take your PS4 to your local game shop, electronics store, or electronic repair shop to ask whether they’ll professionally clean your device for you.

How Do I Know If My PS4 Hard Drive is Bad?
You know if your PS4 hard drive is bad if it makes weird noises, fails to load, shows corrupt files, the console has a major slowdown, or it overheats.

How Long is the PS4 Warranty?
The PS4 warranty is 12 months long. You can purchase an additional 24 months, provides that you do so within 30 days of purchase, extending the guarantee to 36 months in total.

Can Bugs Get Inside Your PS4?
Believe it or not, bugs can get inside your PS4. They love the warm and enclosed environment and can cause untold damage to your game’s console.
Get Back to Gaming
A dirty and dysfunctional PlayStation Four is the last thing you need when you’re trying to play your favorite game. It’s imperative to clean the exterior of your PS4 regularly, keep it in a well-ventilated area, and stay on top of dust-build-up. This will stop dust from getting into the device and causing long-term damage.
Now that you know how to clean PS4, fans, and all, grab your cleaning kit and get started. Just remember that if you take it apart, it will void the warranty. So only do that if necessary and once the device is out of warranty.
When in doubt, take your console to a professional.