We wash our dishes after each use. If we didn’t, we’d spread germs, bacteria, and rotting food from meal to meal.
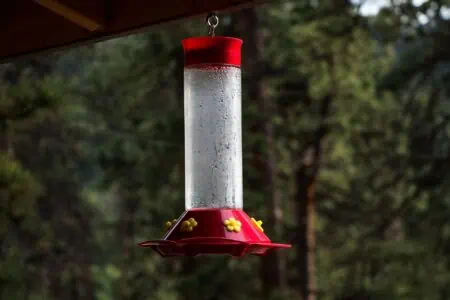
We believe it’s essential to keep your hummingbird feeder clean, too. This improves hygiene, making it safer for your garden visitors.
We’ll show you how to clean a hummingbird feeder using several methods. We’ll also share tips for disinfecting it and maintaining it between cleans.
Key Takeaways
- Clean hummingbird feeders using dish soap, vinegar, or hydrogen peroxide to prevent mold growth and protect the birds.
- Replace nectar regularly, depending on the weather, to avoid fermentation and maintain freshness.
- Deep clean the feeder once a week, and sanitize it with bleach if mold growth occurs, rinsing thoroughly afterward.
- Keep the feeder in the shade, change nectar often, and sterilize frequently to maintain cleanliness and attract hummingbirds.
What Happens If I Don’t Clean My Hummingbird Feeder?
A dirty hummingbird feeder isn’t nice for you or the birds. If you don’t clean your feeder regularly, it can:
- Grow mold: This mold can harm the birds since they will be ingesting it.
- Stink: Dirty feeders can start to smell really bad. On a windy day, the stench might spread to your neighbors.
- Deter the birds: Birds don’t want to eat from a dirty feeder. The birds might not return to your garden if you don’t clean it.
- The nectar will ferment: Hummingbirds drink nectar, but if you don’t clean it correctly, the nectar will ferment. This can make a bird sick or even kill it.
What Is the Safest Way to Clean a Hummingbird Feeder?
Our step-by-step guide will show you the best method for cleaning hummingbird feeders. Let’s quickly go over cleaning methods that won’t harm your tweeting friends.
- The dishwasher: If your bird feeder is dishwasher-safe, this is handy for you but also harmless to the birds.
- Dish soap and water: As long as your city water is chlorine-free or you’re using distilled water, you can safely use it for cleaning. Dish soap is also fantastic for cleaning the bird feeder as it will remove germs and contaminants. Make sure to rinse it well.
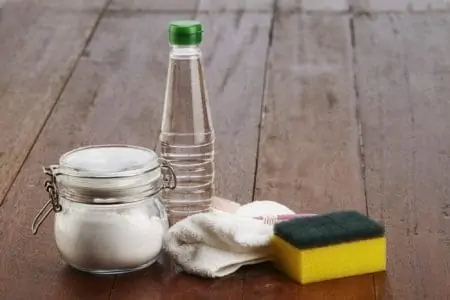
- Vinegar: Distilled white vinegar is a non-toxic and affordable cleaning solution for your bird feeder. It can also kill mold.
- Hydrogen peroxide: Hydrogen peroxide is a safe and effective way to deep clean your feeder and removes mold. Make sure you use three percent hydrogen peroxide, which is a medical-grade strength and safe for household use.
- Bleach: It’s safe to bleach your bird feeder to kill bacteria, germs, and viruses. However, you must remove all traces of the bleach to avoid poisoning the birds. Because of this, many people will avoid bleach and opt for hydrogen peroxide instead.
- Boiling water: Boiling your bird feeder is an excellent method for removing traces of your chosen cleaning product. Always check that the manufacturer allows boiling, as the high temperatures might warp the plastic feeder.
How to Clean a Hummingbird Feeder
The best way to clean a hummingbird feeder is with dish soap, vinegar, or hydrogen peroxide. We’ll walk you through the steps for all three, showing you how to clean each component and dry the feeder.
- Time: 1.5 hours.
- Difficulty: Easy.
With Dish Soap and Water
- Empty the feeder: Pour out the excess nectar into the sink.
- Rinse: Flush the feeder and bottle with hot water.
- Disassemble the feeder: Take apart the feeder so you can individually clean each element.
- Make solution: In a sink or bucket, combine hot water and two tablespoons of dish soap. Stir to combine.
- Add the feeder: Submerge all the feeder parts into the soapy water and soak them for one hour. The warm water and soap will loosen dirt and debris.
- Scrub the parts: Using a bottle cleaning brush or unused toothbrush, scrub the feeder clean. Make sure to get inside the bottle, around the base, and in all the nooks and crannies. If your bird feeder has mold, spend extra time scrubbing it clean to remove all traces.
- Rinse: Once the bird feeder is clean, rinse it well to remove all soap residue. You may want to place it in the sink with some boiling water for 20 minutes to remove excess soap residue.
- Dry: Place the individual pieces on a drying rack or towel. Let them air dry thoroughly to avoid the chance of mold build-up.
- Reassemble: Once the feeder is dry, put it back together, fill it back up and place it outside.
With Vinegar
- Empty the feeder: Empty excess nectar water.
- Rinse: Rinse the bird feeder well with hot water.
- Disassemble the feeder: Disassemble the feeder to deep clean each part.
- Make solution: In a sink or bucket, make a solution of one part distilled white vinegar to two parts hot water.
- Add the feeder: Put all the feeder parts into the vinegar water and soak them for two hours.
- Scrub the parts: Using a bottle brush or unused toothbrush, scrub the feeder. Don’t forget all the nooks, crannies, and deep inside the bottle tube.
- Tackling mold: If your bird feeder has mold, soak it overnight in 100 percent distilled white vinegar. Don’t dilute with water. Scrub well in the morning.
- Rinse: Once the bird feeder is clean, rinse it well to remove vinegar residue. You can also boil some water and soak it in there for an hour to remove the vinegar.
- Dry: Place the individual pieces on a drying rack or towel until they’re 100 percent dry.
- Reassemble: Put the feeder back together, fill it back up and place it outside.
With Hydrogen Peroxide
- Empty the feeder: Empty excess nectar water into the sink.
- Rinse: Rinse the bird feeder well with hot water.
- Disassemble the feeder: Disassemble the feeder entirely so you can access each individual part.
- Add hydrogen peroxide: Place the feeder in a small bowl or basin. Add a few ounces of hydrogen peroxide to the feeder and swirl it around, soaking each part. Leave it for 10 minutes to soak.
- Scrub the feeder: Using a bottle brush or unused toothbrush, scrub the feeder, letting the hydrogen peroxide contact each part. Don’t forget all the nooks, crannies, and deep inside the bottle.
- Tackling mold: If your bird feeder has mold, soak it overnight in undiluted hydrogen peroxide. Scrub well in the morning.
- Rinse: Once the bird feeder is clean, rinse it really well to remove hydrogen peroxide residue. Boil some water and soak it for one hour to be sure you’ve removed all traces.
- Dry: Air dry the individual pieces on a drying rack or towel.
- Reassemble: Once the feeder is dry, put it back together, fill it back up and place it outside.
How to Disinfect a Hummingbird Feeder
If your bird feeder is affected by mold growth, tackle it immediately to protect the birds. This method will show you how to sanitize the feeder and kill the mold.
- Time: 1.5 hours.
- Difficulty: Easy.
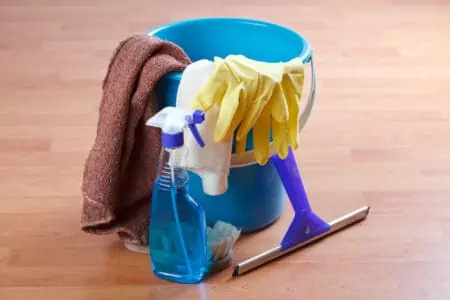
What You’ll Need
- Bleach.
- Water.
- Measuring cup.
- Sink or basin.
- Protective gloves and mask.
- Bottle brush.
- Unused toothbrush.
- Towel or dish rack.
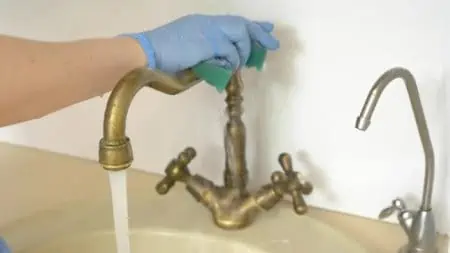
1. Prepare the Feeder and Protect Yourself
Start by rinsing the feeder well with hot water. Disassemble it so you can access all individual parts. Then protect yourself with gloves and a mask because bleach can be an irritant.
Extra Precaution
Keep the area well-ventilated when working with bleach. Breathing in the fumes can be damaging to your lungs.
2. Dilute Your Bleach
In a basin or sink, make a 9:1 ratio of hot water and bleach. Use measuring cups to get the exact ratio.
3. Soak the Feeder
Submerge the bird feeder and the parts in the bleachy water for one hour. This gives the bleach a chance to kill the mold and loosen the residue.
4. Scrub the Feeder
Wearing your gloves, use a bottle brush and unused toothbrush to scrub the feeder parts clean. Remove all traces of mold.
5. Rinse Well
Now it’s time to rinse the feeder like you’ve never rinsed before. Run it under hot water to remove all traces of bleach. You might even want to boil a pot of water and submerge the feeder for a couple of hours.
6. Dry Well
We recommend air drying the bird feeder to avoid the chance of mold regrowth. Lay the parts out on a drying rack or towel. Once it’s 100 percent dry, you can reassemble, refill, and replace it outdoors.
How Often To Clean a Hummingbird Feeder
First of all, you’ll need to replace the nectar regularly. On hot days, above 90 degrees Fahrenheit, you might even need to replace the nectar twice a day. This is so you can avoid fermentation.
In typical summer weather, around 80 degrees, replace the nectar once a day. In 70-degree weather, replace every other day.
If the liquid looks cloudy, it’s already fermenting, and you should empty it, clean the feeder and add new nectar.
During the cooler months, you can get away with replacing the nectar every three days.
In winter, you can go up to five days between new nectar.
You should aim to deep clean the bird feeder once a week, as long as the nectar hasn’t begun fermenting. If you noticed that the nectar was fermenting, always deep clean the feeder before replacing the nectar.
Mold Warning
Besides a cloudy appearance, you can tell your nectar needs changing by a few other factors. If mold is growing in the nectar, it’s crystallizing, or there are floating bugs in there — it’s time to empty it.
Tips For Keeping a Feeder Clean
If you want to avoid twice-daily cleaning in the summer, we have some hacks for keeping your hummingbird feeder clean.
- Keep the feeder in the shade: When your nectar is in bright sunlight all day, it will ferment quicker. Keep the feeder under a tree or in a shady spot of the garden to keep the nectar fresher.
- Change the nectar often: If you change the nectar often, according to our advice above, you can avoid extra cleaning. Change the nectar before it begins to ferment, and then your feeder won’t be as filthy and unhygienic.
- Use nectar defender: A nectar defender like Sapphire Labs Naturally Fresh will keep your nectar fresher for longer. In ideal cases, it can keep the nectar good for up to two weeks.
- Use a smaller feeder: Unless you have dozens of hungry and thirsty birds coming to your garden, you might get away with using a smaller feeder. This will prevent nectar from going to waste and spoiling in the feeder.
- Sterilize often: When making time for deep cleaning, you might want to consider disinfecting it every time. Yes, even if you notice no mold. This keeps on top of germs and bacteria so that your nectar lasts longer and the birds are safer.
FAQs

Why Won’t Hummingbirds Drink From My Feeder?
There are a few reasons why your feeder isn’t attracting any birds. It could be:
- Bees: Other creatures might have already claimed your feeder. Bees, especially. If you have a saucer-shaped feeder, bees are less likely to stop by, making more way for hummingbirds.
For example, the Audubon Hummingbird Feeder is a good option. Also, avoid a brightly colored feeder, such as yellow. Red is best for hummingbirds. - Too many plants: If plants are in the way of the feeder, birds might not find it. Even worse, bugs live in plants, and they might infest the feeder, deterring hummingbirds.
- Your nectar isn’t good enough: We don’t mean to offend, but it could be that your nectar isn’t up to the hummingbird’s standards. Hummingbirds like natural floral nectar. We recommend mixing one part white sugar with four parts water and boiling for two minutes.
- Your feeder isn’t clean: We’ve discussed the importance of cleaning your feeder. If the feeder isn’t clean or has bleach or soap residue, hummingbirds won’t enjoy it.
- You have pets: Unfortunately, hummingbirds might be intimidated if you have your own fur babies. Don’t let your cats or dogs near the feeder.
- Your feeder is in the wrong place: A good place to put your feeder is near flowers, but not too close so that bugs migrate. Avoid placing it in sunlight to protect the nectar from spoiling.
Keep it high so that your pets can’t reach it. Put it in an open spot that’s easy for the birds to see. Keep it away from windows to avoid the risk of birds crashing into the glass.

Why Is My Hummingbird Feeder Empty Every Morning?
When your feeder is empty in the morning, you might initially think you’ve nailed it. The birds are loving your nectar. But that’s not likely the case.
If your feeder is emptying quickly overnight, another creature might have found it. This is most likely ants, bats, or squirrels.
Another issue is that the bird feeder might be leaking, or perhaps a gust of wind moved it, and the nectar spilled out.
In some cases, it could be that a group of hummingbirds found the nectar in the evening and stocked up for nighttime. You could set up a camera and check out the footage in the morning.
Can You Clean Hummingbird Feeders With Bleach?
Yes — use a solution of nine parts water to one part bleach. Make sure to rinse the feeder thoroughly to remove all traces of bleach.

What Can I Feed Hummingbirds Besides Sugar Water?
Hummingbirds eat insects, tree sap, and pollen. The only thing you can provide for them is sugar water. But another great way to feed them is by planting nectar-producing flowers, like cardinals or sage.

Do Hummingbirds Like Cinnamon?
Hummingbirds don’t mind cinnamon, but the good thing about it is that it will keep the ants away. You can add natural cinnamon sticks to your hummingbird nectar. When you’re boiling the sugar water, add two cinnamon sticks.
Happy Hummingbirds
When you know how to clean a hummingbird feeder properly, you’re providing the best meal for your flapping friends. Make sure to change out the nectar water whenever it’s looking cloudy or dirty, or every few days.
Deep clean the feeder once a week (at least) and sanitize it with bleach to kill mold. We highly recommend a nectar defender if you want the nectar water to last longer.
Keep your hummingbird feeder in an open spot away from your pets to attract more birds.