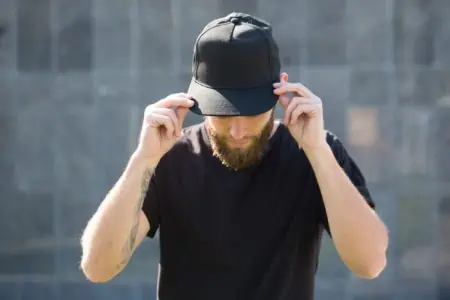
A favorite hat is a fun accessory to wear when you’re out with friends or hanging at the beach. However, hats become dirty over time. You need to wash your hat without damaging the fabric or causing the hat to lose its shape.
So today we’re sharing tips for cleaning your favorite accessory at home.
Key Takeaways
- Clean a baseball cap by handwashing it in soapy water and air-drying it on a ball cap buddy or round object to maintain its shape.
- Wash your hat 2-3 times per season or sanitize it weekly if worn daily.
- Different hat materials require different cleaning methods, such as gentle handwashing for wool hats and using a soft-bristled brush for suede hats.
- You can wash some hats in the washing machine or dishwasher, but be cautious with fragile fabrics and structured hats.
How Often Should You Wash Your Hat?
Hats should be cleaned two or three times every season unless you wear your hat every day. If that’s the case, you should wash or sanitize your hat every week.
A few signs that your hat needs to be cleaned is when you see dirt, dust, or white stains which are a buildup of sweat and oil on your hat. You should also wash your hat if it begins to smell funny.
How to Clean a Baseball Cap
This method for how to clean a cap or a snapback hat is not appropriate for vintage and vintage-style caps that have a soft brim. These hats should be dry cleaned or receive a gentle spot cleaning in which you make sure all the liquid on your cap is blotted up quickly.
- Time: 30 minutes + drying time
- Difficulty: Beginner
What You’ll Need
- Toothbrush or nail brush
- Dish soap
- Dish
- Bucket
- Ball cap buddy or something round such as melon, coffee tin, or bunched up towel
1. Rinse Baseball Cap
Rinse your baseball cap under running water to remove most of the light surface dirt. This will come off with a good rinse and flow down the drain.
2. Spot Clean Cap
Put a small amount of dish soap on a dish and add a tiny amount of water to create a lather. Dip your toothbrush into the lather and use it to spot clean your cap. Scrub out the dirt, mark, and stains using small circular motions.
3. Wash Cap
Now fill your bucket with fresh water. Add a squirt of dish soap and mix until you have a bucket of soapy water. You can also wash your cap in the bathtub.
Soak your cap in the bucket of soapy water for 10 minutes. Swish the hat around. If the water becomes filthy, replace the water with a new batch of soapy water.
4. Rinse Cap
Rinse your cap under running water until the water flows clear. Make sure you don’t twist or wring your cap as this may cause it to lose its shape.
5. Dry Cap
Place the wet baseball hat into the ball cap buddy to help your hat retain its shape. If you don’t have a ball cap buddy, you can stuff something round into your cap so it dries properly in the right shape.
How to Clean a Hat
Hats are made of many different materials which means you’ll need to know how to wash a hat without ruining it.
Wool Hats
To clean a wool hat by hand, fill a sink with cool or lukewarm water. Add a small amount of mild laundry detergent to the water and mix.
Turn your hat inside out and massage the hat in the water for a couple of minutes to remove the dirt. Soak the hat for 20 minutes.
Rinse the hat well in cool water to remove all traces of soap making sure that you don’t twist or wring the hat. Roll your wool hat in a clean, dark towel. This will remove the excess water. Allow it to air dry.
Fedora Hats
Take a soft-bristled clothes brush and brush away the dust and dirt on your hat. You can also use a lint roller to remove any fluff or debris on the surface as well.
If your hat has a leather sweatband, clean the band with a saddle soap such as Fiebing’s Saddle Soap to keep the leather supple.
Straw Hats
Straw hats can be cleaned with a specialty straw hat cleaner such as the cleaner included in the Paul Lashton Premium Straw Hat Care Cleaning Kit, but Windex will also work. Brush your hat with a lightly damp cloth to remove any dust on the surface.
Then spray a clean cloth with the cleaner to remove any stains. Make sure you don’t soak your hat as water is deadly to a straw hat’s shape. If your hat becomes slightly wet, wipe off as much of the water as possible. Then lay your hat brim up on a clean surface to dry.
You can use light steam to restore a hat’s shape. Boil water in a kettle or use a clothing steamer to lightly steam the straw. Mold the hat back into shape with your fingers and allow it to dry.
Suede Hats
Suede hats should be brushed with a stiff-bristled brush to remove all of the dirt on your hat. Brushing will also restore the suede’s nap, the soft finish that suede has.
Buff your hat with fine-grit sandpaper or an emery cloth if the suede gets matted or has caked-on dirt. Tough stains on a light-colored hat may be removed with a suede eraser.
Remove sweat stains by making a 1:15 ratio of baby shampoo to warm water. Gently dab at the stain with the mixture using a soft cloth until the stain is gone.
Felt Hats
Brush your felt hat from top to bottom and counterclockwise with a soft-bristled brush to remove the dust.
Use steam to reshape and clean your hat. Boil water in a kettle or use a clothing steamer to lightly steam-heat the fabric. Mold the hat into shape with your fingers before allowing it to dry. After it’s dry, brush your hat clean.
Leather Hats
Brush your leather hat with a soft-bristled brush. Then use a leather cleaner such as Lexol Leather Care Kit to clean and preserve your hat. Make sure you don’t use saddle soap as it may dry the thin light-weight leather that’s used in hats.
How to Spot Clean a Hat
Spot cleaning a hat is the safest method to clean it as it’s less likely to change the shape of your hat.
- Time: 20 minutes + drying time
- Difficulty: Beginner
What You’ll Need
- Washcloth
- Old toothbrush
- Mild dish soap or non-bleach laundry detergent
1. Dab Stains
Make soapy water by mixing a small amount of mild dish soap or laundry detergent in a bowl of water. Dip your washcloth into the soapy water to lightly dampen it and then dab at the dirty spots on your hat.
2. Scrub Grime
Gently scrub the stains on your hat with a toothbrush. Make sure you don’t allow a straw hat to become damp.
3. Dry the Hat
Air dry your hat indoors away from direct sunlight.
How to Get Rid of Stains on a Hat
Shampoo breaks down body oils, so you can use it to remove sweat stains. Mix the shampoo in water and use a toothbrush to scrub the stain. Then soak your hat in cold water for 10 minutes. Rinse your hat and allow it to air dry.
You can use OxiClean on a baseball hat with a tough stain. Mix 1 scoop of powder in 1 pint of water. Then spot test the mixture on an inconspicuous area of the cap to make sure you won’t stain or damage your hat.
If it’s fine, apply the mixture to the stains. Let it sit on the fabric for up to 5 minutes before rinsing thoroughly. Remember to use a ball cap buddy or something round to help your cap retain its shape.
Tough stains on a white hat can be removed by applying a couple of drops of hydrogen peroxide to the stain. Scrub the stain with a toothbrush and then let it soak for 10 minutes. Rinse your hat and allow it to air dry.
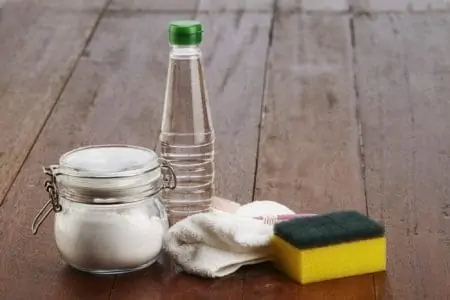
Baking soda and vinegar will also remove sweat stains from hats. Mix equal amounts of water with baking soda to make a paste. Scrub the stain with the paste using an old toothbrush.
Let the hat sit for as long as 1 hour before you spray the stains with distilled white vinegar. Scrub the stain one more time before rinsing it in cold water. Allow the hat to air dry.
Can You Wash Hats In the Washing Machine or Dishwasher?
Yes, you can wash hats made from a sturdy material without a structured front or brim in the dishwasher or washing machine. Baseball caps are an example of a hat with a structured front.
Washing Machine: wash your hat separately from other items of clothing. Make sure you use soap with color-preserving qualities that don’t include bleach. When the hat is finished washing, allow it to air dry.
Dishwasher: Make sure the dishwasher is empty and secure the hats to the top rack with clothespins or straps. Use a bleach-free and citric-free dishwashing detergent and use a warm cycle. Make sure the drying cycle is turned off.
Allow the hat to air dry.
FAQs

Can You Dry Clean a Hat?
Yes, you can dry clean a hat especially if it’s made of a fragile fabric such as wool, silk, velvet, or felt. Always read the care label first.

Are Sweat Stains Permanent?
Yes, sweat stains can become permanent.
Can Vinegar Remove Sweat Stains?
Not all sweat stains can be removed, but vinegar can help remove and prevent sweat stains from becoming permanent. Spray the sweat-affected area of your hat with a 1:1 ratio of distilled white vinegar and water after you remove your hat for the day. Allow your hat to air dry before you put it back on.

How Do You Restore a Hat Shape?
The easiest way to restore a hat shape is to wet the inside with a water-filled spray bottle, place it on a ball so you can shape it, and leave it to dry naturally. You can speed up the drying process by using a hairdryer on medium or high heat.

Can You Dry a Hat With a Hair Dryer?
You can dry a hat with a hairdryer, provided you use it on a medium or high heat setting.

How Do You Get Rid of Cap Wrinkles?
The best way to get rid of cap wrinkles is to use coconut oil. It is a natural emollient and restores the elasticity in your skin.