You might think you got the easy job by volunteering to be the dedicated grill master at parties. But part of that fun task is knowing how to clean a grill after use.
If you don’t clean your grill, it can lead to pesky stains, dried-on food, and even mold. The next time you go to use your grill, you’ll be pretty grossed out.
That’s where we come in. We’ve provided the most effective cleaning method and best way to clean your grill after each use.
If you’ve not cleaned your grill for a while, we also have a fantastic deep cleaning method for which you’ll thank us!
Key Takeaways
- Clean your grill after each use to prevent stains, dried-on food, and mold.
- For a quick clean, turn up the heat, empty the drip pan or ash, remove food with a scraper, and clean the grates.
- Deep clean your grill a few times a year with vinegar, baking soda, and a grill brush.
- Specific cleaning methods may vary depending on the type of grill (gas, charcoal, or pellet.)
How Often Should You Clean a Grill?
You should give your grill a quick (15 minutes) clean after each use. You can issue a deep cleaning less often, a few times a year, or whenever necessary.
Cleaning your grill after each use removes food particles and prevents rotting inside the grill. It keeps the grill clean, which means it will function better the next time you use it.
Another reason to clean your grill after each use is because the collection tray catches grease and food. If this overflows, the grease will get back into your grill, giving you an even bigger cleaning task.
How to Clean a Grill After Each Use
Once you’ve cooked your food and enjoyed it, give your grill a quick cleaning. This method is just enough to keep on top of things between uses. Plus, it doesn’t take too long at all.
- Time: 15 minutes
- Difficulty: Easy
What You’ll Need
- Metal bucket with lid
- Grill brush with a long handle
- Paper towels
- Canola oil or distilled white vinegar
- Thick rag (optional)
- Spray bottle (optional)
- Tongs
1. Turn the Heat Up
It’s easier to clean your grill when it’s still hot. You can leave the heat on for 10-20 minutes while you eat or blast it on high for 10 minutes after eating.
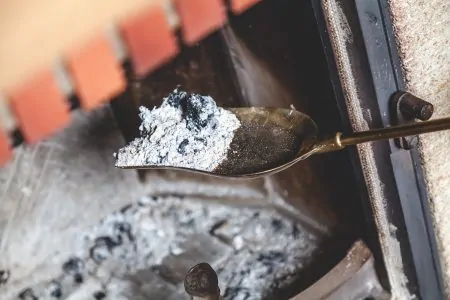
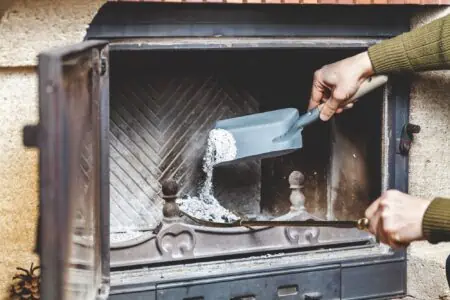
2. Empty Drip Pan and Ash
It’s crucial to empty the drip pan (for gas grills) or ash (for charcoal grills) after each use.
With ash, the grill can collect moisture, making it almost impossible to remove when you eventually come around to it. As for the drip pan, it collects food particles and grease, which can rot or make their way back into your grill later.
To empty ashes, dump them into a metal bucket with a lid. Never put them into plastic buckets. Otherwise, you can cause a fire. Transfer the ash to the garbage once the ashes have cooled down (give at least 24 hours).
To empty the drip tray, you might want to wait until it’s cooled down slightly so you can transfer it directly into the garbage. Use your metal grill brush to scrape off hardened grease and food.
Don’t Forget
If you have a charcoal grill, you must also brush off the bricks after each use. You can use your grill brush to do this. Doing this regularly prevents blockages in the grill vents and potential fire hazards.
3. Remove Food With a Scraper
While the grill is still warm, scrape the racks and grill with your metal scraper to remove food particles. Go at it from every angle to ensure you haven’t missed any spots. Continue until you’ve removed all residue.
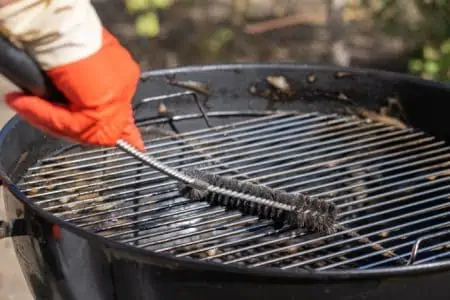
4. Clean Grates
Dampen a paper towel with a little canola oil. Hold the paper towel between a set of tongs and use it to wipe down the grates. The tongs prevent you from making direct contact with the hot grates.
This oil hack cleans off your grates while seasoning them. It gives them a slightly non-stick finish, making your future cleaning tasks easier. Plus, it can prevent rust.
Another way to clean the grates is to mix a 1:1 ratio of water and distilled white vinegar in a spray bottle. Spray the grates thoroughly. Wipe them down with a thick rag. Be careful you don’t burn yourself.
How to Deep Clean a Grill
A few times a year, you should devote a few hours to deep cleaning your grill. This ensures that no food particles, grease, ash, mold, or mildew are hiding in your grill. We’ll walk you through how to clean all the different parts of a grill with vinegar, baking soda, and a grill brush.
- Time: 1.5-2 hours
- Difficulty: Intermediate
What You’ll Need
- Putty knife
- Bucket for soaking grates
- Dish soap
- Wire grill brush
- Baking soda
- Distilled white vinegar
- Spoon
- Bowl
- Canola oil
- Microfiber cloths
1. Turn off the Grill
Turn off the grill once you’ve completed the quick cleaning method from above (trust us, it makes the deep cleaning process easier). Disconnect it and remove the tank for gas grills. Let the grill cool down completely.
For charcoal grills, dispose of the old charcoal briquettes in a metal container.
2. Empty Tray or Ash
Depending on whether you have a gas or charcoal grill, empty the drip or the ashtray. If there is residue in the tray area or caked-on charcoal dust, scrape it off with a putty knife.
3. Soak Removable Parts
Take off all of the removable parts of your grill. This includes the grates, racks, flavorizer bars, burner tubes, warming racks, and more. Check your user manual to ensure that these can all be washed.
Soak the washable ones in a bucket of warm soapy water (dish soap is just fine). Soak them for 30 minutes, or longer if they are particularly caked with dried-on food.
4. Scrub the Grates
After you’ve soaked the parts in warm water, you can scrub them with a wire brush. This will remove the loosened debris and residue, leaving you with clean grill parts. Make sure to move in all directions to ensure that you don’t miss spots.
5. Tackle Stains and Stubborn Bits
There might be parts that don’t come out clean after the previous two steps. That’s where our loved paste of baking soda and vinegar comes in. In a bowl, mix a 2:1 ratio of baking soda and vinegar until you’ve created a paste.
Apply the paste to stubborn bits of the grill and leave it for 30 minutes. This will work to loosen and lift the stains.
After waiting 30 minutes, rinse the grates and dry them well with a microfiber cloth.
6. Oil the Grates
Pour a little canola oil onto a paper towel and wipe down the grates to season them.
7. Clean Grill Exterior
Dampen a microfiber cloth in warm soapy water and wipe down the grill’s exterior. This gives you a lovely finish that shows guests that you’ve worked hard to keep the entire grill clean.
8. Reassemble the Grill
Put all the removable parts back onto the grill and wipe down the entire grill with a towel or cloth. Never let the grill air dry; otherwise, you could end up with rust.
It’s now spotless and ready for your next BBQ!
Quick Grill Cleaning Methods
If you need to clean your grill quickly but are missing some of the materials needed, you can use some alternative methods in a hurry.
With Aluminum Foil
This is an excellent option if you’re cleaning without a brush. It’s vital to scrub down your grates while the grill is still hot. So ball up some aluminum foil and scrub the grates well.
The metallic texture will scrape off any food residue, which is just what you need for cleaning the grill after each use.
Guess what? This is a great hack for your oven and propane grill, too!
With a Lemon
One of the best ways to clean a grill quickly when using household items is to use a lemon. Slice your lemons in half and sprinkle some salt over the open side. Scrub the grates with your salt-coated lemon when your grill is still hot. The abrasive salt and citric lemon will work to scrub your grates clean. Plus, it’s very eco-friendly!
With an Onion
An onion, you say? It’s not just a tasty burger addition, but it’s also a helpful cleaner. Chop open a brown or yellow onion and scrub down the grates while the grill is still hot. If you’re nervous about getting burnt, you can pierce the outside of the onion with a fork and apply it that way.
The water from the onion will create steam to remove food residue. The natural antibacterial properties of the onion will work to disinfect some nasties from your grill.
How to Clean a Gas Grill
While we have covered cleaning a gas grill, here are some extra things you should note. It’s essential to take care and use the correct cleaning methods for the best results.
- Time: 45 minutes
- Difficulty: Intermediate
What You’ll Need
- Dish soap
- Spray bottle
- Protective gloves
- Stainless steel brush
- Hand broom
- Putty knife
- Flashlight
- Grill cleaner spray
- Shop towel
1. Clean the Upper Cookbox
After you’ve followed our above methods, disconnect the gas supply from your grill. Create a solution in a spray bottle of 20 percent dish soap and 80 percent water.
Spray the inside of the upper cookbox with the solution and leave it to soak for five minutes. Use your stainless steel brush to clean it well.
2. Clean Burner Tubes and Lower Cookbox
Don’t forget your burner tubes when deep cleaning your gas grill. Use your stainless steel wire brush to wipe down the burner tubes and eliminate debris. Don’t brush front-to-back; otherwise, you could clog the holes. Instead, brush from side to side.
Use a hand broom to remove loose debris from the bottom of the cook box. A putty knife is handy for stubborn debris inside the grease tray.
If you have accessories in the lower cookbox, such as flavorizer bars, brush those, too.
Use the flashlight (the one on your phone will do) to check that you haven’t missed a spot.
Once you’ve removed debris, you can spray the burner tubes and cookbox with grill cleaner. Wipe them thoroughly with the shop towel. You might need to repeat a few times to get the sparkling clean results you dream of.
3. Clean Igniters
At the end of each burner tube, you have igniters. They should remain clean to work safely and effectively. If you notice that they’re not sparking properly, we suggest replacing them.
Use your stainless steel brush to remove grease and debris to clean the ignitors. Then spray them with a grill cleaner spray and wipe down with a shop towel.
You can return the cooking grates now if you’ve removed them.
4. Clean the Inner Grill Cabinet
Use your hand broom to wipe down all surfaces inside the grill cabinet. Once you’ve removed all of the residue and debris, spray everything with the grill cleaner and wipe it down with the shop towels.
Pay Special Attention
Make sure to clean the top edge of the cabinet doors thoroughly. You might miss this during general cleaning, but this is where lots of grease drippings end up collecting. You should also repeat this hack for the side burner if your grill has one.
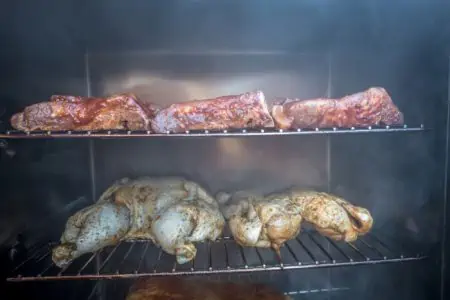
How to Clean a Pellet Grill
It wouldn’t be a complete grill cleaning guide if we didn’t share instructions for pellet grills. These grills need more care than gas or charcoal since they contain more electronic and mechanical elements. They also contain wood pellets which expand when they come into contact with water. This can cause jams within the grill.
On that note, never hose down a pellet grill. If you are cleaning the grates and grease pan with water, always remove these elements first.
What You’ll Need
- Grill brush
- Bucket for soaking grates
- Dish soap
- Scouring pad
- Putty knife
- Wooden paint stirrer
- Fireplace shovel
- Shop vac (optional)
- Microfiber cloth
1. Clean Grates After Each Use
With pellet grates, a quick scrub won’t do. Because pellet grills don’t get too hot, the food particles left on them become sticky and stubborn and are hard to remove later on. You can’t just bake them off the next time you cook.
After you use your pellet grill, scrub the grates with a grill brush before the grill cools down. If there is any food left, soak the grates in hot soapy water before scrubbing with a scouring pad.
2. Clean Grease Pan
While you should empty the grease pan after each use, we recommend giving your pellet grill grease pan a thorough clean after every cooking session. This is especially important if you cook long-smoking fatty meat, which can build up and become a fire hazard.
While the grease pan is still warm, scrape the grease residue off with a putty knife. If you feel that it’s necessary, wash and scrub the greased pan in hot soapy water with a scouring pad. Rinse and dry.
3. Clear the Chute
There’s a chute between the grease pan and collection bucket, which is usually located on the side of the grill. After each use, check that it isn’t clogged with food particles. If it becomes clogged, you’re at risk of a grease fire.
Use a wooden paint stirrer — or another similar non-metal tool — to clear clogs. Dump it into the bucket on the side.
4. Clean Out the Ash
After you’ve gone through a few bags of pellets, you’ll need to empty the ash from the fire cup and firebox. If you don’t, you’ll end up with too much ash, which will stop future pellets from igniting.
Only Clean When Cool
Let the grill cool down before cleaning out the ash. This is for your safety. It’s best to wait overnight. Remove the ash with a small fireplace shovel or shop vac.
5. Clean the Thermocouple and Chimney
Black soot can build up on the thermocouple inside the chimney, which can cause inaccurate temperature readings. Wipe the soot off the thermocouple with a soft, damp cloth.
While you’re in the chimney, we recommend scraping it out every so often using your wooden paint stirrer.
Grill Storage and Maintenance Tips
Besides knowing how to clean a grill, it helps if you know some top care tips. This will keep your grill in the best condition possible. In return? Way better food.
- Store for winter: When you’re putting your grill away for the season, deep clean it. Soak the removable parts and make sure the inside firebox and lid are clean, too. Before storing it, thoroughly dry all parts and reassemble the grill. Also, remove the battery from the ignitor so that it doesn’t corrode.
- No direct sunlight: When you store your grill in direct sunlight, mold can grow from residual food as the temperatures begin to rise. Keep it in the shade.
- Avoid rust: Spray your grill with cooking oil or apply a thin layer of canola oil to reduce the risk of rust. Before doing this, check your user manual as it might suggest lard rather than an oil, especially if you have a cast iron grill.
- Cover your grill: Once your grill has cooled down, cover it between uses. A grill cover will protect your barbecue from various elements, mold, rust, and rodents.
How to Keep a Grill From Rusting
Rust is an issue that grill-owners fear. We’ll share some tips to prevent rusting, as well as a method to tackle any rust that forms.
- Keep the grill dry: After you’ve cleaned the grill with water, thoroughly dry the grill.
- Avoid chips: When you scrub your grates, you can end up chipping them if you’re not careful. If you do notice chips on your grates, repair or replace them.
- Coat with oil: Season the grates with canola oil to create a protective layer. This will prevent rust in the future.
- Clean with ketchup: An easy way to remove rust from your grill is to apply a little ketchup to the area. Leave it on for a few minutes before wiping it clean with a cloth.
- Scrape off rust: Another way to remove rust is to manually scrape it off with a steel brush. Season the grates afterward to add a protective layer.
FAQs

How Do You Clean an Electric Grill?
Here’s the lowdown on how to clean your electric grill:
- Remove parts: After the grill has cooled, remove the removable parts and soak it in soapy water for one hour before wiping it clean.
- Empty tray: Empty the contents of the tray into a garbage can.
- Heat: Heat the smoker for one hour, then let it cool slightly.
- Scrape: Scrape off the loosened grease with a wooden grill scraper.
- Wipe: Wipe the entire grill clean with a 1:1 solution of distilled white vinegar and warm water.

What is Not Safe to Clean a Grill With?
Avoid soap on cast iron grills as this can wipe off the natural coating. Instead, use baking soda, salt, and water. Create a paste and apply it to the grill for 15 minutes before scrubbing with a brush and rinsing.
You should also avoid bleach and other chlorine-based products when cleaning your barbecue, as these are not safe to use around heat.

How Do You Clean a Rusty Grill?
While you can employ our ketchup or scraping hack to remove rust, here’s another method you might like:
- Make mixture: Pour distilled white vinegar into a spray bottle and add a few tablespoons of salt. Shake well.
- Spray onto rust: Spritz the cleaner over the rust-affected areas and cover with plastic wrap. You can also remove the grates that contain the rust-affected areas, put them into a bag, spray them with your cleaner and seal the bags overnight.
- Wipe: After you’ve soaked the rust-affected area overnight, wipe them down with a rag to remove loosened rust residue.

Is It Ok to Cook on a Rusty Grill?
While the studies about the long-term effects of ingesting rust aren’t concrete and imply you’d have to eat a lot of rust to get sick, we still don’t suggest cooking on a rusty grill.

Can I Pressure Wash My Grill?
Yes, you can! It’s a quick and easy way to wash your grill and remove stubborn grease and grime.
You have to be careful, though, because the high pressure can push residue into the burners, affecting your cooking experience. Plus, you might send grease flying all over your yard, which can attract bugs and rodents.
Lastly, always make sure you pressure wash while outdoors!

What Happens If You Don’t Clean Your Grill?
If you don’t clean your grill, you risk bacteria growth, mold, carcinogens, and your food tasting funny.
Greater Grillin’
When you know how to clean your grill properly, you will have a safer cooking experience, but you’ll also have much tastier food.
You should issue a quick 15-minute cleaning session after each use to ensure that there is no lingering food residue.
As for deep cleaning, we recommend carrying this out 1-2 times per year, or whenever necessary.
Remember to avoid bleach or chlorine-based cleaner. And if you’re up for the fun task, you can put your pressure washer to the test. Time to get cleaning!