Fans are a wonderful item to have during the summer. They blow fresh air on you and help to keep you cool. However, if you aren’t careful the fan can become full of dust and pollen triggering an allergy attack.
So, it’s important to know how to clean your portable or standing floor fan so that you can enjoy the breeze without sneezing.
Key Takeaways
- Use a hairdryer or compressed air to remove dust from fan blades, then vacuum and wipe the fan with a damp microfiber cloth.
- For deep cleaning, disassemble the fan and clean wire housing, blades, and interior with a soapy water solution.
- Regularly clean ceiling fans by dusting and wiping blades, and deep clean by disassembling and washing blades.
- Keep fans clean to avoid triggering allergies and ensure efficient operation.
The Best Products to Clean a Fan
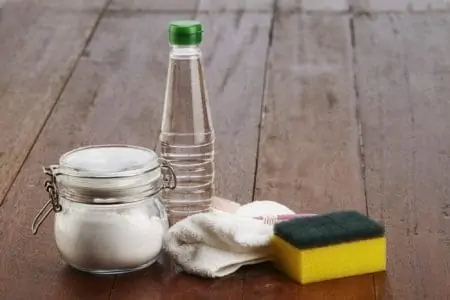
You can clean a fan with soap and water, white vinegar, a multi-surface cleaning spray such as Mrs. Meyer’s All-Purpose Cleaner Spray, or a degreaser such as Simple Green.
How to Take Apart a Fan to Clean It
To deep clean a fan each quarter, you will need to take it apart.
- Time: 15 minutes
- Difficulty: Intermediate
What You’ll Need
- User manual
- Screwdriver
- Small container
- Camera
1. Turn Off and Unplug
Turn off your fan and make sure it’s unplugged. If it includes batteries, make sure they are removed. You need to ensure that there is no power source connected to your fan. Read your manufacturer’s user manual if it’s available for specific instructions on how to take apart your fan.
2. Remove Outer Housing Components
Use the right type of screwdriver to loosen the screws holding the wire housing in place. Check for clips that may need to be removed as well.
Sometimes the rear wire housing is held in place by a heavy-duty nut that is only able to be removed after the blades have been removed, so you may need to wait to remove the rear wire housing at that point.
Put all screws, clips, and small parts into a small container so you don’t lose them.
Quick Tip
Take pictures as you take your fan apart so you can refer to the pictures as you put them back together again.
3. Remove Fan
Most oscillating fans have a blade cap that holds the fan blades onto the motor housing. You will need to unscrew the cap at the front of the fan. Remove each blade.
If you haven’t removed the rear housing, do so now.
How to Clean a Box Fan
Once the fan has been taken apart, it’s time to clean your box or oscillating fan.
- Time: 15 – 60 minutes
- Difficulty: Beginner
What You’ll Need
- Hair dryer or compressed air
- Vacuum with attachments such as a soft brush
- Microfiber cloth
- Spray bottle
- Dish soap with a grease cutter such as Dawn Platinum Dish Soap
Regular Cleaning
The regular cleaning of a fan should be done weekly. It only involves making sure that you have dusted and cleaned the exterior of it. You can clean the fan without opening it or taking it apart.
1. Unplug the Fan
Turn off your electric fan and unplug it to prevent accidental shocks.
2. Remove Dust
Use a hairdryer or compressed air to remove all the dust from the surface of the metal or plastic blades.
If you’re using a hairdryer, make sure the dryer is set to the coolest setting and it’s 6-10 inches away from the blades. This will prevent you from damaging the blades.
Remember to clean the back of the blades the same way you cleaned the front.
3. Vacuum the Fan
Using a handheld vacuum or your vacuum’s hose attachment, go over all the surfaces of the fan starting at the top. Work downward and make sure you remove all the debris on the fan.
Don’t forget to vacuum the motor exhaust vents and the electrical cord as well.
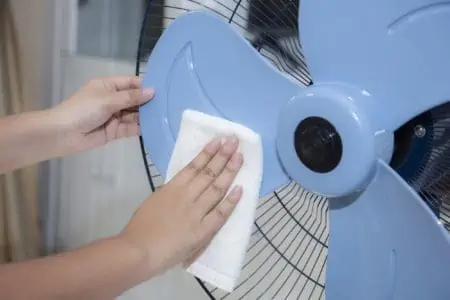
4. Wipe Fan
Using a damp microfiber cloth, wipe the exterior of your fan, especially the controls, to remove any dirty spots remaining on the fan. Don’t forget to clean the pole and base of a pedestal fan.
Deep Cleaning
Deep cleaning a fan requires the fan to be taken apart so that you can clean the internal components as well as the external parts. Refer to the instructions above if you don’t know how to take your fan apart.
1. Mix Cleaning Solution
Make a cleaning solution by mixing 3 cups of cool water with 2 teaspoons of dish soap. Put the cleaning solution into a spray bottle.
2. Clean Wire Housing and Blades
Put the wire housing and blades into a large sink or bathtub. Spray them thoroughly with the cleaning solution. Wait 5-10 minutes to give the solution time to work.
Use a microfiber cloth to wipe everything down, respraying the housing and blades as needed. Make sure all greasy spots have been removed.
Rinse the wire housing and blades with cool water before putting the pieces in a breezy, sunny area to dry. Allow them to dry for at least 30 minutes as they will need to be completely dry before reassembling your fan.
3. Clean Interior of Fan
Use the vacuum’s soft brush attachment to remove any dust and debris that’s still in the fan. If you have an air filter in your tower fan, you will need to remove and either clean or replace the filter.
Clean the filter by vacuuming it with the soft brush attachment.
4. Reassemble the Fan
Make sure that all of the parts of your fan are completely dry. Then put your fan back together starting with the last piece that you removed from the fan. Continue to work backward until it’s reassembled.
Quick Tip
How to Clean a Ceiling Fan
Cleaning a ceiling fan can be challenging because of its height from the floor.
- Time: 15 – 60 minutes
- Difficulty: Beginner
What You’ll Need
- Step Stool
- Microfiber cloth
- Compressed air
- Microfiber cloth
- Spray bottle
- Dish soap with a grease cutter such as Dawn Platinum Dish Soap
Regular Cleaning
Regular cleaning involves dusting your ceiling fan and cleaning the exterior each week.
1. Prepare to Clean
Turn off your fan and wait for the blades to stop rotating before you begin cleaning. Position a step ladder underneath the fan so that you’re able to reach it.
2. Dust Blades
Dust the dirty blades with a duster or dry rag. You can use an extension duster to reach the blades.
3. Wipe Blades
Wipe the blades with a damp microfiber cloth to remove all of the dirt.
4. Spray Motor
Spray the motor with compressed air to remove any dust and debris in it. Be sure not to hold the canned air upside down as this may result in spraying liquid into your motor.
Deep Cleaning
Deep cleaning your ceiling fan involves taking it apart so that you can clean the interior.
1. Prepare to Clean
Turn off the ceiling fan and make sure it’s stopped oscillating. Place a step ladder underneath the fan so you can reach it.
2. Take Apart the Fan
Remove the blade cap holding the fans in place and remove the fans. Put any small parts such as screws, clips, or caps into a small container so that they are not lost.
3. Spray Motor
Spray the motor with compressed air to clean it. Make sure that you don’t hold the can of compressed air upside down as this may cause the can to spray liquid into your motor.
4. Wash Each Blade
Mix 2 teaspoons of dish soap with 3 cups of water and put the cleaning solution into a spray bottle. Place the blades in the bathtub. Spray the blades with the cleaning solution and wait 5-10 minutes.
Use a microfiber cloth to wash each blade clean. Then rinse the blades with a clean microfiber cloth and fresh water to remove the soapy residue. Allow the blades to dry for 30 minutes or longer.
5. Reassemble the Fan
Once the blades are dry, reassemble your ceiling fan.
Fan Cleaning Hacks
There are several cleaning hacks you can use to clean your ceiling fans, desk, floor, and wall.
- Clean the fans once a week as this will keep the dust down.
- Dust your fan with a plastic bag or pillow case instead of using a duster.
- Check the air filter, if your fan has one, to make sure the fan continues to run efficiently.
- Lay an old sheet on the floor when cleaning a ceiling fan to prevent dust from getting everywhere.
FAQs

Can Dust on Fan Make You Sick?
Fans circulate dust and pollen in the air. So, if you’re allergic to dust, then a fan may trigger your allergies.

Why Do Fans Get So Dusty?
Fans get dusty because the blades build up charge as they rotate through the air. Charged dust particles are attracted to the charge on the blades and attach themselves to the blades. This buildup is why it’s important to know how to clean a fan of dust so that you don’t blow dust all over your house.

How Do You Clean a Fan Without Taking It Apart?
If you have a fan that doesn’t come apart, clean it by laying it flat on a sheet. Then pour some coarse, clean salt through the grilles. The salt will remove the loose dust and debris from the blades. You can also blow the fan with a hair dryer to clean it.