Oil diffusers are meant to relax you and create a soothing aroma. Whether you use one for massages, to help you sleep, or to tackle odors at home, diffusers have endless benefits. But if yours is dirty, it can lead to mold, musty odors, and damage.
It’s important that you know how to clean a diffuser and keep it clean. Not only does it ensure a safer mist for you to inhale, but it will also extend your diffuser’s lifespan.
Are you ready to clean your diffuser? Keep reading for our step-by-step guide that works for all kinds of diffusers. This includes Anjou, Urpower, Young Living, Asakuki, Scentsy, and more.
Key Takeaways
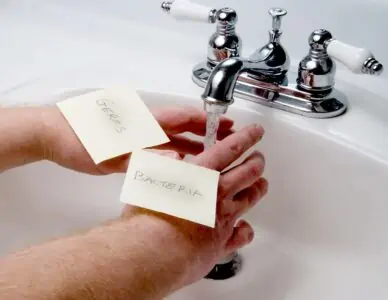
- Clean your diffuser after each use to prevent mold, bacteria, and residue buildup.
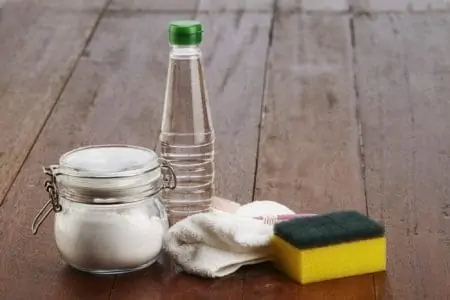
- Use a 1:1 solution of distilled white vinegar and water to effectively clean your diffuser.
- Deep clean your diffuser once or twice a month for optimal performance.
- Only use pure, high-quality essential oils and distilled water in your diffuser to prevent damage.
How Often to Clean an Oil Diffuser
We recommend cleaning the diffuser every time it runs out of water. It’s super important to clean it if you’re switching up what oils you’re using, too. Once or twice a month, issue a deeper clean and let the diffuser fully dry out to tackle the chance of mold and bacteria build-up.
Many essential oils are antimicrobial or antifungal, so mold and mildew might not be an issue for you. But even so, it’s essential that you clean your diffuser to keep it running properly.
Oils are heavy and can leave behind a filmy residue. Over time, this can clog up your diffuser, and it won’t work as well. Another issue is that the residue still smells of the oil.
So if you previously diffused grapefruit oil but now want to diffuse lavender, you might get traces of grapefruit in the air. This isn’t helpful when you’re trying to drift off.
How to Clean a Diffuser With Vinegar
The most effective cleaning solution is distilled white vinegar. You can buy this in the store, but we like to buy it in bulk online. We use a lot of it for cleaning, and it works out cheaper.
- Time: Five to 20 minutes.
- Difficulty: Easy.
What You’ll Need
- Spray bottle.
- Distilled white vinegar.
- Rubbing alcohol.
- Water.
- Cloths.
- Cotton swabs.
Routine Cleaning
Follow these steps after each use:
- Pour out water: Empty all water from the diffuser.
- Create cleaner: In a spray bottle, combine a 1:1 solution of distilled white vinegar and warm water.
- Spray cloth: Spray the cleaner onto a cloth.
- Wipe: Wipe the interior of the diffuser, scrubbing well. Don’t forget the nooks, crannies, and inside of the lid. You can even use this solution to clean the outside of the diffuser and the base.
- Rinse: Dampen a separate cloth with plain warm water. Wring it out well and wipe the diffuser to rinse away vinegar residue.
- Clean the ultrasonic chip: Inside the tank is a small chip that emits the mist. Dampen a cotton bud in rubbing alcohol and wipe the mist chip well to remove the gunk.
- Dry: Use a separate cloth to wipe the diffuser dry.
Deep Cleaning
Once a month, or more often if you use your diffuser daily, you should deep clean the device. Here is the best method:
- Routine clean: Start by issuing the above routine cleaning method to ensure the diffuser is mostly clean.
- Fill: Fill the diffuser tank with water.
- Add vinegar: Add one teaspoon of distilled white vinegar.
- Diffuse: Turn the diffuser on and run it for 15 minutes. The vinegar and water combo will loosen oil residue and dirt inside the machine.
- Empty: After 15 minutes, turn off the diffuser and empty the vinegar water.
- Wipe: Use a cloth to wipe down the inside of the tank and the lid. Scrub well on areas where you notice stubborn grime. Don’t forget to wipe down the ultrasonic mist chip, too.
How to Clean a Diffuser Without Vinegar
Cleaning with vinegar is our top recommendation because it’s non-toxic, super effective, and can fight bacteria. But if you don’t have vinegar, you can still clean your diffuser super well. Here are three alternative cleaning methods.
With Rubbing Alcohol
Pour a little rubbing alcohol on a cotton ball. After emptying the diffuser, run the cotton ball inside the tank. Clean the mist chip to disinfect and remove grime. Rinse well with a damp cloth.
Citric Acid
Let’s walk through how to clean an oil diffuser with citric acid.
Fill the diffuser with water and one tablespoon of citric acid. Cleaning with lemon juice is a suitable alternative if you don’t have citric acid. Let the water stand for 10 minutes.
Turn on the diffuser for another few minutes to let the acid run through the diffuser.
Drain the water, rinse with a damp cloth, and dry well. You may need to repeat if the tank is still dirty.
Caution
Check your user manual before implementing any cleaning solutions. Some brands will advise against stronger cleaners, such as citric acid.
With Baking Soda and Dish Soap
This is an excellent method for cleaning a diffuser with residue and hard water deposits. Fill a sink with warm water, ¼ teaspoon of baking soda, and six drops of dish soap. Stir to combine.
Use a jug to pour some of the soapy water into the diffuser tank. Submerge the lid of the diffuser in the sink. Let the parts soak for one hour.
Rinse the parts well with warm water and a damp cloth. Dry well.
How to Keep a Diffuser Clean
Looking for handy hacks to keep your diffuser in good condition between deep cleans? For the best aromatherapy, check out these tips:
- Clean after each use: We’re reiterating this hack because it is the most important one. This will prevent oil build-up and the growth of bacteria.
- Use distilled water: If you live in a hard water area, distilled water is best. It won’t leave behind mineral deposits and build-up.
- Pure essential oils: Make sure you buy pure, high-quality essential oils. Don’t use ones with fillers or additives, as these can build up and damage your diffuser. A good option isdoTERRA oils which are pure and free of contaminants.
- No standing water: If you’re switching off your diffuser for the day, empty the water. Don’t leave it standing until the next day. This can cause bacteria growth.
- Don’t overload with oils: Usually, a maximum of 10 drops is enough. Always check your brand’s advice. For instance, Young Living recommends eight to 10 drops of essential oil in their diffusers.
Why is My Oil Diffuser Not Working?
We’ll walk through some common issues you might notice with your diffuser. Plus, we’ll provide a reason for each one and what you can do about it.
| Problem | Cause | Solution |
| There is no power light on, and the diffuser isn’t turning on. | It’s not plugged in, or the water level isn’t high enough. | Make sure the diffuser is plugged into a working electrical outlet. Empty the diffuser, let it fully dry out for 24 hours, refill to the maximum line and try again. |
| Low diffusion levels. | Not enough water, or the diffuser is dirty. | Make sure there is enough water in the tank. Try cleaning the mist chip and dispersion outlet to remove oil residue. |
| The diffuser is hot. | There is too much water in the tank, or the fans are dirty. | Empty the water and clean the diffuser. Let it cool down and refill it to the maximum line. Otherwise, ensure that there are no obstructions around the fan. |
| The lights are on but it’s not diffusing. | Restricted airflow or dirty diffuser. | Make sure the diffuser is on a level, hard surface with no objects around to obstruct airflow. You should also try cleaning the unit out properly. Lastly, ensure you’re using purified or distilled water. |
| Water got in the electrics. | When cleaning, perhaps you accidentally got some water in the electrical parts which caused breakage. | Take the diffuser apart and check if there is moisture inside the unit. If so, we recommend getting a new diffuser. |
FAQs

When Should I Replace My Diffuser?
There is no specific time frame for this. When cared for, an oil diffuser should last for years to come. We had ours for over five years before it stopped working.
If the diffuser has water damage, won’t turn on, or is filled with mold, then it’s time for a new one.

How Often Should You Change the Oil In the Diffuser?
Whenever the water runs out, you will need to add new oils. You don’t need to empty the water and change the oils until the water runs out.
If the water is still in your diffuser after about three weeks, empty it and issue a deep clean.
You should also clean the diffuser out between changing oils. This prevents scents from mixing up with one another.

Can You Use Old Diffuser Water?
When you clean your diffuser out, you must empty the tank. It may seem like a waste dumping out that water and oil. However, because it’s been sitting there for a while, it’s best not to reuse it.
However, if it’s only been in the tank for about one day, you can pour it into a spray bottle. Add some more water and even some white vinegar. Use it as a room spray or as a multi-purpose cleaner.
It will last for weeks in this bottle since it is airtight.

What Essential Oils Should You Avoid?
For kids under five, always ensure you only use a one percent dilution of essential oil. You should also avoid certain essential oils around kids (1). This includes:
- Aniseed.
- Basil.
- Camphor.
- Cinnamon bark.
- Clove bud.
- Clove leaf.
- Eucalyptus radiata fennel.
- Hyssop.
- Juniper.
- Lemongrass.
- Marjoram.
- Nutmeg.
- Oregano.
- Parsley seed.
- Peppermint.
- Pennyroyal.
- Sage.
- Savory.
- Tagetes.
- Thyme.
Essential oils that are unsafe during pregnancy include:
- Aniseed.
- Basil.
- Cinnamon.
- Fennel.
- Hyssop.
- Juniper.
- Marjoram.
- Nutmeg.
- Oregano.
- Parsley.
- Pennyroyal.
- Rosemary.
- Sage.
- Tagetes.
If you have low blood pressure, avoid clary sage, ylang-ylang, and lavender.
If you have high blood pressure, avoid rosemary, peppermint, hyssop, thyme, eucalyptus, and sage.
If you have epilepsy, avoid sage, sweet, fennel, hyssop, eucalyptus, and rosemary.
One of the biggest risks is if you have pets since so many essential oils are toxic to animals. For dogs, that includes:
- Cinnamon.
- Citrus.
- Pennyroyal.
- Peppermint.
- Pine.
- Sweet birch.
- Tea tree.
- Wintergreen.
- And more.
For cats, avoid:
- Wintergreen.
- Pine.
- Cinnamon.
- Clove.
- Tea tree.
- Thyme.
- Lavender.
- And more.

Can I Leave My Diffuser on All Night?
It’s not recommended that you leave a diffuser running all night. Exposure to essential oils for too long can lead to various health issues. We recommend using the timer function on your diffuser and setting it to one hour.
If your bedroom is particularly small, 30 minutes is best.

Can I Clean My Diffuser With Vodka?
We don’t recommend it. Stick to mild and non-toxic cleaners, like vinegar or baking soda. If you need to clean your mist chip with alcohol, we recommend rubbing alcohol instead of vodka.