When your candle is burnt to the bottom, it can seem like a waste to throw the whole jar away. Perhaps you want to reuse it for another project or simply clean it out so you can recycle it.
I owned a candle business for three years, so I’m quite the expert in all things wax! We’ve put together steps for the best way to clean a candle jar so that you can reuse empty jars.
Keep reading to learn how to clean a candle jar using a few different but very easy methods!
Key Takeaways
- Remove leftover wax: Use methods like freezing, boiling water, or using a hairdryer to remove the leftover wax from the candle jar.
- Create a baking soda paste: Mix a 1:1 ratio of baking soda and water to create a paste, apply it to the old label, and leave for 20 minutes before wiping with an abrasive sponge or brush.
- Soak the jar in boiling water: Pour boiling water into the jar to remove wax and oil residue. Leave it overnight for the best results.
- Clean with soapy water: Wash the jar with warm soapy water and an abrasive sponge or brush, then dry thoroughly with a dish towel.
How to Get Wax Out of a Candle Jar
Before you properly start cleaning a candle jar, you need to remove all the wax. It’s normal for there to be some leftover wax that can’t be burned. This wax is what holds down the wick.
We’ll share nine nifty methods for removing wax from your candle jar.
In the Freezer
When wax is cold, it shrinks. So the freezer can help you remove it from the glass jar or tin.
Place the candle in the freezer overnight. As soon as you remove it, use a butter knife to pry the wax out of the jar. Put the wax in the garbage can – never melt it and pour it down the sink – or keep it if you want to reuse the wax.
Lift the wick and tab from the bottom using your butter knife. If the bottom of the jar is still sticky, don’t worry. We’ll clean that out later.
With Boiling Water
Opposite to the freezer method, this uses heat to melt the remaining wax.
Boil some water, then pour it into the candle jar. The wax will melt slightly before rising to the surface. Give it a few minutes until it’s all at the surface of the water. Use a spoon to remove the melted wax that’s floating in the water. Put it in the garbage can.
Pour out the boiling water. Repeat if necessary. Once you’ve removed all wax, wipe the inside of the candle jar with a paper towel to remove the melted wax residue.
In the Oven
If you’ve already got the oven on, why not melt the wax in there?
Set the oven to 200 degrees Fahrenheit. Line a baking tray with tin foil and place the candles upside down on top.
Leave the jars in the oven for 20 minutes. Check that the wax has drained well from the jars. Use a butter knife to remove any remaining wax. Then use a paper towel to remove extra residue.
Safety Warning
Make sure to wear oven gloves as the candle jars will be hot!
In a Double Boiler
If you made the candles yourself, you probably have a double boiler. You can also empty the wax from the jars using your double boiler.
Just note that this might take a bit longer with beeswax and palm wax.
To do this method, fill a saucepan with water and bring it to a simmer on your stovetop. Put the candle jars in the simmering water and let it heat up. Once the wax has melted, dump it into the garbage or another container if you plan to reuse the wax.
Use a butter knife to remove the wick and tab from the bottom of the jar.
There may be some residue left in the jar, but we will clean it out later.
Take Note
When I made candles, I would use my double boiler to remove candle wax. It works a treat!
With a Hairdryer
You can use a hairdryer to melt the wax inside your jar. Aim the nozzle at the jar for a few minutes and watch as the wax starts to melt. Do not blow hot air directly into the candle jar, as this could result in hot wax splashing back at you.
Use a butter knife to remove the loosened wax. Wipe the inside of the jar out with a paper towel.
With the butter knife, remove the wick and tab from the bottom of the jar.
Again, be careful as the jar can get very hot when using a hairdryer!
In the Microwave
Before you try this, you have to be absolutely 100 percent sure that there is no metal wick tab in the candle. The only way you can be sure of this is if you made the candle yourself or if you double-check with the supplier. You should also make sure that the jars aren’t made from aluminum. Metal and microwaves do not mix.
On the other hand, the microwave can melt the wax, but it doesn’t distribute heat evenly. So it may not melt the wax evenly. Plus, one side of the jar might feel cool while the other side is burning hot.
However, we have a safe method if you want to use a microwave to melt your candle wax.
Place the candle in a microwavable container such as a ceramic bowl. Heat for one minute at a time. Stop when the wax is fully melted, but don’t let it get hotter than 170 degrees Fahrenheit. You’ll need to use a thermometer to check the temperature.
Once it’s melted, or around 170 degrees, remove the candle from the microwave. Quickly pour it into the garbage can or a separate container if you plan to reuse it.
With a Heat Gun
How to remove candle wax from a jar using a heat gun, you ask?
You can melt candle wax with a heat gun the same you would with a hairdryer. Point the heat gun at the bottom of the candle jar to melt the wax. Once it’s melted, remove it with a butter knife. Discard the wax or save it for later. Don’t forget to remove the wick and tab.
With a Spoon
If you don’t want to use any heat to melt the wax, you can just use a spoon. Keep in mind that this will take a lot longer. Basically, take your spoon and get to town scraping out the leftover wax! This is a good method if you want to get kids involved since it’s very safe.
With Nail Polish Remover
Acetone-based nail polish remover can actually dissolve candle wax. But this may be a lengthy method. However, it’s worth giving it a go! Pour some nail polish remover into the jar, covering a thin layer over the remaining wax. Leave it for 5-10 minutes to see if the wax starts to dissolve. Use a spoon to remove the loosened and dissolved wax. Continue until you’ve removed all the wax from the jar.
How to Remove a Whole Candle From a Jar
Did you know that you can use the freezer method to remove an entire candle from a glass jar or tin? Plus, it can leave it intact if you do it carefully.
Keep in mind this works best if your candle jar doesn’t have ridges. Otherwise, you will not be able to pull it from the jar without breaking the wax. For instance, this might not work with Yankee candles because their jars have curves and ridges.
- Place the candle in the freezer overnight.
- Remove the candle from the freezer and place it upside down.
- The wax might just pop out with a little shake.
- If it’s not popping out, use a butter knife to loosen it from the jar gently. Don’t apply too much pressure. Otherwise, you might crack the wax.
You can use the candle wax for another project or put it into another jar if you like.
How to Clean a Candle Jar
Once you’ve removed excess wax from a jar, you should clean it out. You can use candle jars for another project, making new candles, or for storage. This method uses dish soap, so you don’t need any fancy cleaning solutions. Here is the best way to clean a candle jar and remove old labels.
- Time: Soak overnight, clean 20 minutes
- Difficulty: Easy
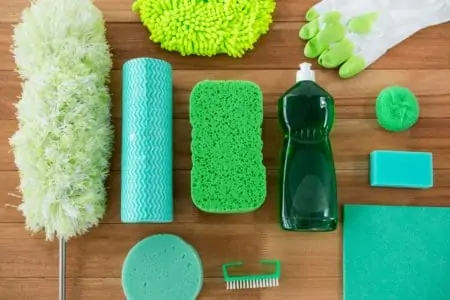
What You’ll Need
- Boiling water
- Dish soap
- Abrasive sponge or brush
- Dish towel
- Baking soda
- Water
- Bowl
- Spoon
1. Remove Candle Wax
Choosing one of the above methods, remove the candle wax from the jar. The more you reuse, the easier the cleaning steps will be.
2. Create Baking Soda Paste
In a small bowl, use a spoon to mix a 1:1 ratio of baking soda and water. Mix to create a paste. Apply the paste to the old label.
Leave for 20 minutes then wipe with an abrasive sponge or brush. The old label will lift off super easily! Rinse with water.
3. Pour Boiling Water Into the Jar
Once you’ve removed as much wax as possible, pour boiling water into the jar. This will remove wax and oil residue from the jar. The longer you leave the jar, the more effective this will be. We recommend leaving it overnight if you have the time, but you should leave it for at least a couple of hours.
4. Wash the Jar With Soapy Water
Now wash the jar out with warm soapy water like you usually wash your dishes. Super easy! We recommend using an abrasive sponge or brush to loosen more wax and oil residue.
5. Dry Well
Use your dish towel to dry the jar thoroughly. It should be looking 100 percent clean now.
Top Ways to Reuse Candle Jars
Now that the candle jar looks spotless, how can you reuse it? Here are some fantastic ideas for upcycling your candle jar.
- More candles: Why not use the jar for making more candles? It’s an eco-friendly way to keep the candles burning in your home. Simply reuse the same jar every time you want a new candle. Another idea is dropping a tealight in the jar and lighting it.
- Planting succulents: Used candle jars are a great place for planting succulents. Fill it with soil, plant your little buddy and enjoy this unique idea.
- Store your skincare: You can store your skincare in your old candle jars or even make DIY skincare. A DIY body scrub is easy to make, and these clean jars will make a cute storage solution.
- Kitchen storage: Why not store your tea, coffee, rice, or other kitchen ingredients in these clean jars? They will look adorable on display in your home.
- Office storage: Clean candle jars make for great pencil holders. Put it on your office desk and enjoy a new storage solution!
- Store candle matches: Get rid of the boring cardboard box that your matches come in. Store them in your old candle jar instead.
- Clutter storage: You can put a used candle jar in any room to store random bits and bobs. In the bathroom, use it for hair ties, bobby pins, and q-tips. In the garage, use it for nuts, bolts, and screws.
How to Reuse Candle Wax
You might not want to waste all the candle wax that you save from the bottom of your jars. If you store it in a separate container, you can let it build up for a while. Soon, you’ll have enough to make a whole new candle. Just note that it might have a strange scent, especially if you’re mixing a few different candles together.
- Time: 1-2 hours
- Difficulty: Intermediate
What You’ll Need
- Container for storing wax from old candles (Tupperware is fine)
- Wick
- Wick tab
- Clothespin
- Candle container (jar or tin)
- Hot glue gun
- Double boiler
- Scissors
1. Store Old Wax
Using any of the above methods for melting wax, store all your old wax in a container. An old Tupperware tub is suitable.
2. Prep Your Jars
Using a candle jar or tin, apply hot glue to secure the wick tab to the bottom of the jar. If using a cloth wick, you can clip it into place with a clothespin.
3. Melt Old Wax
Set up your double boiler. If you don’t have one, you can create your own with an old saucepan. Place it inside a larger saucepan that’s filled halfway with water. Bring the water to a simmer.
Use a butter knife to pry the old wax out of your container. Place it into your double boiler or old saucepan. Stand by until it’s melted. Don’t leave the wax unattended.
4. Pour Into Jar
Once the wax has melted, pour it into the clean candle container. Make sure the wick doesn’t fall into the wax. That’s where the clothespin comes in handy!
5. Let Wax Harden
Leave the wax overnight to harden completely. In the morning, trim the wick, so it’s about two centimeters above the wax. Light your candle and enjoy!
Cleaning a Candle Jar
Now that you know how to get wax out of a candle jar, you can do all sorts of cool things with the empty jars. Make sure to deep clean them with warm soapy water and dry the jars thoroughly.
Then you can use them for various fun projects, like repotting succulents or even making new candles.
With years of candle experience, our tips and methods are to be trusted.
