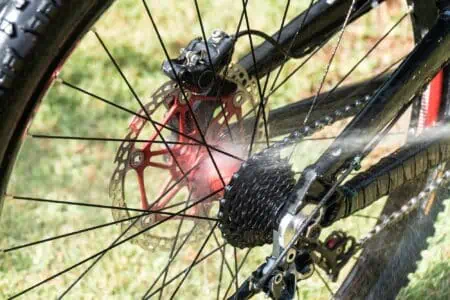
A filthy bike chain can shorten the lifespan of your bike. Besides that, it looks gross and can cause stains on your clothes.
What’s even worse is that a dirty chain can wear down the drivetrain. The drivetrain consists of the parts of your bike (crank, chainrings, cogs) that you use to pedal along.
If you want to know how to clean a bike chain to increase your drivetrain’s longevity, stick around. Our five-step method will have your bike chain clean and sparkling in less than 20 minutes.
Key Takeaways
- Clean your bike chain regularly to increase its lifespan, prevent wear on the drivetrain, and avoid stains on clothes.
- Aim to clean and lubricate your bike chain once a month or every 75 miles, or more often if it appears dirty or you ride in wet conditions.
- Use a degreaser, brushes, and hot soapy water to clean your chain, then apply a waterproof chain lubricant for smooth functioning.
- Replace your bike chain when it’s worn, measuring 12 pins to check if it’s one percent longer than it should be (12.12 inches).
Why is Cleaning a Bike Chain Important?
There are many reasons you should learn how to clean a bicycle chain.
Firstly, a clean chain will ensure your bike runs faster. Dirt equals friction which will slow you down when you’re in a hurry to get somewhere.
A dirty chain can also affect your bike’s drivetrain. The chain is connected to the bike’s chainrings, chain catchers, pulleys, cassette sprockets, and more. If it’s dirty, it will eventually damage these other elements, which can be a pricey repair.
Last but not least, if your bike chain is greasy, it can stain your clothes or get dirt on your legs if you come in contact with it. Not great if you cycle to work for important meetings.
How Often to Clean a Bike Chain
If you frequently go on wet, snowy winter rides, cleaning your chain after each ride is a good idea.
Another rule of thumb is to clean it simply whenever it looks dirty. If you have time to clean your chain after every ride, go for it. Most people don’t have the time, but if you do — it’s the best way to care for your bike chain.
In general, you should aim to clean and lubricate your bike chain once a month or every 75 miles.
How to Clean a Bike Chain
Whether your chain is removable or not, we’ll show you the best methods for cleaning it.
- Time: 20 minutes.
- Difficulty: Intermediate.
Without Removing the Chain
What You’ll Need
- Gloves.
- Disposable container (such as an old ice cream tub).
- Degreaser (such as the Muc Off Bio Drivetrain Cleaner).
- Large paintbrush.
- Two nail brushes or bike chain scrubbers (like the Park Tool Cyclone).
- Sponge.
- Hot soapy water.
- Bucket.
- Dry rag.
1. Set Up Your Bike
Position your bike in a standing position with access to the bike chain. Because you’ll be using a degreaser, keep the bike away from grass, plants, pets, and kids. Placing it on a driveway or sidewalk is best.
Pop your gloves on, and let’s get started.
2. Prepare Your Degreaser
Check the degreaser packaging instructions. You might need to dilute yours. If not, you can pour it directly into a disposable container.
3. Apply Degreaser
Dip your paintbrush into the degreaser and apply it to the bike chain. Hold the brush in one spot and use your other hand to backpedal the bike. This allows the degreaser to access every inch of the chain.
Leave the degreaser to sit for a few minutes to work its magic.
4. Deep Clean the Chain Gunk
You’ve applied the degreaser, but you’ve not yet deep-cleaned the chain.
For that job, you need a bike chain scrubber. These nifty devices are super handy as they capture the entire chain and deep clean all the crevices.
You can use two nail scrubbing brushes if you want a cheaper option. Sandwich the chain between the nail brush and backpedal the bike. The nail brush bristles will deep clean the chain as you backpedal.
If using a bike chain scrubber, open it up, insert the chain and close the scrubber again. Fill the reservoir with your degreaser and backpedal the chain. This is more effective than two nail brushes, but it’s a little more expensive.
5. Rinse and Dry
Fill a bucket with hot soapy water. Dip a sponge in the solution and hold it to the bike chain. Backpedal the bike and let the sponge remove the degreaser and oil residue.
Do the same thing with a clean, dry rag to remove moisture. You don’t want the chain to rust.
By Removing the Chain
When you remove your chain, you can get a bit of a deeper clean. The best way to do this is by using an Ultrasonic cleaner. However, if you don’t have one, you can still use this method, but you’ll only need to follow steps three to six.
What You’ll Need
- Ultrasonic machine (such as the Vevor Ultrasonic Cleaner).
- Simple Green degreaser.
- Stiff-bristled brush.
- Water.
- Spray bottle.
- Garden hose (optional).
- Old towel.
- Compressed air.
Warning
If your bike chain has a joining pin rather than a quick link, we don’t recommend removing it to clean it. Each time you remove it, you weaken the link a little more. You should only remove the chain when you’re replacing it.
1. Set Up the Ultrasonic Cleaner
Pour hot water into your ultrasonic cleaner with ¼ cup of degreaser. We recommend Simple Green because that’s what many bike experts suggest, but feel free to use a favorite of yours.
Place your bike chain in the solution. Turn on the ultrasonic cleaner and watch the grease ooze out of the chain.
Using The Ultrasonic Cleaner
Make sure you read the user manual for your cleaner. It will share safety tips and instructions on how to use it.
2. Empty the Cleaner
Empty the solution from the ultrasonic cleaner.
3. Create the Degreaser Solution
To deep clean the nooks and crannies, we need to make our own degreaser solution. Dilute Simple Green according to the packaging instructions in a spray bottle with warm water. Shake well to combine.
4. Clean the Bike Chain
Spray the bike chain with the degreaser solution and scrub well with your soft-bristled brush.
5. Rinse Bike Chain
Rinse the bike chain to remove cleaning residue and dirt. You can run the chain under a faucet or use your garden hose.
6. Dry the Chain
Use an old towel to wipe the bike chain dry. Use compressed air to dry the nooks and crannies.
Leave the chain to air dry to 100 percent before returning it to the bike.
How to Lube a Bike Chain
Let’s shift gears and talk about lubrication.
It’s important to lubricate your bike chain so that everything runs smoothly. This will lead to a better biking experience and longevity and prevent friction and corrosion to the drivetrain.
- Time: Five minutes.
- Difficulty: Easy.
What You’ll Need
- Waterproof chain lubricant (such as WD-40 Specialist Lube).
- Rag.
1. Apply Lubricant
Once you’ve cleaned and dried your bike chain, you can apply a generous amount of lubricant. Hold your lubricant bottle upside down over your bike chain in direct contact with the links. Begin applying the lubricant while backpedaling the bike to apply the lubricant to each link.
Continue until you’ve applied lubricant to the entire chain. This should only take a minute or two.
Deeper Clean
If you want the best performance, you can take the time to lubricate each link separately. This will take a bit longer, but it will pay off in the long run. One small drop per link is the way to go.
2. Backpedal the Bike
Keep backpedaling the bike to spread the lubricant to other parts of the drivetrain. Repeat about three times, then leave the lubricant to sit overnight.
3. Wipe Off Excess Lube
The next day, hold a rag over the bike chain and backpedal to remove excess lubricant.
What to Use to Clean a Bike Chain
We’ve mentioned a few products to try, but how did we come to our conclusion? We’ll explain what to look for in a degreaser and lubricant and what to avoid.
When it comes to degreasers, we recommend using an environmentally friendly or biodegradable degreaser. It will come in contact with the ground, yard, and possibly your ultrasonic cleaner. So we want to stay away from harsh chemicals.
Don’t use petrol or diesel-based products, as these leave behind a thick coating, making it hard to lubricate your chain.
Avoid degreasers with hydrocarbon solvents, turpentine, or paint thinners, as these can damage your bike’s paintwork.
Ensure the degreaser is formulated to remove gunk, grime, dirt, and grease from the chain. Third-party tests will assure you of the degreaser’s ability.
Make sure the degreaser is suitable for all weather types. You don’t want something that will sud up in rainy conditions and ruin the bike.
When it comes to choosing a lubricant, an oil-based option is good. It can help bring dirt to the surface, making it easy for you to wipe off the next morning.
You will find “dry” oil lubricants in your search, which we recommend against. They collect a lot of grit, which is especially harmful if you have a mountain bike (MTB).
A “wet” lubricant is better, but remember that you must wipe your chain after each ride to remove grit. However, it’s great in most weather conditions, including rain.
If you cycle primarily in dry, off-road conditions, you might benefit from a wax-based lubricant, like Finish Line Wax Lube. It repels dust and dirt, protecting your chain in the long run.
With Household Products
If you can’t access a commercial product, are there household products you can use? Yes, but let’s be careful.
- Chainsaw oil: If you’re biking in a rainstorm, chainsaw oil is thick enough to withstand the weather. In other elements, we don’t recommend it.
- Silicone spray: When in a pickle, you can use silicone spray for a short period of time. It’s suitable for one ride, but you will need to reapply for your next ride as it’s not long-lasting.
- Clipper oil: Like silicone oil, this is good for one ride at a time, but it washes away easily. So it’s not going to do much on rainy or humid days.
- Vaseline: Vaseline is a good alternative to commercial light bike oils. It’s got a great consistency, but it’s quite sticky. Therefore, it will collect more dust and debris, so you will need to clean your chain more often.
- 3-in-1 oil: This multipurpose oil is suitable for lubricating your bike chain. It works well in most weather types and will protect your chain from corrosion.
With that being said, you should avoid some alternatives. For instance, engine oil is too thick. WD-40 degreaser shouldn’t be used as a lubricant; instead, use the WD-40 bike lubricant spray. Lastly, don’t use cooking oil — it’s not made for mechanical parts as it’s too acidic and not durable.
How to Lube a Bike Chain Without a Stand
For bicycles, you can simply prop your bike up against a wall. Since you’ll be backpedaling, you don’t need a stand — the wheels won’t be moving.
If you have a motorcycle, however, you might need to create a DIY stand, so you have free rotation for the wheel. One easy way to do this is to use a piece of wood with a Y-shaped cutout at the top. Put the Y-cut on the bolt of the wheel and prop it up.
Another option is to have a couple of people helping you hold the bike up while you lubricate the wheel, but this requires mighty muscles!
When to Replace a Bike Chain
You should replace your bike chain when it’s worn. Over time, a worn chain will gradually become a little looser as the elements are pushed and elongated.
Generally, a bike chain should be one inch from the middle of one pin to the next. Measure 12 pins, and it should equal 12 inches. If it’s one percent longer (so 12.12 inches), you should replace the chain.
If you find it too difficult to measure with a ruler, you can use a chain checker such as the Park Tool CC-4 Chain Wear Indicator. With chain checkers, you install the hook end onto a link with an inner plate. Then install the other end into a chain. If it can fit into the chain, your chain is worn, and you need a new one.
FAQs

Can You Use a Rusty Bike Chain?
You can get away with riding a bike with a rusty chain for a short time. However, it’s not the safest decision. The rust can weaken the chain, and it can snap at any time.
Instead, try cleaning and degreasing your bike chain to remove the rust.

Can You Clean a Bike Chain Without Degreaser?
You can, but a degreaser is the best option. If you don’t have one but need to clean your chain immediately, we recommend using liquid dish soap.

Can I Use Dish Soap to Clean Bike Chain?
Yes, you can clean your bike chain with dish soap. It’s one of the only alternatives we recommend to degreaser. It’s pretty gentle, but it will also do a good job of removing grease and grime.
Simply dilute around one tablespoon of dish soap for every two cups of water and use that instead of a degreaser.

Is Vaseline Good for a Bike Chain?
When you don’t have proper bike chain lubricant to hand, you can use Vaseline instead. Most people already have it at home, so it’s convenient.
However, keep in mind that this isn’t what Vaseline was made for, so it won’t be as effective. Plus, it’s not as long-lasting, so you may have to reapply it after each ride.
Another drawback to Vaseline is that it’s hard to clean off, captures more debris, and is a fire hazard.

How Long Does a Cycle Chain Last?
With proper maintenance, a bike chain should last between 2,000 and 3,000 miles.
Chain Reaction
When you know how to lube a bike chain and keep it clean, you’ll notice a chain reaction — your cleaning efforts will lead to better cycling. Better cycling leads to more happiness. And less maintenance leads to bigger savings.
It’s an all-round great cycle. Remember to clean your bike chain roughly every 75 miles, lubricating it after each clean.
You can clean your bike chain in around 20 minutes. You don’t even need to take it off your bike!