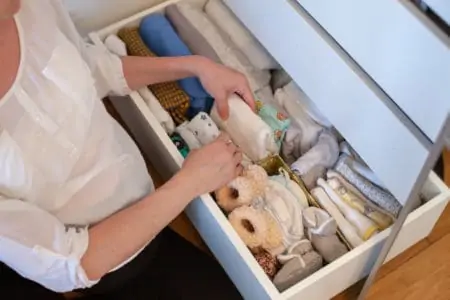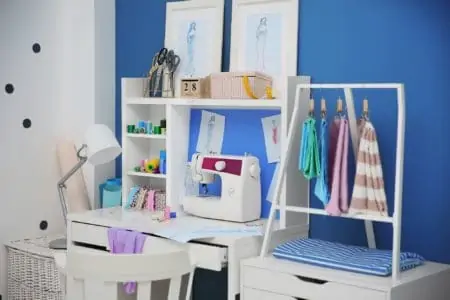
Your craft room is the place where your inspiration and imagination can run free. Unfortunately, it is also a place that gets messy fast. After all, the paper scraps, buttons, glitter, glue, and paint can clutter your craft room making it hard to find what you need. Then when you can’t find the item you need, crafting becomes a chore instead of a joy.
To keep your craft room a space of pleasure and creativity, here are some craft room storage ideas to help you clean up your crafting area and easily find the items you need.
Key Takeaways
- Organize your craft room with a pegboard, plastic containers, a lazy susan, and a rolling cart for easy access to supplies.
- Use the walls for storage by installing a pegboard wall, wrapping paper station, PVC pipe holders, and a paint rack.
- Keep cabinets organized with pegboards, shoe organizers, pull-out baskets, spice racks, and a bulletin board.
- Organize drawers, papers, and shelves using drawer dividers, labeled baskets, magazine holders, and hanging files.
Organize Craft Room Desk
When you’re ready to organize a craft room, the desk or table is where you should begin. It’s where you do most of your crafting, lay out fabric for cutting, and wrapping paper for gifts. So you will need a large table or desk that will give you plenty of room for crafting. You also need your craft supplies organized in an easy to reach and use manner. Here are some ideas on how to organize your crafts at your desk.
Pegboard Over Desk
Hang a pegboard over your craft room desk. You can use buckets to hold various tools such as scissors, paintbrushes, pencils, and washi tape. The pegboard can also hold shelves for jars of buttons, thread, and fabric samples.
Plastic Containers
Push your craft table up against the wall and add plastic containers to the table. The wall will ensure that the containers don’t fall off the back of your table, and you’ll still have the use of the table to layout large pieces of fabric and foam. The containers can store glue sticks, pencils, scissors, chalk, and other items you need to use.
Lazy Susan
Use a lazy susan on your crafting desk. The lazy susan can hold pens, markers, crayons, paints, glue sticks, and other items you’ll need to use at your crafting desk. The lazy susan will spin allowing you to easily access all the items on it.
Rolling Cart
Slide a rolling cart underneath your craft room desk. The cart can hold items such as papers, ribbons, scissors, and instructions that you need when crafting. When you don’t need the stuff on the cart, you can simply roll it back underneath the desk so that it’s not underfoot cluttering up your craft room.
Sliding Wire Baskets
Install sliding wire baskets underneath your craft room desk. The baskets can neatly hold pencils, washi tape, glue sticks, paint, instructions, and assorted other items out of the way. You’ll be able to pull out the baskets when you need the items inside. Then push the basket back under the desk when you are done, so it’s no longer in your way.
Craft Room Ideas for Walls
The walls of your craft room are an important area to organize. If you think vertically, you’ll find that you have plenty of space to add more storage to your crafting area. This makes organizing crafts easy.
Plus, you can customize your walls to fit your style and personal needs.
Pegboard Wall
Install a pegboard wall in your craft room. The pegboard wall can be customized with baskets, hooks, and rods to hold many of the supplies in your craft room. It can hold baskets of buttons, rods with spools of ribbons, art supplies, and hooks for scissors to name a few.
Wrapping Paper Station
Put some rods up the wall of your crafting room. These rods are perfect for holding wrapping paper and will give you a wrapping paper station. You’ll be able to easily pull out the wrapping paper of your choice, cut off an appropriate length, and wrap the gift.
PVC Pipe
Cut PVC pipes at an angle and attach them to a wooden plank. You can use different sizes of PVC pipes to hold different items or use the same size. The board can then be attached to a wall.
This creates a great place to hold paintbrushes, pencils, and scissors.
Series of Rods on Wall
Add a series of rods going up your wall. You’ll be able to use the rods to hang buckets of paints, brushes, or pencils. You can also hang baskets full of chalk, stickers, and glitter.
With a good set of hooks, you’ll be able to hang many items on the walls of your craft room.
Hang a Paint Rack
If you love painting, hang a paint organizer rack on your craft room wall. You’ll be able to store all your small bottles of paints and grab them when you need to use them. It’s really handy if you organize your paints in the rack by color so you can easily find the color you need.
Cabinet
Cabinets are an important part of your craft room organization. Cabinets allow you to put items away neatly and hide the clutter. With a bit of thought, you can keep your cabinets organized so that it’s always easy to find the item you need.
Pegboard
Install a pegboard on the back of your crafting cabinet. A pegboard is extremely useful as it can be set up in many different ways. You can also easily customize and change the layout as your needs change. You can add hooks, baskets, shelves, and rods. The shelves can hold things like scrapbooks, jars, and bins. The baskets are perfect places to toss ribbon, buttons, and bobbins.
The rods can hold wrapping paper among other things.
Shoe Organizers
Hang shoe organizers on the cabinet doors. These organizers are perfect for holding small to medium-sized items such as glue, paints, and brushes. If you use a shoe organizer with clear pockets, you’ll be able to see what’s in each pocket making it easy to find the items you need.
Pull-Out Baskets
Install pull-out baskets in your cabinets. Because the baskets can pull out and be pushed back, like a series of drawers, you’ll be able to store more items in the cabinet than you would on open shelves. Use wire or clear baskets so that you can see what’s in each one.
Another idea is to keep kids’ craft supplies in the baskets. This way your kids will be able to pull out their basket when they’re in the mood to create.
Spice Rack
Install spice racks on the doors of your cabinets. The racks will hold small items such as bobbins, glue, and glitter. In addition, when the doors of your cabinets close, your craft room will have a clean appearance as the small items won’t be cluttering up your crafting shelves and table.
Bulletin Board
Add a bulletin board to the inside of your cabinet. The bulletin board is a great place to pin the plans, color samples, and notes of the projects that you’re working on. You’ll also be able to close the cabinet doors to keep things neat and open them up to easily access the info when you’re working.
Craft Shelves
Shelves are vital for a craft room as they can hold all sorts of crafting supplies. However, it needs to be organized in an easy-to-use manner, otherwise, you’ll have a jumbled mess on your shelves where you can’t find anything you need.
So here are some great tips to help you keep your shelves organized.
Shelves
Can you ever have too many shelves in a crafting area? No, so the best solution is to install floor-to-ceiling shelves along an entire wall of your craft room. You’ll have plenty of space to hold all of your crafting supplies and the shelves will look amazing.
Labeled Wicker Baskets
Use labeled wicker baskets to hold various supplies on your shelves. The baskets will look amazing lined up on your shelves. Plus they’ll be able to hold various items you need to be stored in your craft room such as fabric, felts, and paints.
Dowels on Shelves
Add dowels to your shelves. This will give you a great place to keep spools of ribbon. If the dowels are slender enough, you can even keep spools of thread on these shelves.
You’ll be able to see all the ribbons or threads you have. Keep them organized by color, and you’ll be able to easily find the ribbon you need at a moment’s notice.
Magazine Holders
Magazine holders can be used to store more than just magazines. Consider using magazine holders to store folded wrapping paper, bows, and ribbons. Another idea is to store your cardstock in the magazine holders.
Magazine holders are a flexible tool that’s useful for neatly storing items on your selves.
Labeled Transparent Bins
Use labeled transparent bins for storage on your shelves. You’ll be able to see the items in each bin and the labels will help guide you to find exactly what you are looking for. The bins fit neatly and can be stacked on the shelves giving you extra storage for your crafting supplies.
Drawers
Drawers are an important part of your craft room organization as they’re capable of holding so many small items. However, the items tend to roll together and clutter up the drawers unless you figure out a way to keep the items in the spot that you’d like them to stay in.
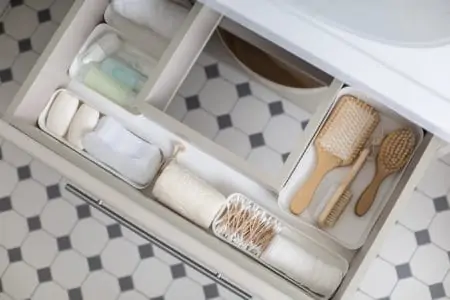
Drawer Dividers
Use drawer dividers in your drawers to help keep your supplies organized. You can keep your colored pencils, erasers, and post-it notes in one spot. You can also use the drawer dividers to keep ribbons and washi tape neat.
Drawer dividers are insanely useful for keeping drawers organized.
Small Bins
If you’re having trouble with paints rolling around your drawers, getting messed up, and making it hard to find the color you want, then you need small bins. The bins will help to keep your paints upright and organized by color. This way you’ll be able to find the colors you need.
Spice Jars
Small spice jars are perfect to hold small items neatly in drawers. You can store glitter, buttons, and wiggly eyes neatly in your drawers without them getting messed up together. These work very well when you combine them with the drawer dividers to keep the small jars from rolling around.
Adjustable Metal Dowels
Add adjustable metal dowels to your drawers. You’ll be able to store wrapping paper and ribbons inside one drawer. When you’re ready to wrap a present, just pull on the end of the wrapping paper you’d like to use, pull out a section, and cut it. The wrapping paper and ribbons will remain neat inside the drawer.
Label Drawers
Organize your drawers by type of item. Each drawer can hold a specific item such as your tools can be kept in one drawer, your fabric in another, hot glue in a third drawer, and cards in a fourth. Organize them in a manner that works for you and to make it easier to navigate you can label the drawers.
To label them, you can paint the drawers with chalkboard paint, or use a nice label maker to add some glamor to the drawers.
Papers
Keeping all of your scrap crafting paper organized is a challenge. The papers float about the crafting room causing clutter and tempting you to simply toss the scraps into the trash can. However, with some thought, you can create an organized system to hold the papers and keep them organized.
Magazine Holders
Magazine holders are perfect for organizing your crafting paper. You can add card stock, sewing patterns, and crafting magazines to the different holders. Keep them organized by type and color to make life easy for yourself.
File Holder
Use a file holder to organize and store your paper. You can even add file folders to hold small scraps of paper and label the folders so you know what’s stored in each folder. This way you’ll be able to keep your paper neat and organized in one spot.
Hanging Files
Use hanging files to hold your scrap paper. You can organize the paper by color and use washi tape to show what color is in each hanging file. This is perfect for keeping your small scraps of crafting paper neatly so that you can easily find it when needed.
Clear Plastic Envelopes
Use clear plastic envelopes to organize your paper scraps. This will allow you to easily see what’s in each envelope and the envelopes are much easier to keep neat and organized than small pieces of paper. One of the best places to keep the envelopes is in a basket on your shelf.
Baskets and Dividers
Use small baskets with homemade dividers to organize your paper scraps. You can cover the homemade dividers with the color of paper that’s stored behind the divider or use different colors of cardstock to make the dividers. Whichever way you decide to go, you’ll have a system to keep your scrap paper organized.
DIY Solutions
There are some fun DIY projects you can take on when you’re organizing your craft room. You can create a PVC wallflower organizer, design and create a pretty crate, or build yourself a new craft table.
DIY Craft Room Table
Make yourself a craft room desk that’s the perfect size for your space. This DIY craft room table is a great weekend project if you enjoy woodwork. You’ll be able to have a table with storage underneath and plenty of working space on top (1).
DIY PVC Wallflower Organizer
Build yourself a wallflower organizer using PVC pipes. The organizer is a great place to hold bottles of paint and it looks beautiful on your wall. If you’re looking to combine function with beauty, then this is the project for you (2).
DIY Ribbon Storage
Create a beautiful and simple ribbon storage unit for your craft room. Using a picture frame, small hooks, and a few rods you can create a custom ribbon storage unit. It’s a simple solution to the question of how you store your ribbon neatly (3).
DIY Mini Crate Rotating Craft Organizer
Put together some mini crates to create a rotating craft organizer. This organizer is perfect for a shelf, dresser, or even in the middle of your crafting desk. Spin it to access any tool or crafting supply you need.
There’s even room in the middle to hold paint brushes, pencils, or pens (4).
DIY Pretty Crate Storage
Do you need a good place to keep your scrap papers for crafting? Then make yourself this pretty crate for storage. You can add hanging files to keep your scrap papers organized.
With a bit of thought and planning, you’ll have a beautiful place to keep your scrap papers in your crafting room (5).
DIY Desk Island
Use shelves and bins to create a desk island in the middle of your craft room. You’ll have plenty of space to spread out your supplies as you craft. Plus, you’ll also have a large amount of storage space in the bins and on the shelves.
It’s a great weekend project that will help you organize your craft room (6).
DIY Cutting Table
If you’re on a budget, use a large dresser and two trestle legs to create a custom cutting table for your craft room. This is the perfect place to cut fabric for dresses, foam for costumes, or to spread out your large projects. This table allows you to store supplies in the drawers, while also having a place to lay out your materials, and it’s a great place to sit and craft (7).
DIY Drop Leaf Crafting Table
Create a drop leaf crafting table for your craft room. The drop leaf can be set up or dropped down as needed. This way you can have a larger table for cutting material and the table doesn’t take up as much space when you don’t need the larger space (8).
Expert Tips When Organizing The Craft Room
Organize Ribbon by Color in Drawers
Keep your ribbon organized by color in your drawers. This way when you open your drawer, you’ll be able to see exactly what you have. You’ll also be able to easily find the color of ribbon you need.
Store Buttons in Jars
Use small mason jars to store your buttons. The mason jars will keep your buttons from being lost. Plus you can pick up enough mason jars so that you can organize your buttons by color and size, making it simple to find the button you need when you’re crafting.
Designate a Space for Everything
Ensure that you have a designated space for all of your crafting supplies as anything that does not have a specific home will be left out or randomly tossed somewhere in your space, and will clutter up your crafting area.
Organize by Zone
Organize your crafting room by zones. This means that you’ll keep all your sewing supplies in one area, paper supplies in another area, and paint in a third area. This way you’ll be able to easily find the type of item you need in an instant.
Wire Baskets
Wire baskets are your friend when you’re organizing a craft room. They’re sturdy and allow you to see anything that’s stored inside the basket making it easier to find what you need. In addition, wire baskets fit neatly on shelves, in cabinets, and in drawers.
FAQs

What are Must Haves for a Craft Room?
The must haves for a craft room includes storage carts, glue, double-sided tape, glue dots, and a cutting machine, like this Cricut Digital Cutter. You also need a fresh supply of paper, cards, paint, and brushes.

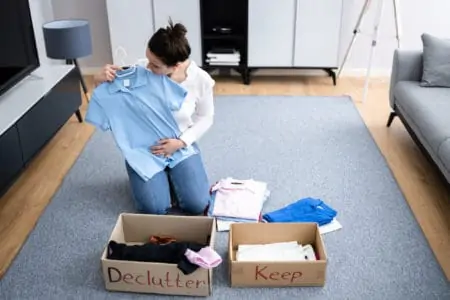
How Do I Get Rid of Craft Items?
If you are set on getting rid of craft items, you need to sort them into piles and decide what you want to keep and what is going. You can then get rid of it at school, ask on Facebook groups and other social media, and organize a craft swap.

How Do I Organize My Cricut Mats?
You can organize your Cricut Mats in several ways, including a portable storage cart, a peg board or tool organizer, and command hooks.

How Do You Store Zippers?
The best way to store zippers is to ensure they are clean and dry and stashed inside an air tight container to protect them from humidity.

How Do You Store Stamps and Envelopes?
A simple way to store stamps and envelopes is to keep them in plastic sleeves within a folding album. It protects them from the damp and keeps them organized in one place.